Short guide:
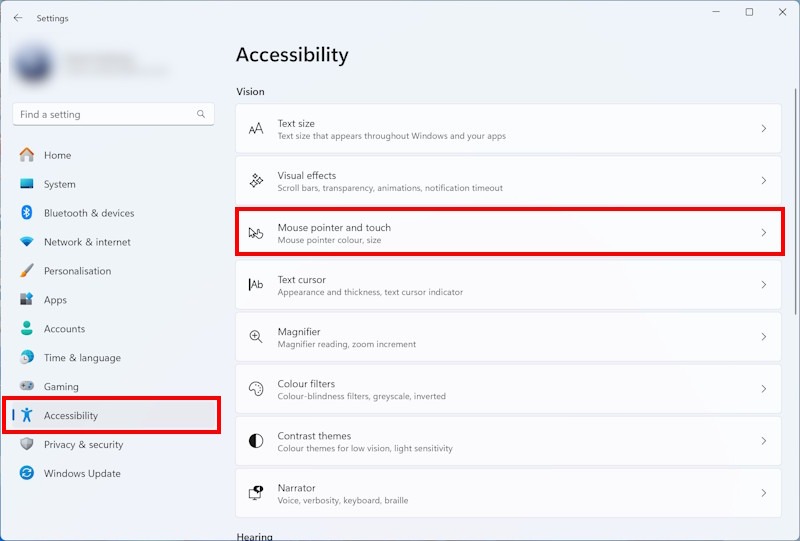
- Open the Accessibility settings by pressing the Windows logo key + U. Select Mouse pointer and touch.
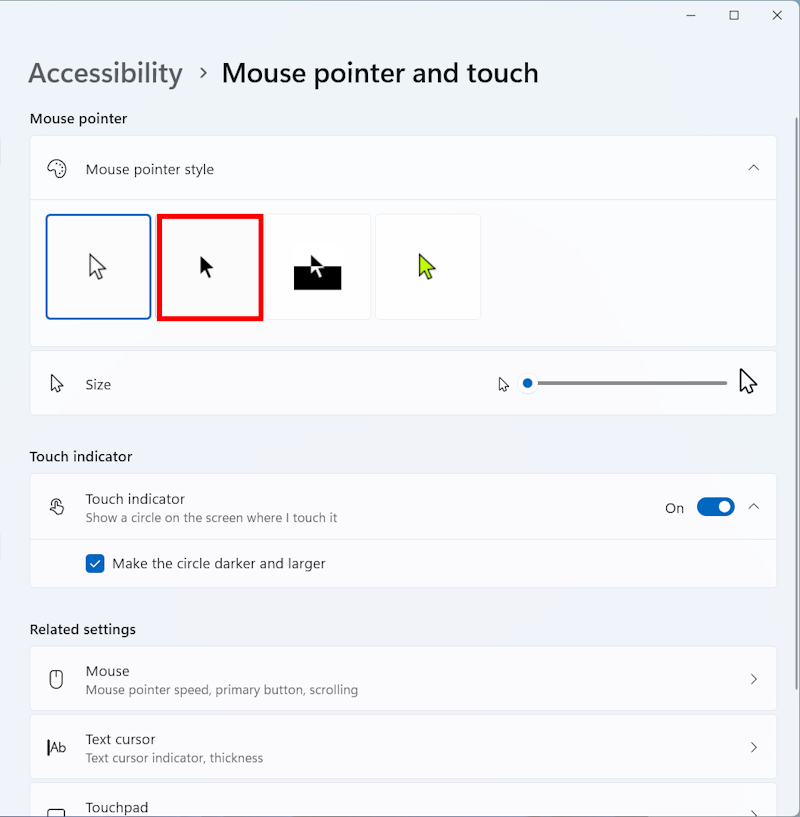
- Select one of the four Mouse pointer style options.
- To choose your own pointer colour, select Custom then click the + (plus) button.
Before and after
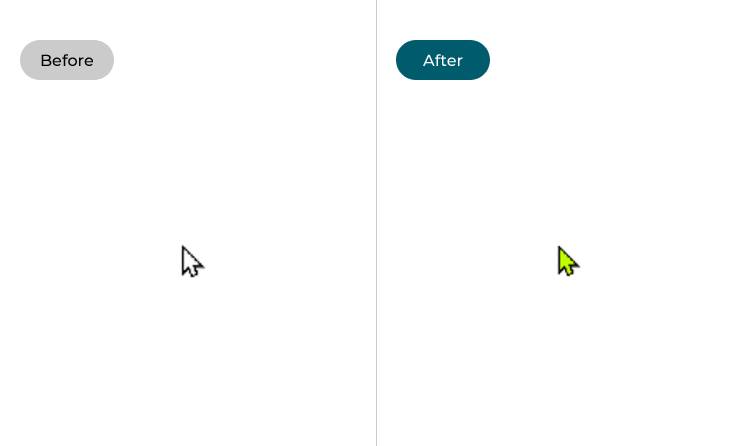
This section takes you step-by-step through changing the colour of the mouse pointer in Windows 11, with pictures of the screen to help.
Open the Ease of Access settings
1. Open the Accessibility settings by pressing the Windows logo key + U. Alternatively, click Start then Settings then select Accessibility from the left-hand column. Select Mouse pointer and touch from the list on the right.
Switch between the standard black and white pointers
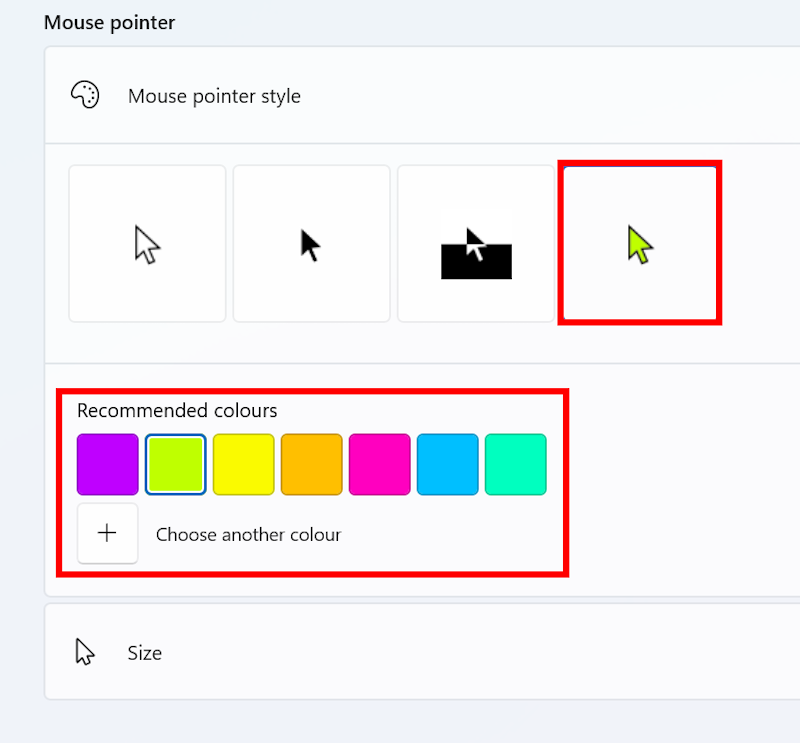
2. On the right, below Change pointer colour, you will see four options for changing the colour of the pointer. The first two are the default setting, White with a black border, and the most obvious alternative, Black with a white border.
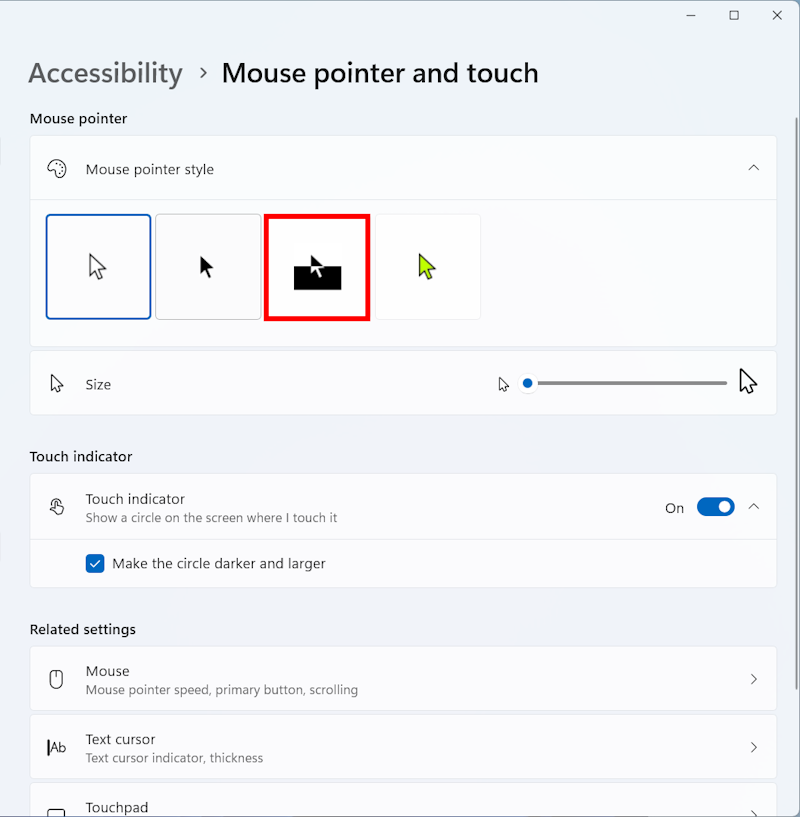
Choose the Inverted pointer
3. The third setting, Inverted, changes the colour of the pointer automatically based on the background colour, so that it’s white over dark-coloured areas and black over light-coloured areas. You can see through this pointer to text and images below, with their colours also inverted.
Pick your own colour
4. The fourth setting, Custom, allows you to pick from palette of suggested colours, or press the + (plus) button below to add your own custom pointer colour to the line-up.
Note: If this does not work it could be because someone else manages your computer settings (an IT department or administrator). If this is the case, you will need to contact them to access these settings or for further help.