To find out how to enable and use Switch Access see How to control your device with switches in Android 12.
Short guide:
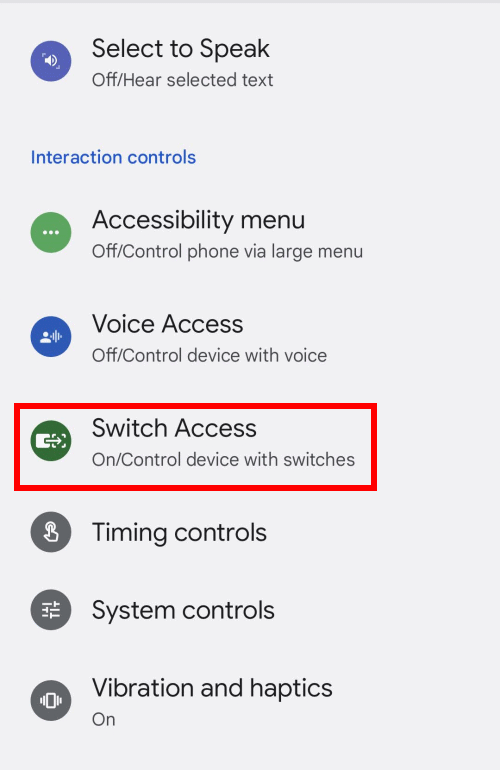
- Open Settings and tap Accessibility. Scroll down to Interaction Controls and tap Switch Access.
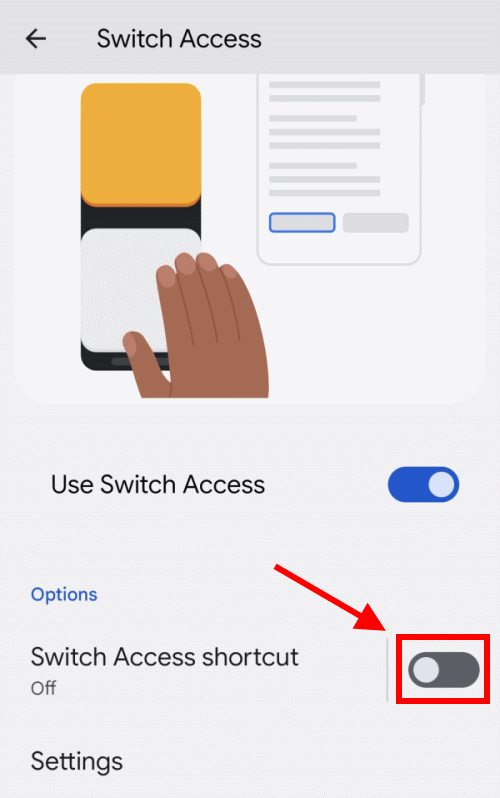
- To enable a shortcut to turn Switch Access on or off, tap the toggle switch for Switch access shortcut. Tap OK.
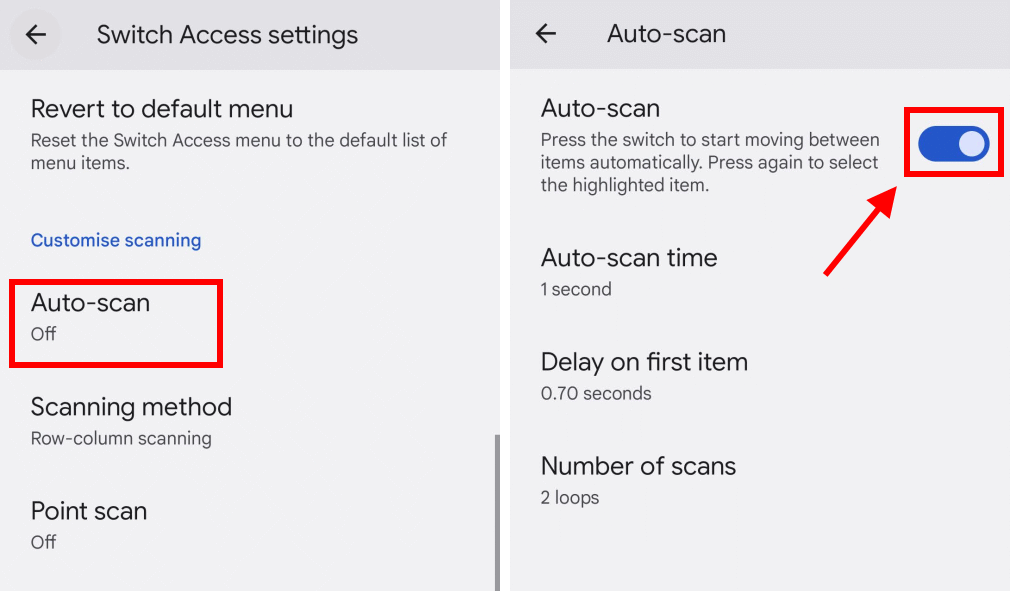
- Tap Settings under Switch Access and scroll down to the Customise scanning section. Tap Auto-scan, then the toggle switch next to Auto-scan to enable the feature.
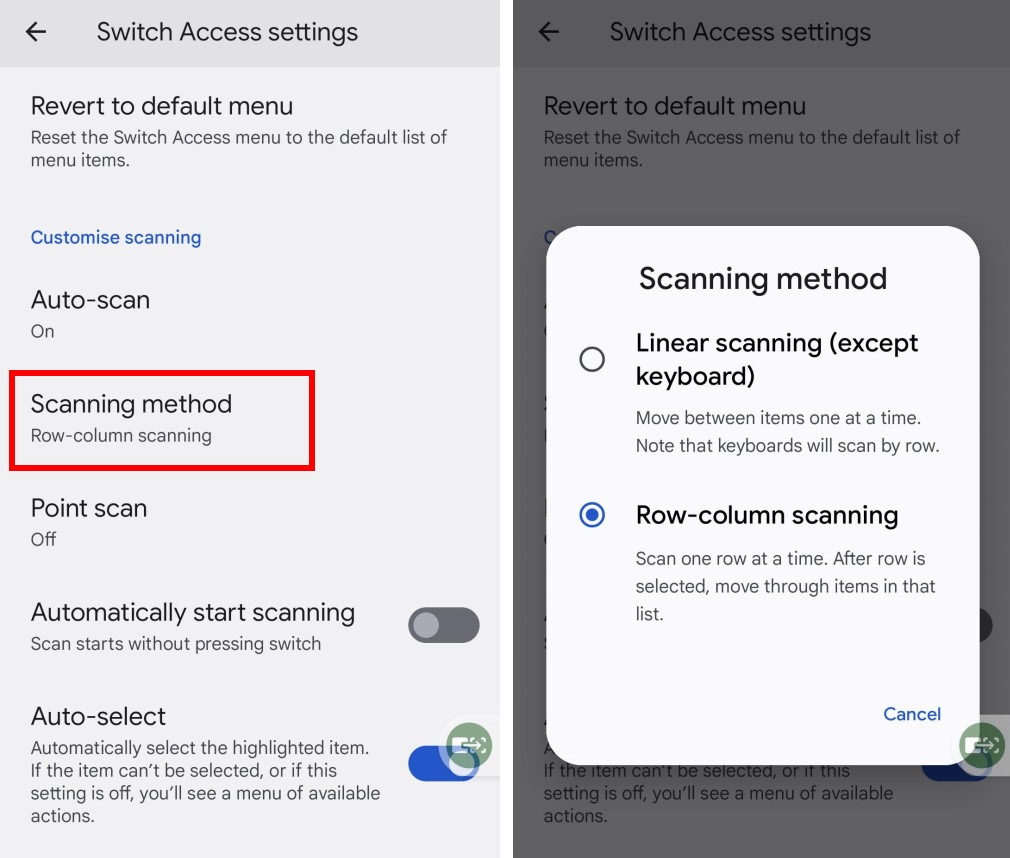
- Return to the Switch Access settings. To switch between the three main scanning methods, tap Scanning method and select a new one.
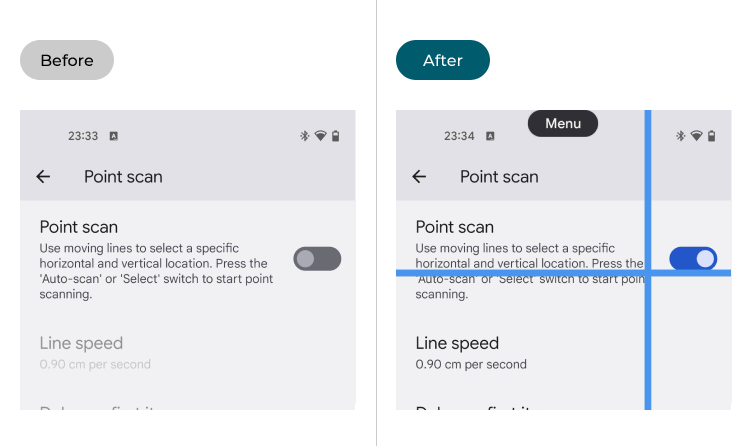
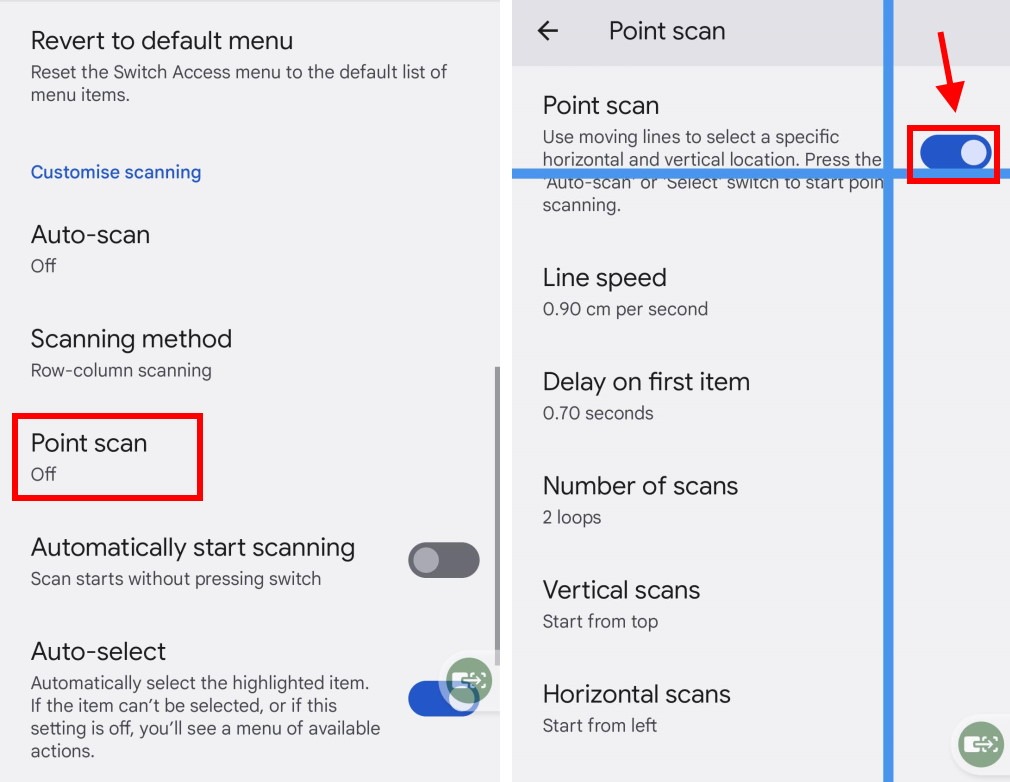
- Tap Point scan to use the Point scan method instead. Tap the toggle switch for Point scan to enable it, then use the options below to adjust how it works.
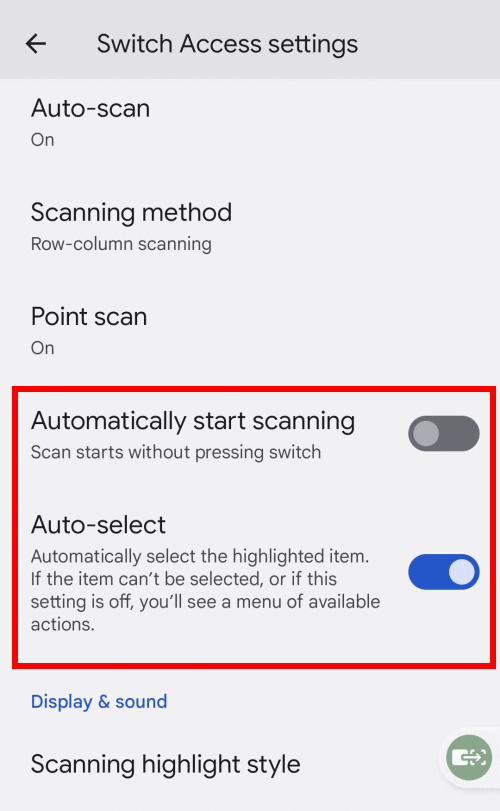
- Return to Switch Access settings. Tap the toggle switches for Automatically start scanning or Auto-select to enable these options.
Before and after
This section explains how to change the settings for external switches in Android 12. This is a step-by-step guide with pictures of the screens to help.
Find Switch Access
1. You’ll find the necessary settings under the Switch Access settings. Open Settings and tap Accessibility. Scroll down to Interaction Controls and tap Switch Access.
Enable the Switch Access shortcut
2. To enable a shortcut to turn Switch Access on or off, tap the toggle switch for Switch access shortcut. You’ll see a notification explaining how the shortcut works. Tap OK to continue. The shortcut will appear attached to the right-hand edge of the screen.
Switch to Auto-scan
3. You can also change the scanning method Switch Access uses. Tap Settings under Switch Access and scroll down to the Customise scanning section. The Auto-scan setting tells Switch access to start cycling through items automatically once you press the Next button. Tap Auto-scan, then the toggle switch next to Auto-scan to enable it.
Change Scanning method
4. Return to Switch Access settings. To switch between the three main scanning methods, tap Scanning method and select Linear scanning, Row-column scanning or Group selection.
Enable Point scan
5. Alternatively, tap Point scan. This method uses moving horizontal and vertical lines to select an item. You press a key, switch or button to start and stop the horizontal line, then a switch to start and stop a vertical line. The point where the two lines cross will get selected. Tap the toggle switch for Point scan to enable it.
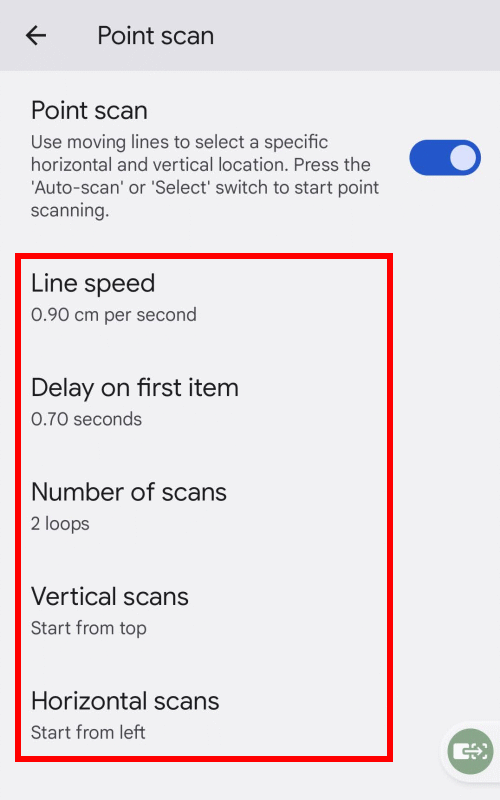
Change the Point scan options
6. Use the options below Point scan to adjust how quickly the lines move and where they start from.
Automatically start scanning and Auto-select
7. Return to Switch Access settings. Tap the toggle switch for Automatically start scanning if you want scanning to start automatically as soon as you open a new screen. Tap the toggle switch for Auto-select to select highlighted items automatically, without pressing the Select button. If the item can’t be selected, you’ll see a menu listing any options.
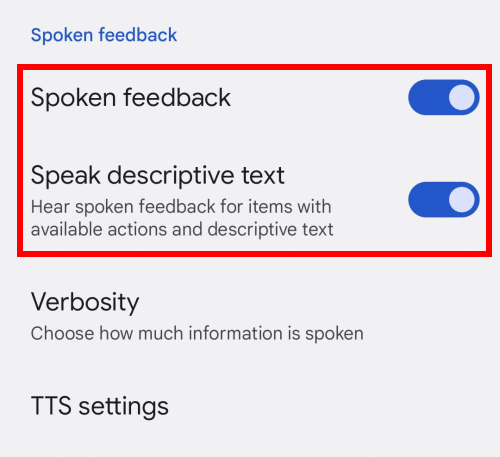
Get spoken feedback
8. You can also get spoken feedback when you use Switch access to tell you what you’re highlighting or selecting. Scroll down to the Display and sound section and tap the toggle switches next to Spoken feedback and Speak descriptive text to turn them on.
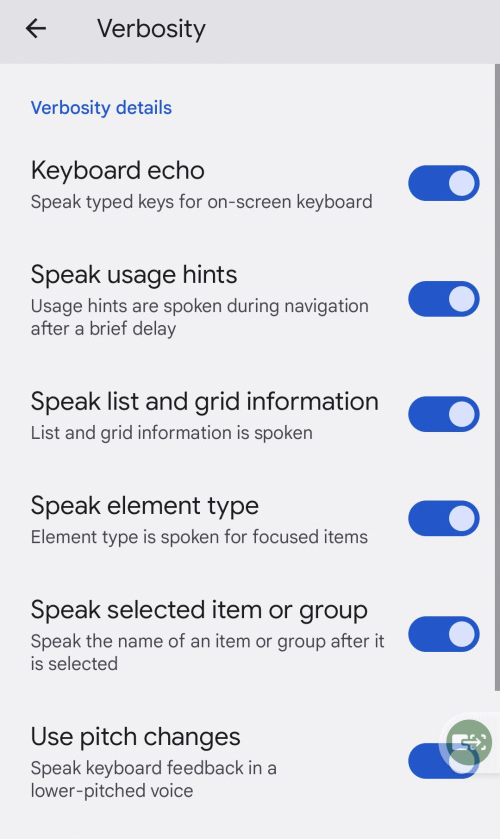
Adjust the feedback
9. Tap Verbosity to change the amount of spoken information you hear. Use the toggle switches to turn the different options on or off.
Note: We have written these instructions for devices running the standard version of the Android operating system. You may find some minor presentation differences if the manufacturer has customised the theme.
Need some more help?
Call our helpline 0300 180 0028 or email enquiries@abilitynet.org.uk
Need free IT Support at Home?
If you are older or disabled and need IT support at home, you can book a free home visit.