- Tap items
- Move backwards and forwards between items
- Scroll up and down
- Swipe between screens
- Press the Digital Crown and hold the side button
- Open the Control Centre and Notifications
- Activate Siri
- Use Apple Pay
You can customise the settings for AssistiveTouch. See our guide How to change the settings for AssistiveTouch in watchOS 11 on your Apple Watch for more information.
Short guide:
- To enable AssistiveTouch, press the Digital Crown on your Apple Watch and select Settings.
- Tap Accessibility.
- Tap AssistIveTouch.
- On the next screen, tap the toggle switch for AssistIveTouch to turn it on.
- To activate AssistiveTouch, perform a double-clench gesture.
- Move between the items on the screen using tap gestures (tap your index finger and thumb together). Perform a single-tap gesture to move forwards, and a double-tap gesture to move backwards.
- To select an item, perform a single-clench gesture.
- To perform more complicated actions, open the AssistiveTouch Action Menu. The Action Menu is an on-screen menu containing actions for pressing the Digital Crown, scrolling the screen, launching Siri, and more. To open the Action Menu, perform a double-clench gesture.
Before and after
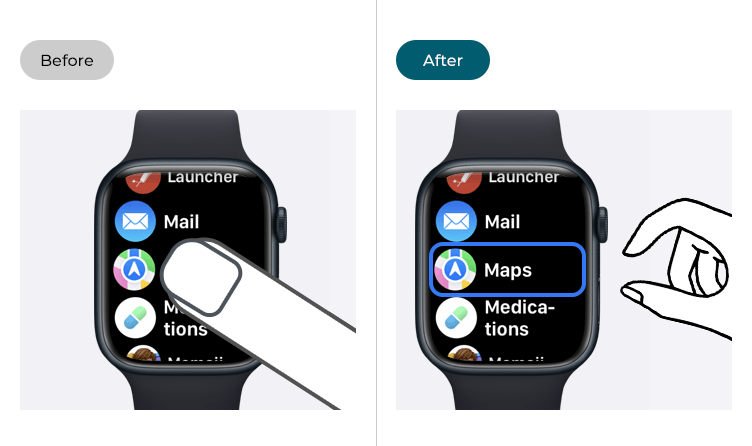
This section gives you step by step instructions on how to enable and use AssistiveTouch in watchOS 11, with pictures of the screens to help.
Enable AssistiveTouch in settings
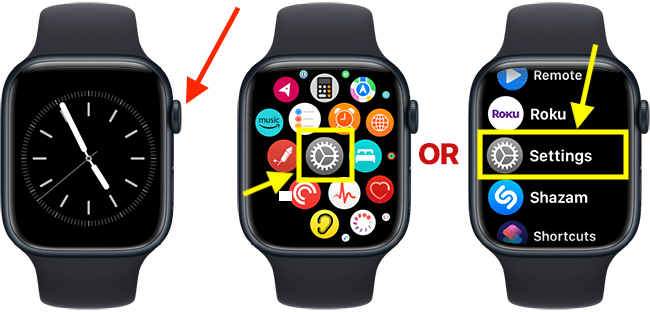
1. To access the Settings app, press the Digital Crown on your Apple Watch. If your apps are displayed as icons, tap the Settings icon ![]() . If your apps are displayed in a list, scroll down and tap Settings.
. If your apps are displayed in a list, scroll down and tap Settings.
Open the Accessibility settings
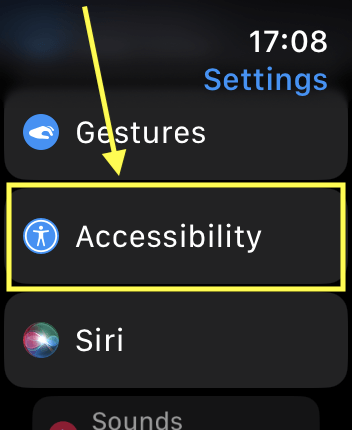
2. On the Settings screen, scroll down and tap Accessibility.
Open the AssistiveTouch settings
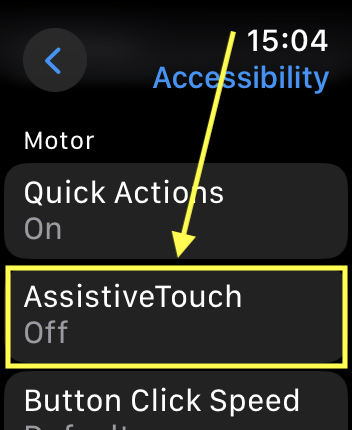
3. On the Accessibility screen, scroll down and tap AssistiveTouch.
Turn on AssistiveTouch
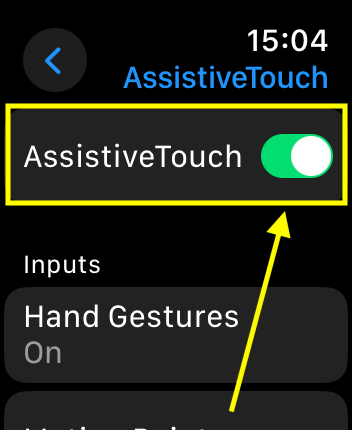
4. On the next screen, tap the toggle switch for AssistiveTouch to turn it on.
Using AssistiveTouch
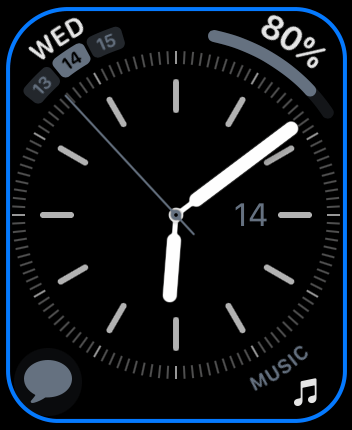
5. When you raise your wrist, a blue ring appears round the outside of the Apple Watch display. This indicates AssistiveTouch is turned on.
6. You can now activate AssistiveTouch by clenching your fist twice quickly. When you activate AssistiveTouch, a blue ring appears around the first item on the screen. You can now navigate your Apple Watch using the following gestures:
- Tap (tap your index finger and thumb together) – Move forwards through the items on the screen.
- Double Tap (tap your index finger and thumb together twice) – Move backwards through the items on the screen.
- Clench (make a fist) – Select the highlighted item.
- Double Clench (double-clench your fist quickly) – Bring up the Action Menu. The Action Menu enables you to perform more complicated actions such as pressing the Digital Crown, scrolling the screen, opening the Notification Centre, and showing the app list. You can customise the Action Menu in the Assistive Touch settings.
You can change the actions the above gestures perform in the Assistive Touch settings.
Practice using hand gestures
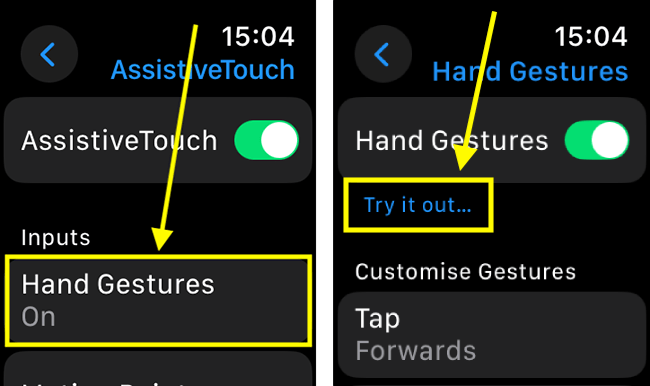
7. You can practice the above gestures in the AssistiveTouch settings. Access the AssistiveTouch settings by following steps 1 - 3, above. Next, tap Hand Gestures. On the next screen, tap the Try it out… link found below the Hand Gestures toggle switch.
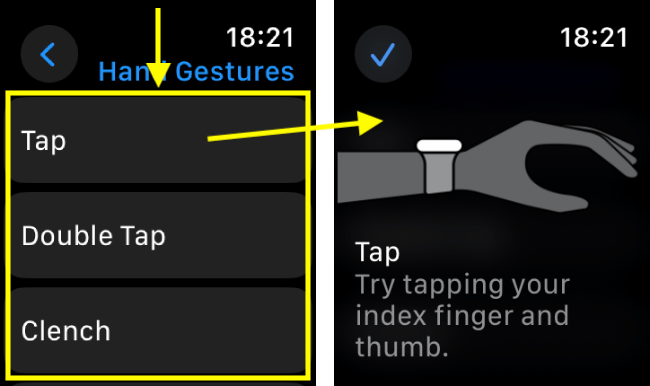
8. On the next screen, tap one of the gestures. Perform the gesture as shown on the screen. Your watch will react when the gesture is performed.
The Action menu
9. The Action Menu is an on-screen menu that enables you to perform complicated actions such as pressing and rotating the Digital Crown, scrolling the screen, launching Siri, opening the Notification Centre, and showing the app list.
The Action Menu also contains app-specific actions. For instance, when you open the Action Menu whilst viewing the watch face, the menu includes actions for changing to a different watch face, editing the watch face, and speaking the time.
You bring up the Action Menu by double-clenching your fist. Use tap gestures (tap your index finger and thumb together) to move through the menu items. When the action you want to use is highlighted, clench your fist to select it.
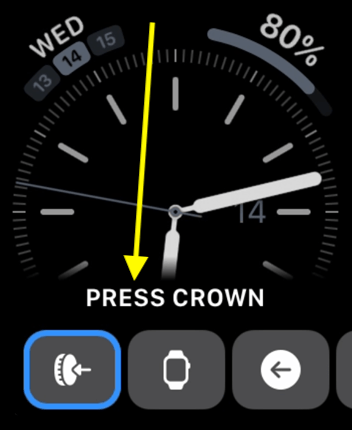
An example of using AssistiveTouch to open the Control Centre
10. Follow these steps to play a sound on your iPhone using the Ping your phone action found in the Control Centre.
- Wraise your wrist to wake your watch
- Double-clench your fist quickly to activate AssistiveTouch.
- Double-clench your fist quickly again to bring up the Action Menu.
- The first item in the action menu is Press Crown. It will be highlighted with a blue ring (to show it is the item you can select). Tap your index finger and thumb together to move to the next item, System.

- When System is highlighted, clench your fist to select it.
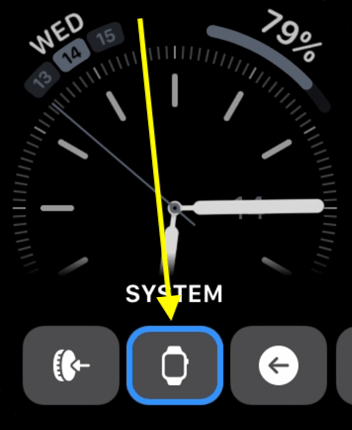
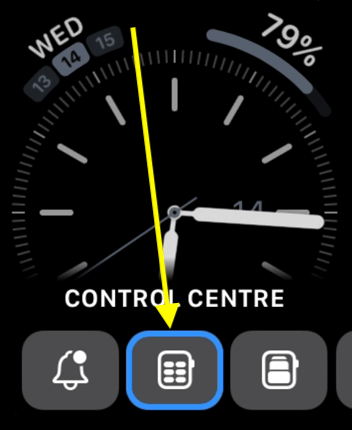
- When the System menu appears, tap your index finger and thumb together to move to the Control Centre action. Clench your fist to select it.
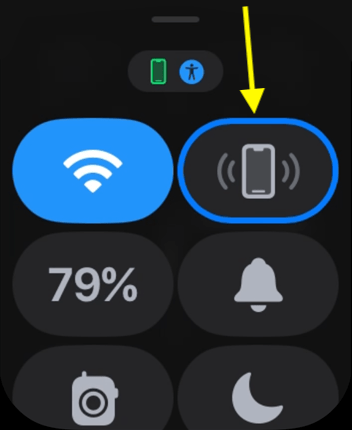
- When the Control Centre loads, tap your index finger and thumb together to move through the menu items. When the Ping your phone icon is highlighted, clench your fist to select it. Your iPhone will play a sound.
- To return to the watch face, double-clench your fist quickly to bring up the Action Menu again.
- Clench your fist to select the Press Crown action and return to the watch face.
Use wrist motion to control your device
11. Another way of controlling your Apple Watch is with Motion Control. With Motion Control, you navigate the screen by titling your wrist to control a pointer (the Motion Pointer ).
You can activate the Motion Pointer in the Action Menu:
- Wraise your wrist to wake your watch
- Double-clench your fist quickly to activate AssistiveTouch.
- Double-clench your fist quickly again to bring up the Action Menu.
- Tap your index finger and thumb together repeatedly until the Interaction item is highlighted. Clench your fist to select it.
- Motion Pointer is the first item in the Interaction menu. Clench your fist to select it.
- The Motion Point will appear on the display.
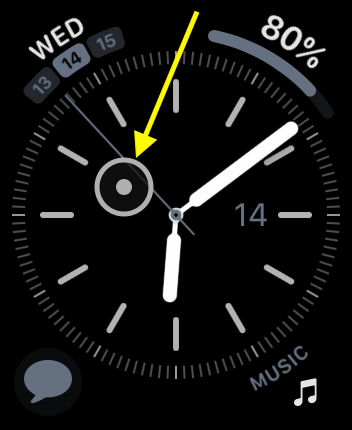
12. To move the Motion Pointer, tilt your wrist up and down and side to side. When the Motion Pointer rests over an item, the item will be highlighted. You can select the item using a hand gesture, as described above, or you can allow the motion pointer to automatically select the item after a specified amount of time.
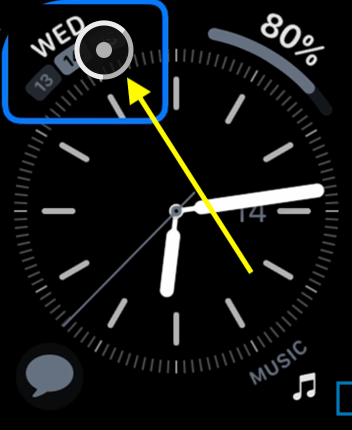
13. Motion Control has a feature called Hot Edges. When the pointer hovers over one of the edges of the display, a swipe gesture is performed in that direction. You can change the action associated with each edge in the AssistiveTouch settings.
14. If you would prefer to use the Motion Pointer all the time, use Dwell Control. With Dwell Control, the Motion Pointer is active as soon as you raise your wrist (or after shaking your wrist, if you prefer). See our article How to control your Apple Watch with wrist movements in watchOS 11 for more information on using Dwell Control.