Call our helpline
0300 180 0028The process for creating panels for Switch Control and the Accessibility Keyboard is the same, but each panel will only appear in the feature for which it was created.
This section explains how to create Panels for using with Switch Control and the Accessibility Keyboard in macOS 26 Tahoe. This is a step-by-step guide with pictures of the screens to help.
Open System Settings
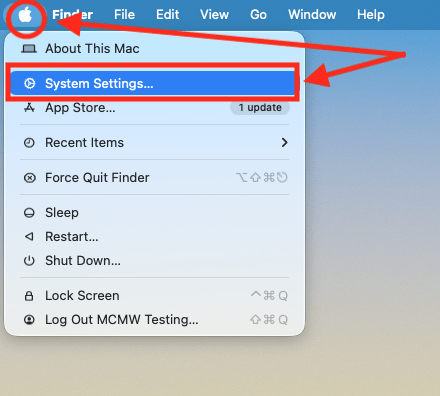
1. Click the Apple icon ![]() in the top left corner of the screen and choose System Settings from the menu.
in the top left corner of the screen and choose System Settings from the menu.
Open the Accessibility settings
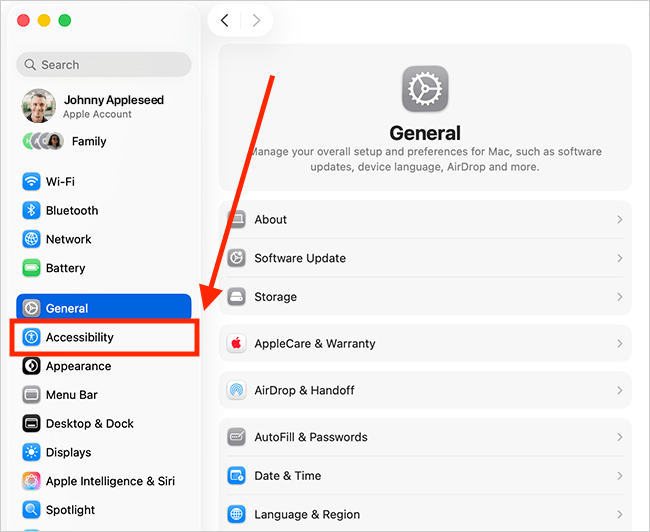
2. In the System Settings window, click Accessibility in the sidebar.
Opening the Panel Editor
3. The steps to open the Panel Editor are different for Switch Control and the Accessibility Keyboard. The steps are shown separately, below. For Switch Control, follow steps 4a.1 and 4a.2. For the Accessibility Keyboard, follow steps 4b.1 and 4b.2.
How to open the Panel Editor for Switch Control
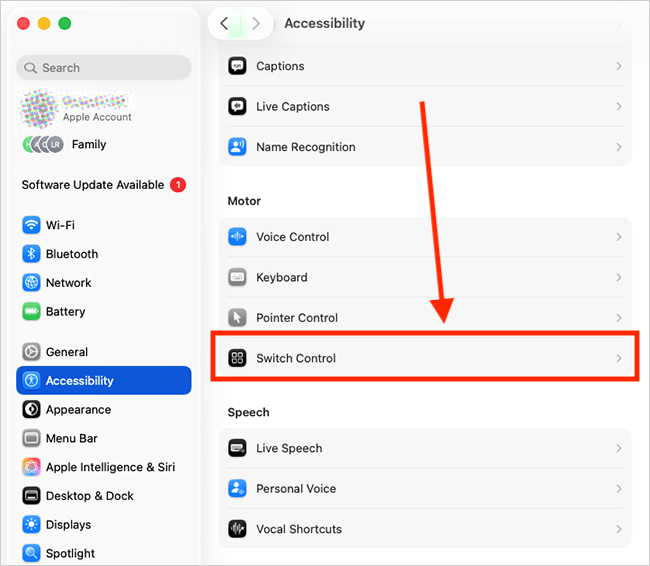
4a.1. On the Accessibility page, select Switch Control from the list of Accessibility options.
4a.2. On the Switch Control page, click the Panel Editor button. Follow step 5 onwards for creating panels.

How to open the Panel Editor for the Accessibility Keyboard
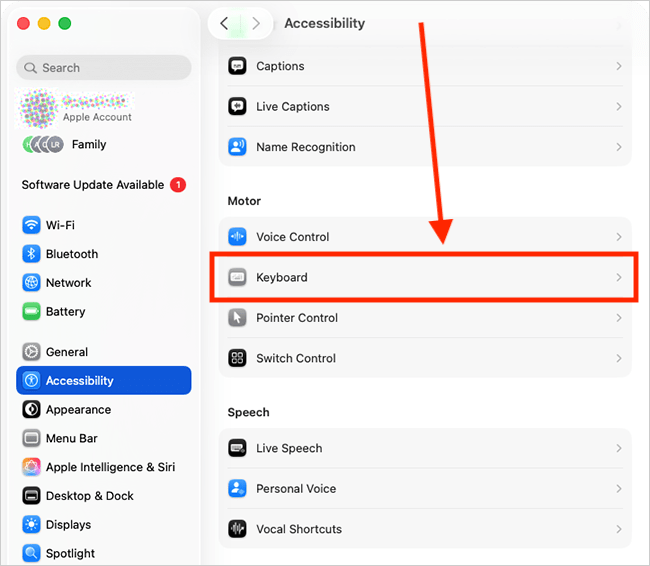
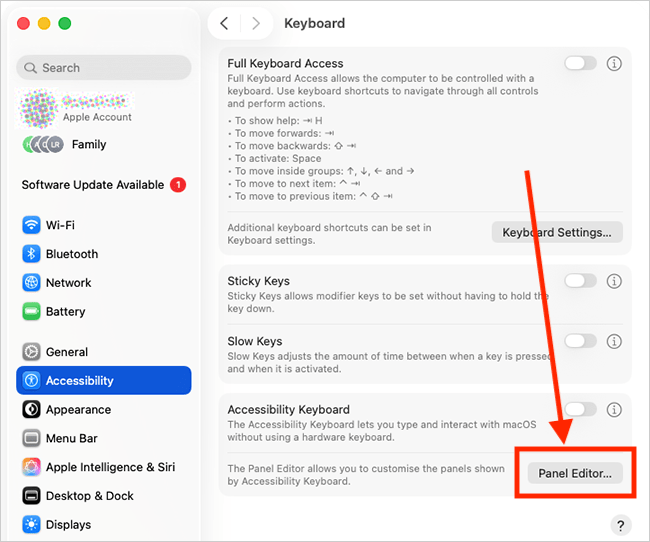
4b.1. On the Accessibility page, select Keyboard from the list of accessibility options.
4b.2. On the Keyboard page, under Accessibility Keyboard, click the Panel Editor button. Follow step 5 onwards for creating panels.
Add a pre-made panel
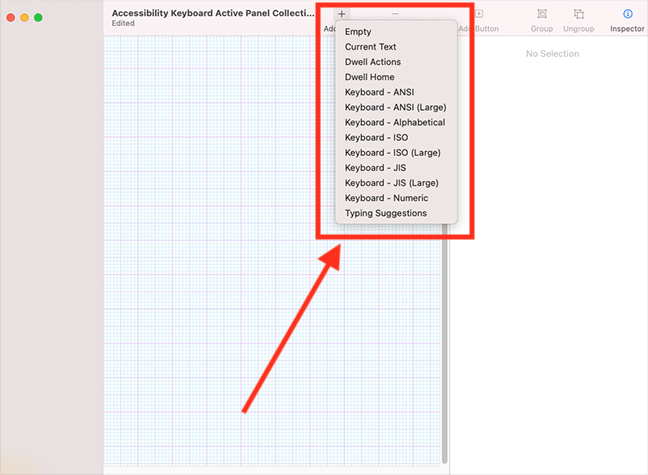
5. The Panel Editor has a collection of ready-made panels for you to use. These include panels for Dwell Control, Typing suggestions and different keyboard layouts. To add one to the canvas (the area with the grid pattern), click Add Panel in the toolbar and select one of the options.
6. You can click on any of the buttons to edit, resize or reposition them.

Create a new blank panel
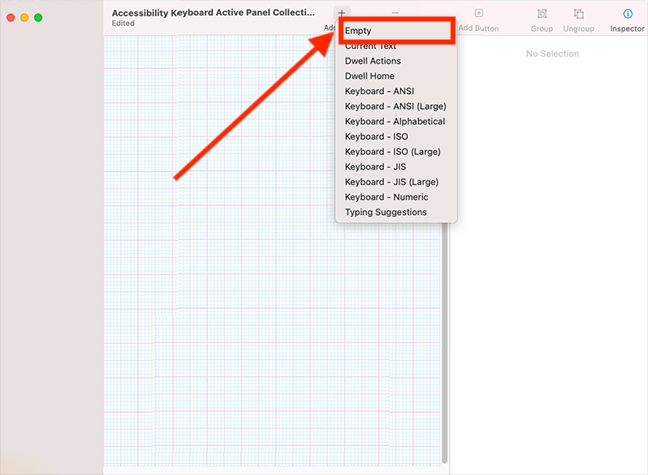
7. To create a blank panel that you can add your own buttons to, click Add Panel in the toolbar and select Empty.
Name your panel
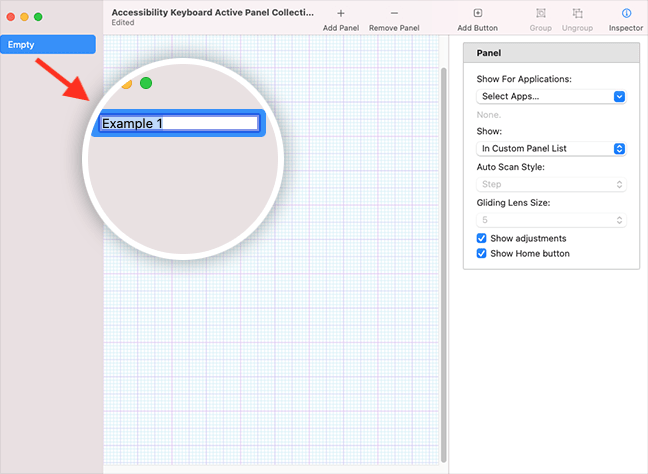
8. To give your panel a unique name, select the current name ("Empty") in the sidebar, then press the Enter key to edit it. Press Enter again to save the new name.
Add buttons to a panel
9. To add a button to a panel, click Add Button. You can resize and reposition the button on the canvas.
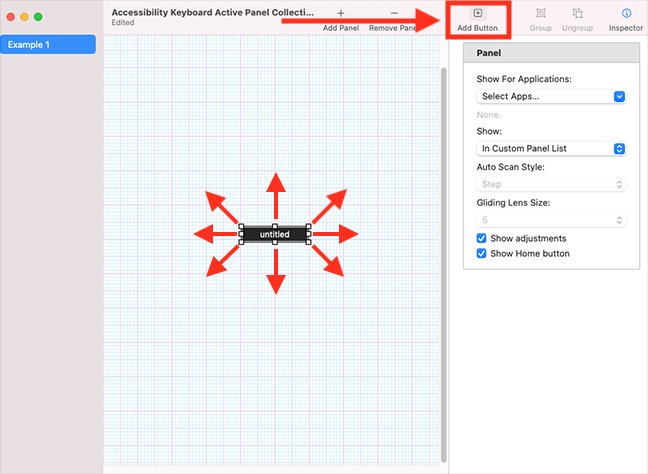
If you want to remove a button from the canvas, first, select it, then press the Backspace key. Or select the button, then click Edit > Delete in the menu bar.
Assign an action to the button
10. To assign the action you want this button to perform, select the button on the canvas. In the right-hand column, select the drop-down menu shown under Action. The actions you can choose from are listed in the table below.
| Panels - Button Actions | |
| Action | Description |
| Go Back | Return to the previous panel. |
| Open Panel | Choose a panel to open when this button is clicked. |
| Mouse (Switch Control panels only) | Choose a mouse action or movement – left click, double click, move the mouse in a particular direction, etc. — to perform when this button is clicked. |
| Scroll (Switch Control panels only) | Choose which direction to scroll the page when this button is clicked. |
| Show/Hide Toolbar (Accessibility Keyboard panels only) | Choose one of the panel toolbars to show/hide when this button is clicked. |
| Dwell (Accessibility Keyboard panels only) | Choose a Dwell action — left click, double click, etc. — to trigger when this button is clicked. |
| AppleScript | Choose the AppleScript that will run when this button is clicked. |
| Enter Text | Create a block of text that will be inserted into a document when this button is clicked. |
| Press Keys | Create a keyboard shortcut that is performed when this button is clicked. |
| Open App | Choose the app you want this button to open. |
| Run Shortcut | Choose the Shortcut that will run when this button is clicked. |
| Open Panel Editor | Open the Panel Editor. |
| System Event | Choose the system event, such as changing the volume or brightness, to be performed when this button is clicked |
| Typing Suggestion | Display typing suggestions based on the current content |
| Current Text | Show the text input that is in progress. |

Edit button properties
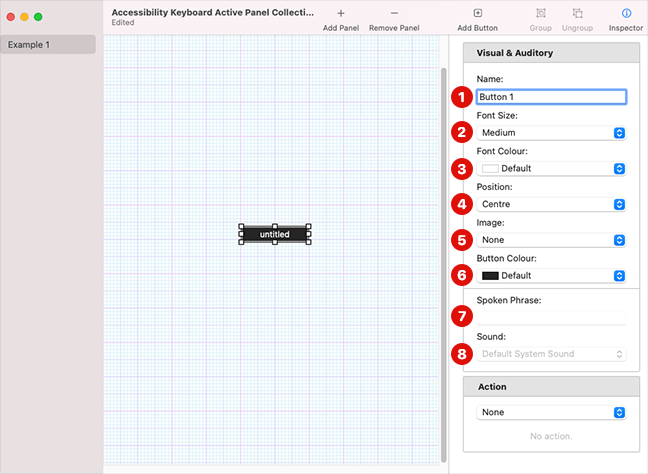
11. To edit a button’s properties, such as the button’s name, colour, and font, select the button on the canvas. In the right-hand column, you can edit the following properties:
| Panels - Button Properties | |
| Property | Description |
| Name | Give the button a name |
| Font Size | Choose how large the button name should appear. |
| Font Colour | Choose a colour for the button name. |
| Position | Choose where the name should be displayed on the bottom — centre, top, or bottom. |
| Image | Choose an image to display on the button. You can choose one of the system images, or one of your own designs. Note: When an image is displayed, the button name will not be visible. |
| Button Colour | Choose a colour for the background of the button. |
| Spoken Phrase (only editable in Switch Control panels) | This is the phrase used by the VoiceOver screen-reader to describe the button. Type the phrase you would like to use. |
| Sound (only editable in Switch Control panels) | Change a sound to be played when the button is clicked. |
| Tip: If you select more than one button on the canvas, any properties you edit will be applied to all the selected buttons. | |
Grouping buttons
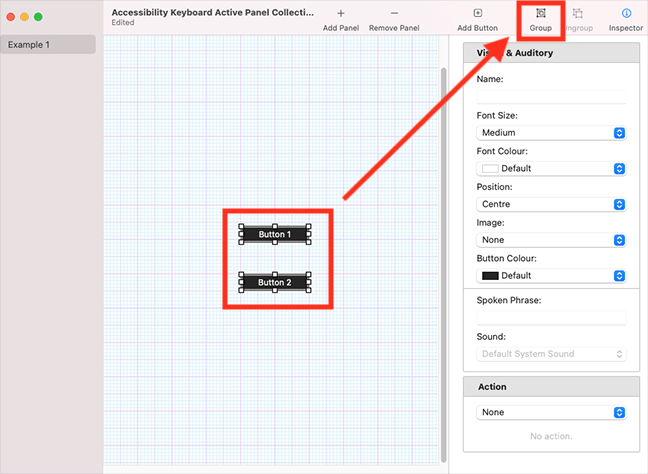
12. Grouping buttons that perform similar tasks can make it easier to navigate through them. Select the buttons you want to group by dragging the pointer across them, or by holding down the Shift key and clicking each button. Then, select the Group button in the toolbar. To ungroup buttons, select the group then click Ungroup in the toolbar.
Tip: If you select a group on the canvas, any properties you edit (colour, font, etc.) will be applied to every button in the group.
Edit a panel’s properties
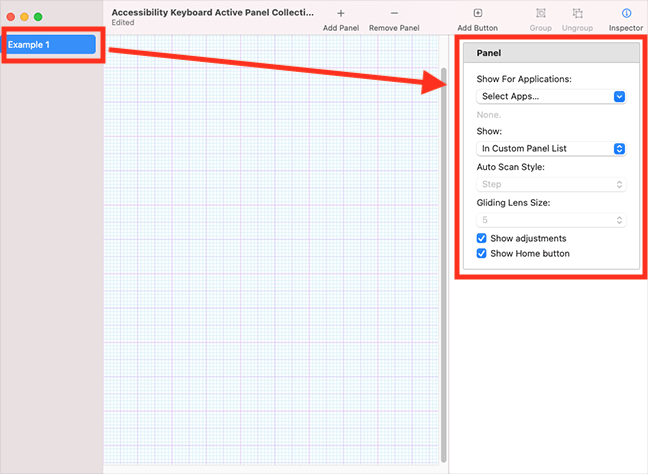
13. To edit a panel’s properties, select the panel name in the left sidebar. The properties you can edit will appear in the right-hand column. Note: Make sure no buttons are selected on the canvas, otherwise the button properties will be shown in the right-hand column.
- Show For Application
Choose which apps you want to use this panel with. This is particularly useful if you want to create app-specific panels.
- Show
Choose where this panel should appear within the panel menu structure. Select from:- In Custom Panel list
- As Home Panel - this panel will become the ‘Home’ menu.
- Default Keyboard (Switch Control panels only)
- Default Pointer (Switch Control panels only)
- Not Shown - this panel will only appear when you are using one of the applications selected in the Show For Application section (see above).
Copy a panel
14. To copy a panel, select the panel name in the left sidebar, then press Command + C. Press Command + V to paste the copy below the original panel. Alternatively, select the panel name in the left-sidebar, then click Edit > Copy in the menu bar, followed by Edit > Paste.
Using Panels
The way to open Panels is different for the Accessibility Keyboard and Switch Control but using them is the same.
Open panels on the Accessibility Keyboard
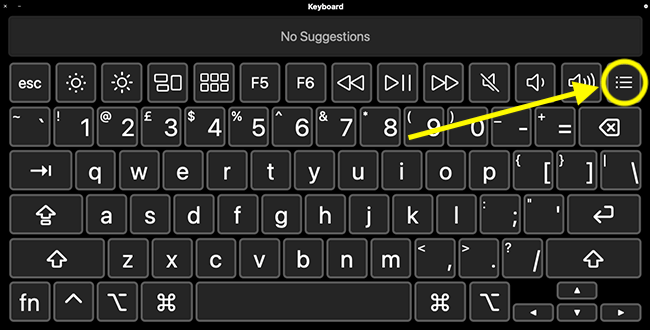
16.a. To open panels on the Accessibility Keyboard, select the Panels button on the top row of the keyboard keys.
Open panels in Switch Control
16.b. To open panels in Switch Control, select the Custom button on the Home panel.

Select a panel
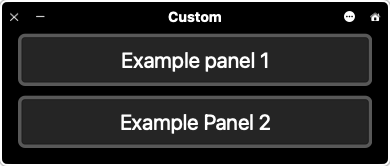
17. Select a panel from the list.
Perform an action
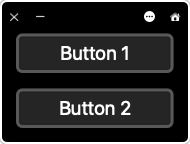
18. Click the button associated with the action you want to perform.
Return to the Accessibility Keyboard / Switch Control Home panel
19. To return to the Accessibility Keyboard / Switch Control Home panel, select the Home icon in the top-right corner of the panel.

Note: If this does not work, it could be because your computer settings are managed by someone else (an IT department or administrator, for example). If so, you will need to contact them to access these settings or for help.
Need some more help?
Call our helpline 0300 180 0028 or email enquiries@abilitynet.org.uk
Need free IT Support at Home?
If you are older or disabled and need IT support at home, you can book a free home visit.