Short guide
- If you have already launched the Magnifier, click the Settings icon then the Go to Settings link. Otherwise, press the Windows key + U to open the Accessibility settings, then click Magnifier.
- Use the + (plus) and – (minus) keys to change the Zoom level. Use the Zoom increment drop-down menu to make zooming faster or slower.
- Click the down arrow next to the Magnifier toggle switch. Click Start Magnifier after sign-in or Start Magnifier before sign-in to have the Magnifier start when Windows launches.
- Enable Smooth edges of images or Invert colours if you find these options make the screen easier to read.
- Click the View drop-down menu to switch the view the Magnifier launches with. Click the > arrow for further options with that view.
Before and after
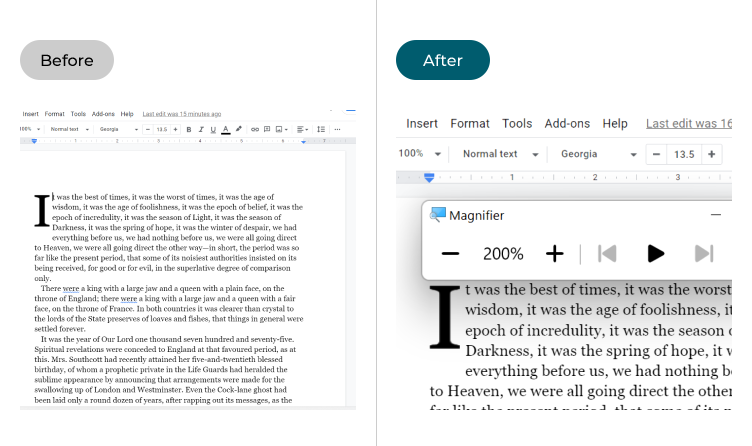
This section explains how to customise the Magnifier tool in Windows 11. This is a step-by-step guide with pictures of the screens to help.
Find the Magnifier settings
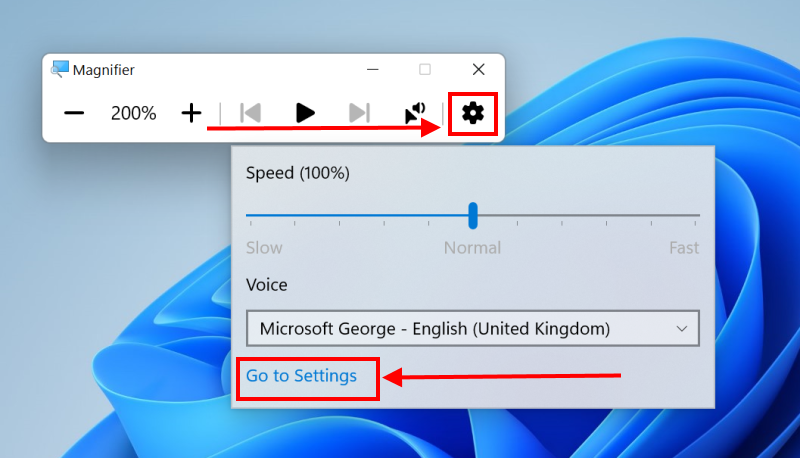
1. If you have already launched the Magnifier, you can open the settings by clicking on the Settings icon in the Magnifier toolbar and then clicking on the Go to Settings link. You can also press the Windows key + U to open the Accessibility settings, then click on Magnifier under Vision.
Adjust the Zoom settings
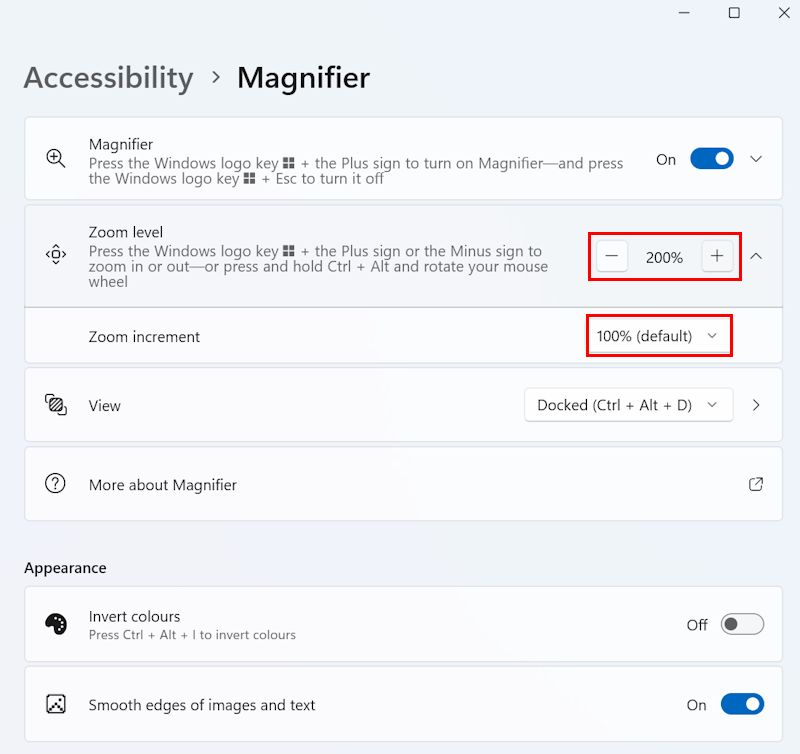
2. Use the + (plus) and – (minus) keys for Zoom level to zoom in and out, or use the Zoom increment drop-down menu underneath to change the increments used here and in the Magnifier toolbar. For instance, set this to 50% if you feel you need more control over the zoom level.
Set the Magnifier to launch when Windows starts
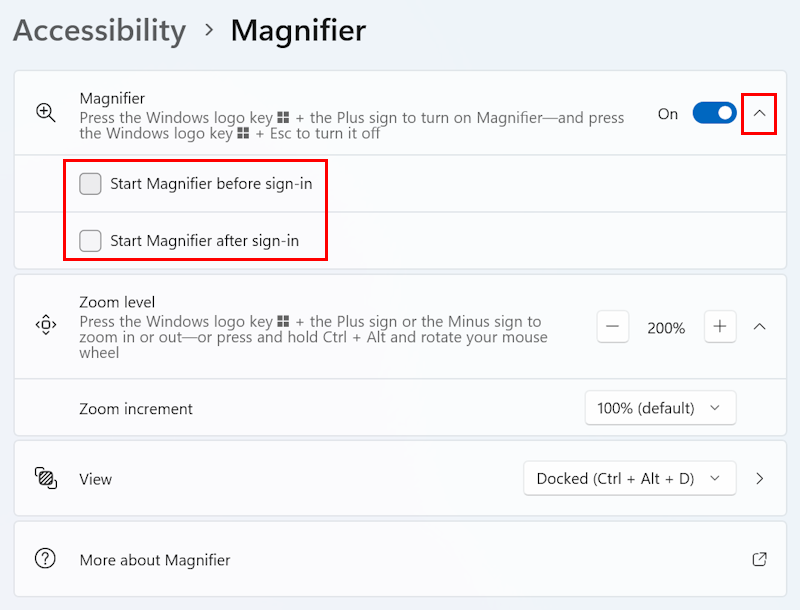
3. Click the right arrow > next to the Magnifier toggle switch. You can now click the checkbox next to Start Magnifier after sign-in to have the Magnifier launch automatically when you start Windows, or the checkbox for Start Magnifier before sign-in to have it launch when Windows first shows the sign-in screen.
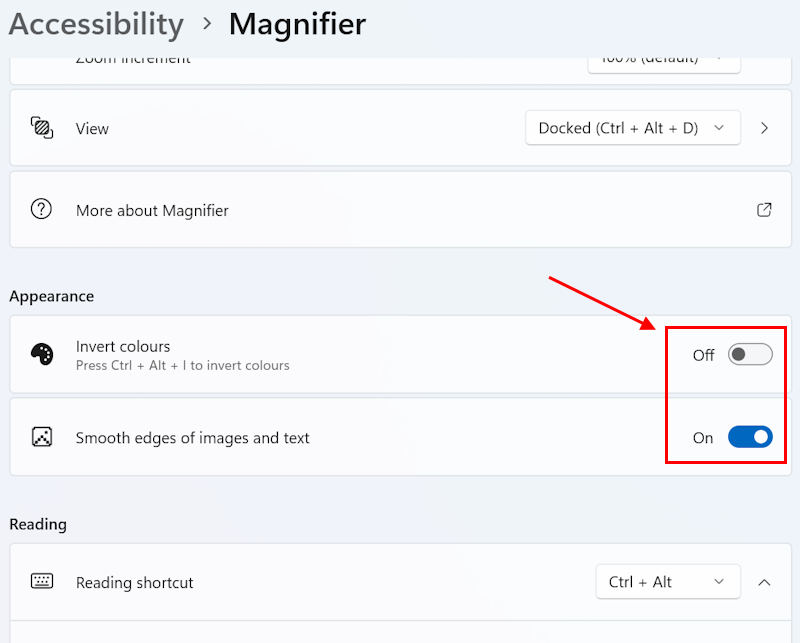
Change the appearance of the magnified view
4. Enable Smooth edges of images and text to get a smoother, more readable magnified image, or untick the checkbox if you find it makes some things more difficult to read. You can also enable or switch off the Invert colours option if you find inverting the colours makes text easier or harder to read.
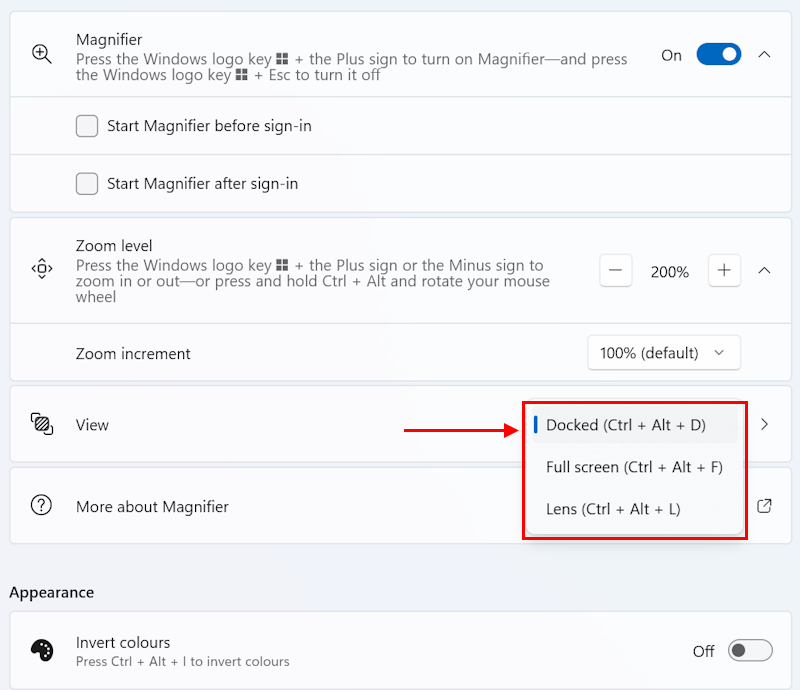
Set the default magnified view
5. Click the View drop-down menu to change the view the Magnifier will use or launch with next. Click the right arrow > next to it to see more options for that view.
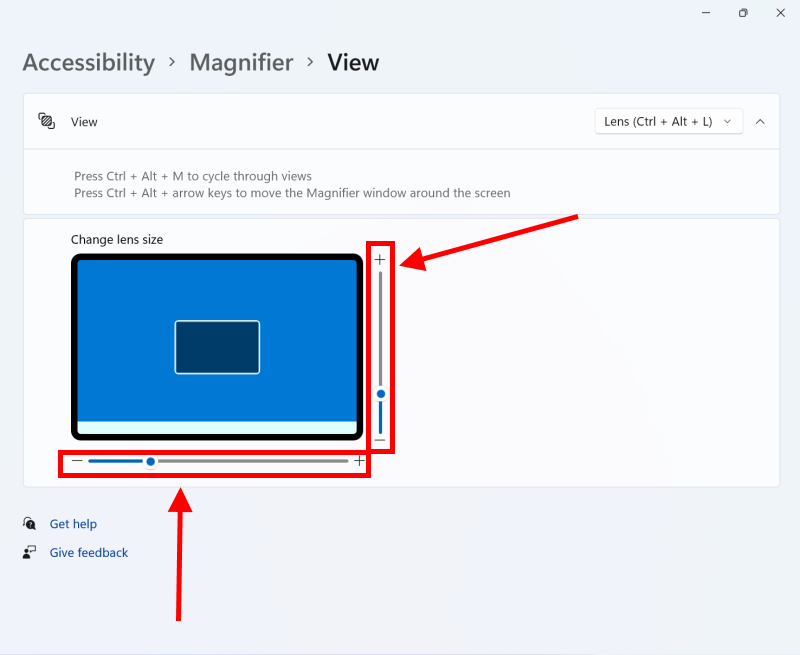
Adjust the Lens view options
6. In the Lens view, you can change the size of the magnifying lens using the sliders below and to the right of the diagram of the screen. You can see the lens get bigger and smaller as you move the sliders.
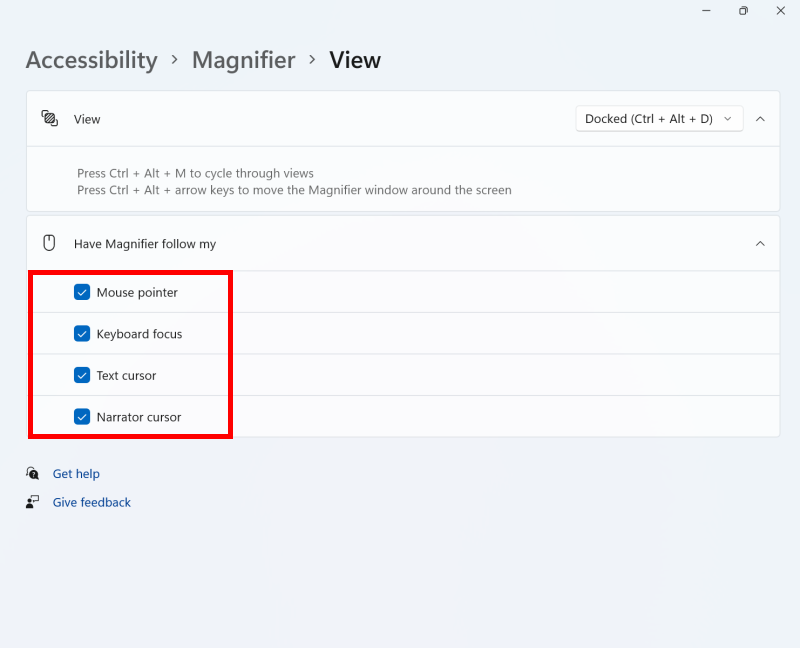
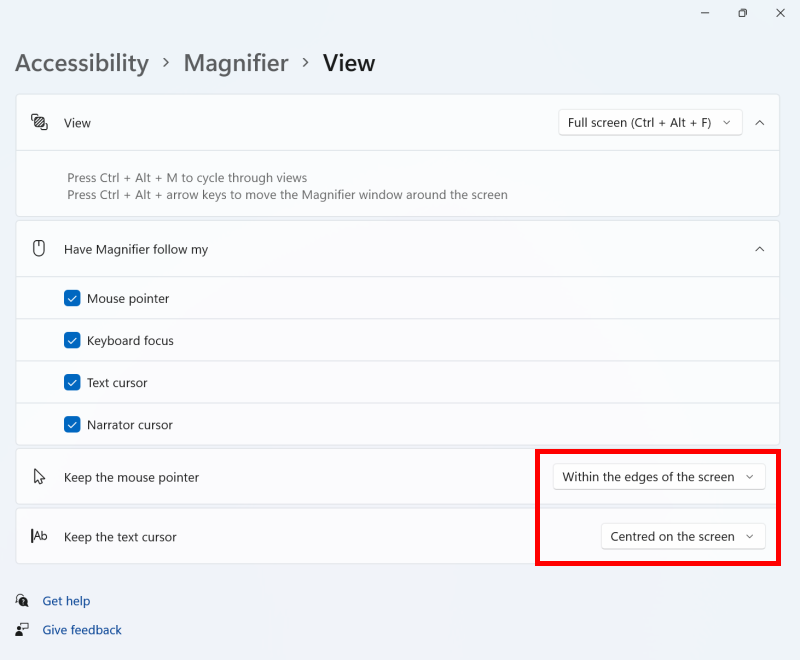
Adjust the Docked and Full-screen views
7. In the Docked and Full screen views, you can use the checkboxes under Have Magnifier follow my to select whether the magnified view will track your Mouse pointer, your Text cursor, or your Narrator cursor and/or follow the Keyboard focus from text field to text field. This last option can be especially useful if you’re filling in details on a website or an online form.
Change the behaviour of the Full-screen view
8. In the Full screen view, you can also use the Keep the mouse pointer option to select whether the magnified view keeps the mouse pointer in the centre of the screen, or whether it only moves the view when the pointer reaches the edge of the screen. The Keep the text cursor option does the same for the text cursor.
Note: If this does not work it could be because your computer settings are managed by someone else (an IT department or administrator for example). If this is the case, you will need to contact them to access these settings or for further help.
Need some more help?
Call our helpline 0300 180 0028 or email enquiries@abilitynet.org.uk
Need free IT Support at Home?
If you are older or disabled and need IT support at home, you can book a free home visit.