Call our helpline
0300 180 0028Hover Text is a companion feature to Hover Typing. Hover Typing displays the text you are typing in a much larger font size. To learn more about using Hover Typing, see our guide How to display a larger version of the text you are typing in macOS 26 Tahoe.
Short guide:
- Click the Apple icon
 in the top left corner of the screen and System Settings.
 - Click Accessibility in the sidebar.
- Select Hover Text from the list of Accessibility options.
- Click the toggle switch for Hover Text.
- Now, you can show a large version of the text you want to read by moving the pointer over it while holding down the Command (⌘) key.
- To customise the settings for Hover Text, click the settings button
 next to the toggle switch..
Before and after
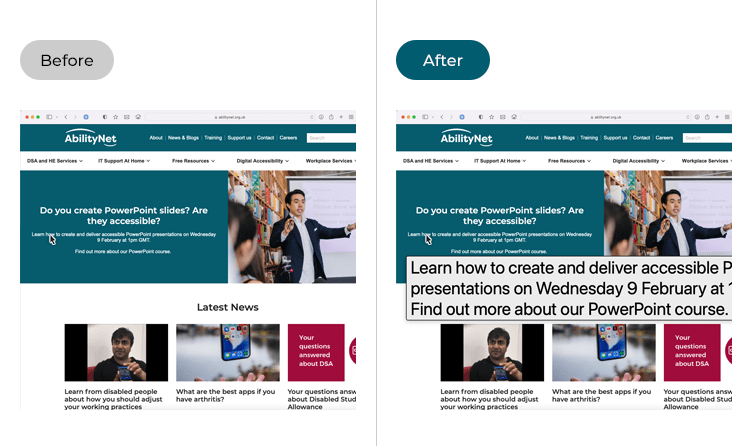
This section explains how to enable Hover Text in macOS 26 Tahoe. This is a step-by-step guide with pictures of the screens to help.
Open System Settings
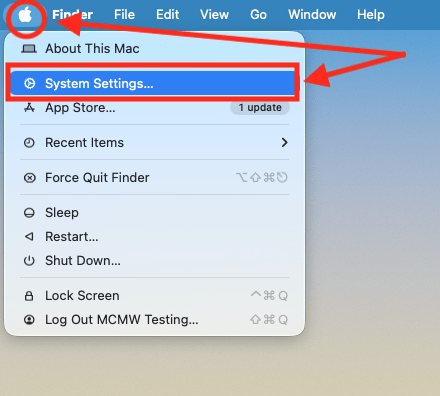
1. Click the Apple icon in the top left corner of the screen and choose System Settings from the menu.
Open the Accessibility settings
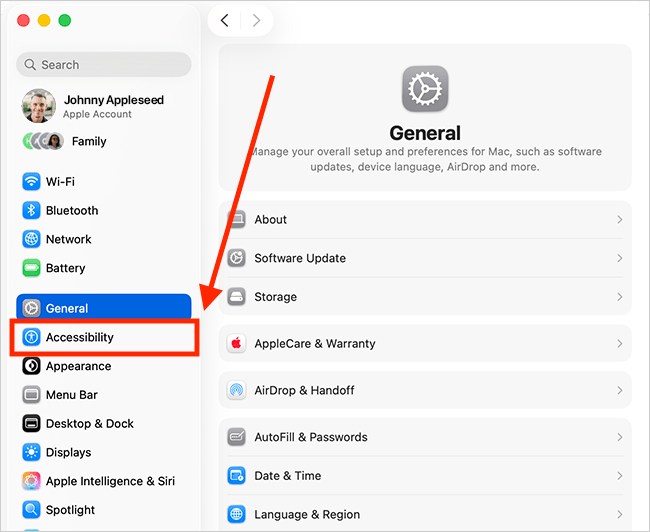
2. In the System Settings window, click Accessibility in the sidebar.
Open the Hover Text settings
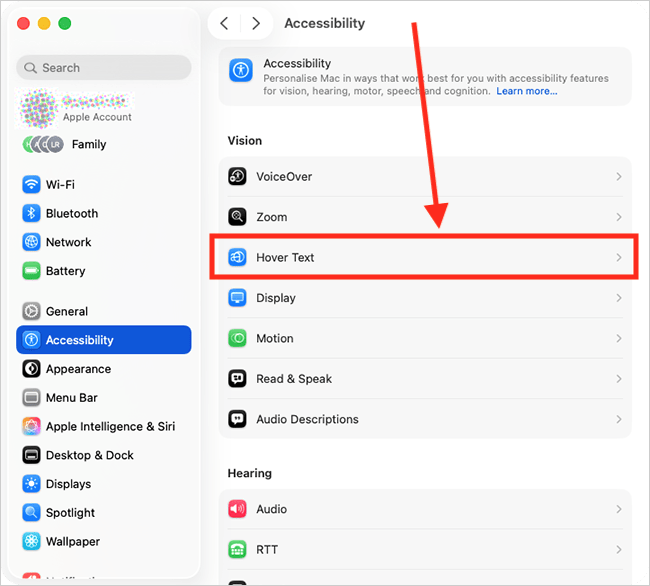
3. Select Hover Text from the list of Accessibility options on the right.
Turn on Hover Text
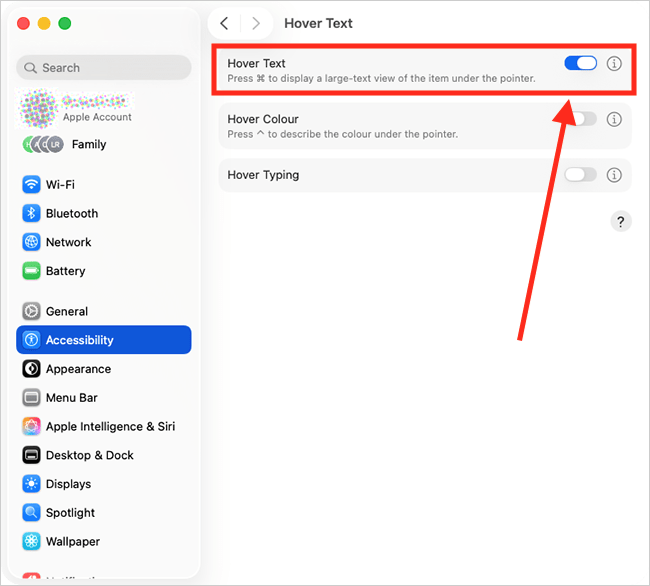
4. On the next page, click the toggle switch for Hover Text to turn it on.
How to use Hover Text
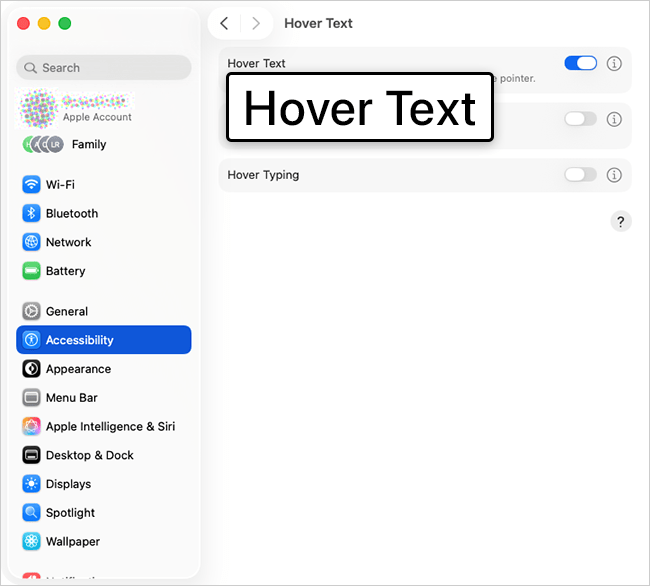
5. To use Hover Text, hold down the Command (⌘) key and move the pointer over some text. Try it now — it works on the text in System Settings!
Change the settings for Hover Text
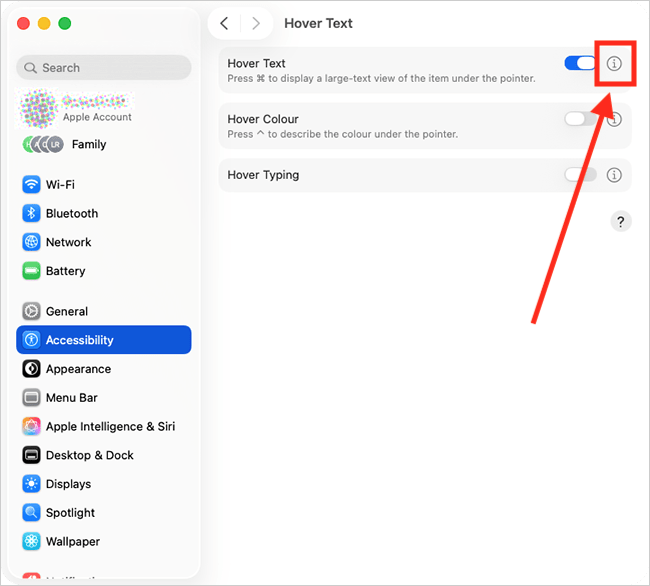
6. To customise the settings for Hover Text, click the settings button next to the toggle switch.
Change the modifier key
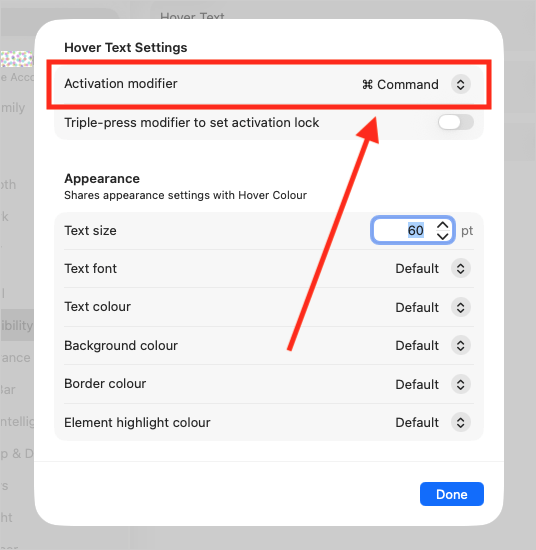
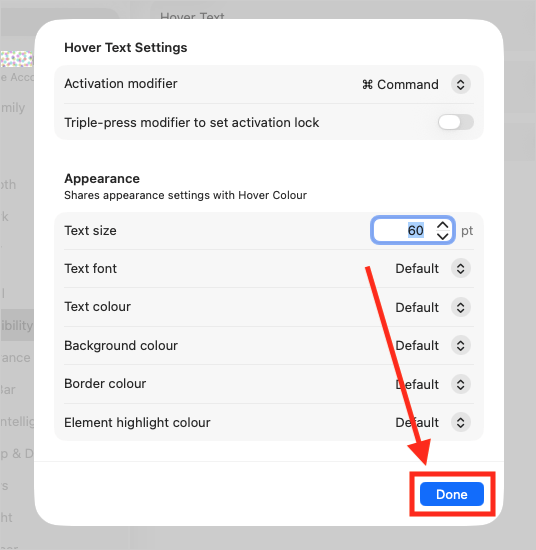
7. The modifier key is the key you hold down whilst moving the pointer over the text you want to read. By default, this is the Command key. To change it, click the Activation Modifier drop-down menu and choose Control (⌃), Option (Alt ⌥), or Command (⌘).
Show hover text without holding down a modifier key
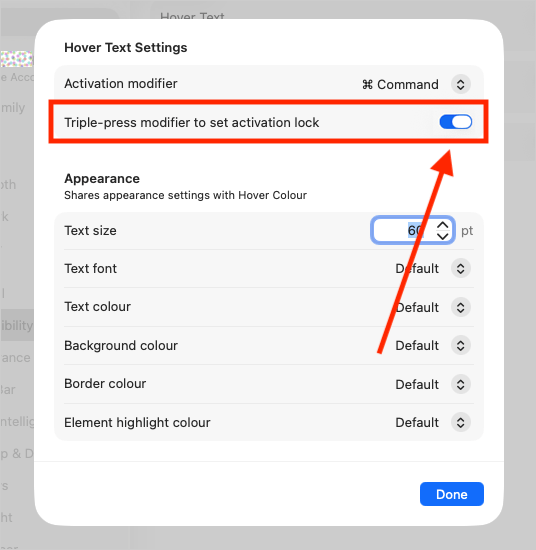
8. You can lock Hover Text so that you don’t need to keep holding down the modifier key to magnify text. Turn on the toggle switch for Triple press modifier to set activation lock. When you triple-press the modifier key, Hover Text will be turned on and locked. To unlock it, triple-press the modifier key again.
Change the text size
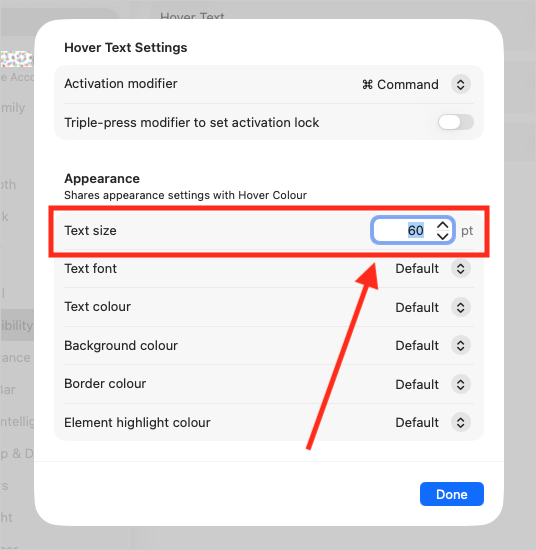
9. To change the size of the Hover Text, choose a new size from the Text size selector.
Change the font
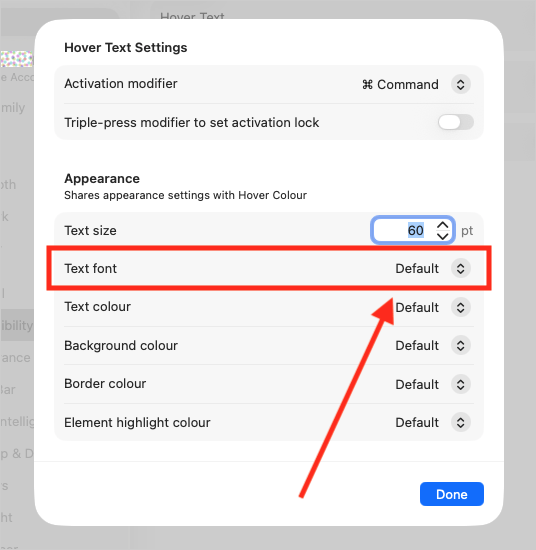
10. To change the font used for Hover Text, choose from the options in the Text Font drop-down menu.
Change Hover Text colours
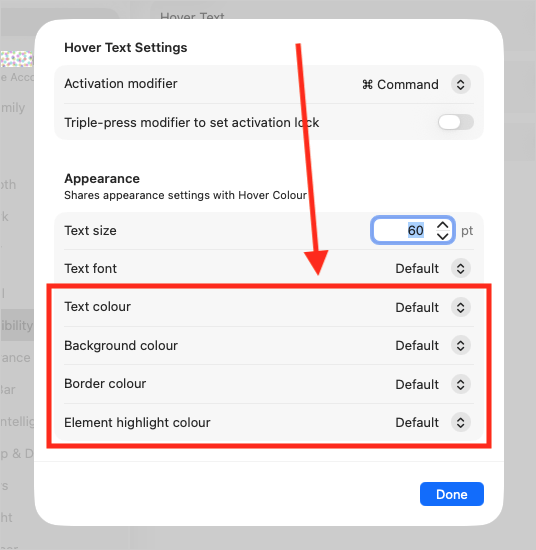
11. Choose the colours for each element of Hover Text from the options in the Appearance section.
Save your Hover Text settings
12. When you are happy with your settings, click Done.
Close System Settings
13. When you are happy with your settings, close System Settings by clicking the Close button (red circle) in the top-left corner of the window or using the Cmd + W keyboard shortcut.
Note: If this does not work it could be because your computer settings are managed by someone else (an IT department or administrator for example). If so, you will need to contact them to access these settings or for help.
Need some more help?
Call our helpline 0300 180 0028 or email enquiries@abilitynet.org.uk
Need free IT Support at Home?
If you are older or disabled and need IT support at home, you can book a free home visit.