Call our helpline
0300 180 0028Short guide:
- Tap the Settings icon to open the Settings app. Scroll down and tap Accessibility.
- On the Accessibility screen, select Read & Speak.
- On the Read & Speak screen, tap Speak Screen.
- Tap Speak Screen to turn the toggle switch on.
- You can also access and control Speak Screen using the always-on-screen Speech Controller. To enable it, tap the toggle switch for Show Controller to turn it on..
- To activate Speak Screen, swipe down with two fingers from the top of the screen. Or tap the Play button on the Speech Controller if already enabled.
Before and after
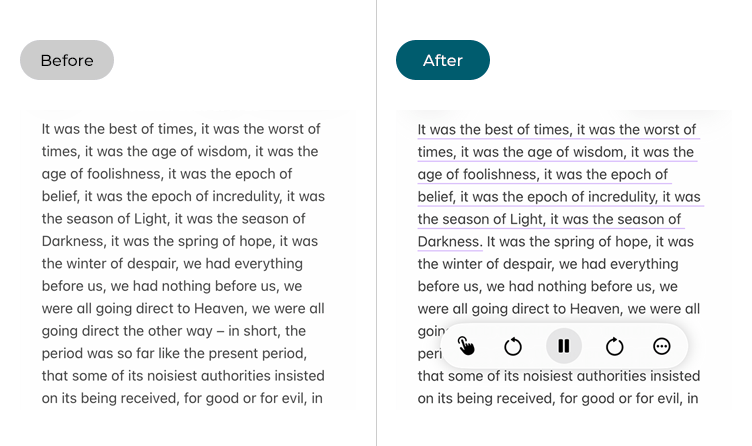
This section explains how to enable and use Screen Speak in iOS 26, with step-by-step instructions and pictures of the screen to help.
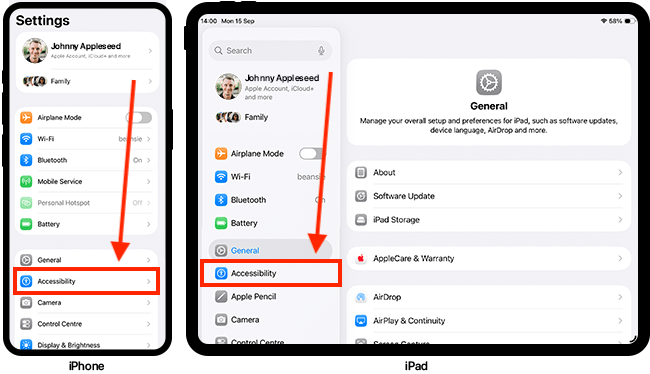
Open Settings
1. Tap the Settings icon to open the Settings app. Scroll down and tap Accessibility.
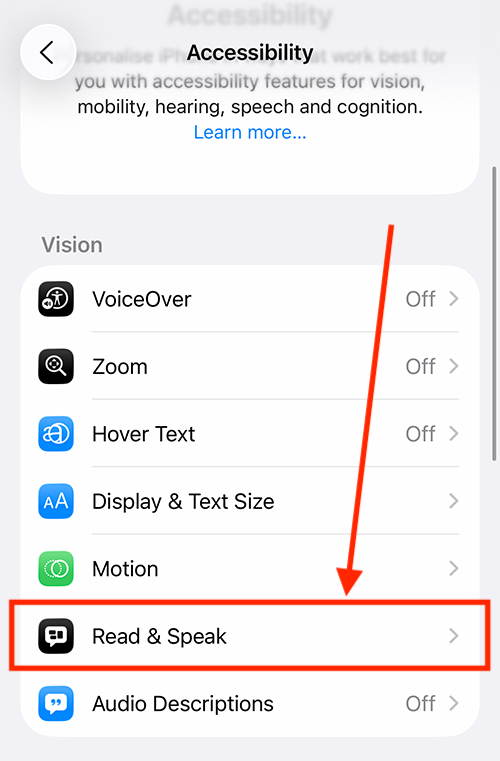
Select Spoken Content
2. In the Vision section, tap Read & Speak.
Open the Speak Screen settings
3. On the Read & Speak screen, tap Speak Screen.

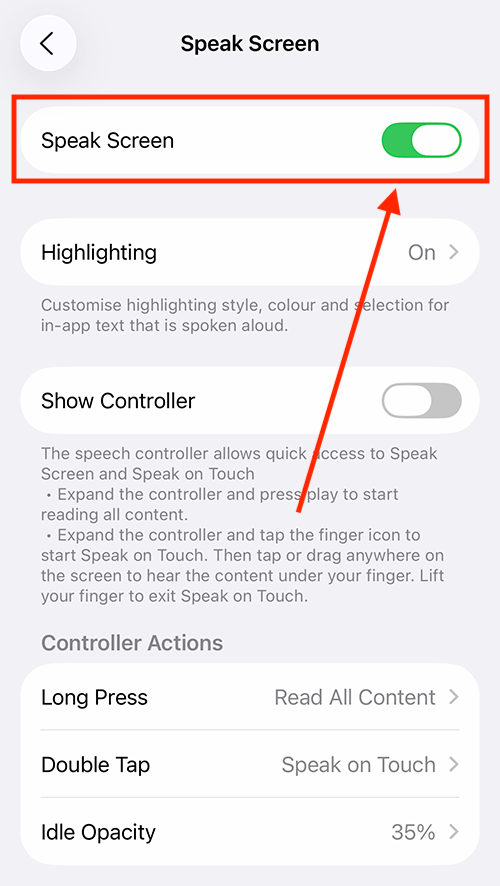
Enable Speak Screen
4. Tap the toggle switch for Speak Screen to turn it on.
To use Speak Screen, swipe down with two fingers from the top of the screen. This will activate the feature and read aloud the contents of your screen.
Highlight text as it is read aloud
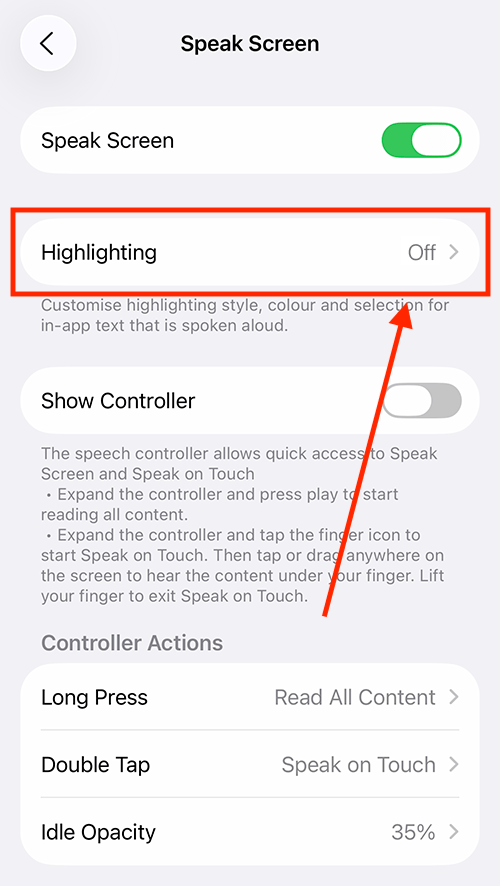
5. Speak Screen can highlight text as it’s read aloud. To enable this feature and customize the highlighting style, tap Highlighting.
Enable Highlighting
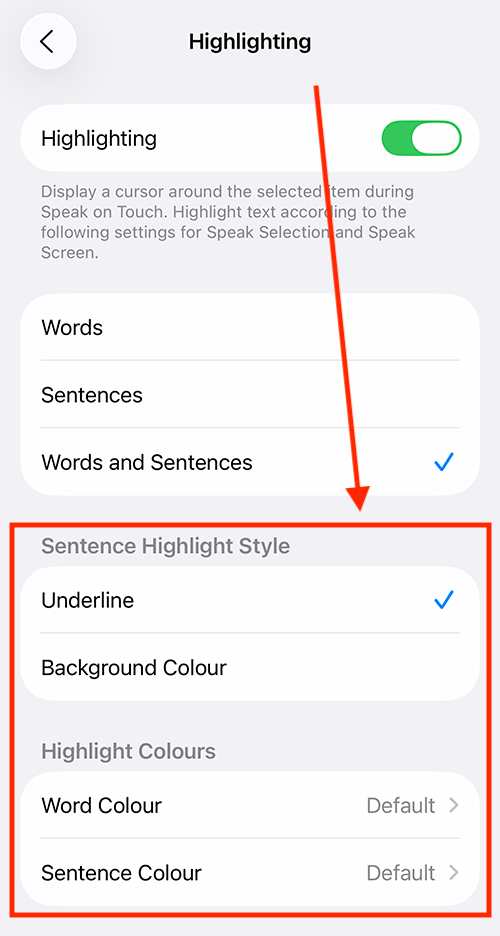
6. Tap the toggle switch for Highlighting to turn it on.

Choose what content to highlight
7. Select the type of content you want highlighted during playback. You can choose to highlight Words, Sentences, or Both Words and Sentences as they are read aloud.

Choose how you want the content to be highlighted
8. Next, choose how you want the content to be highlighted as it’s read aloud.
Select a highlight style – either Underline or Background Color – then pick colors for highlighting Words and Sentences.
Always show the Speech Controller
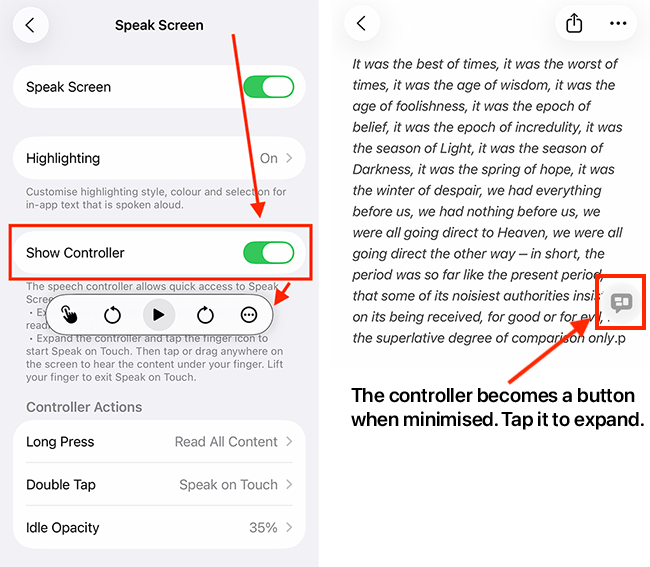
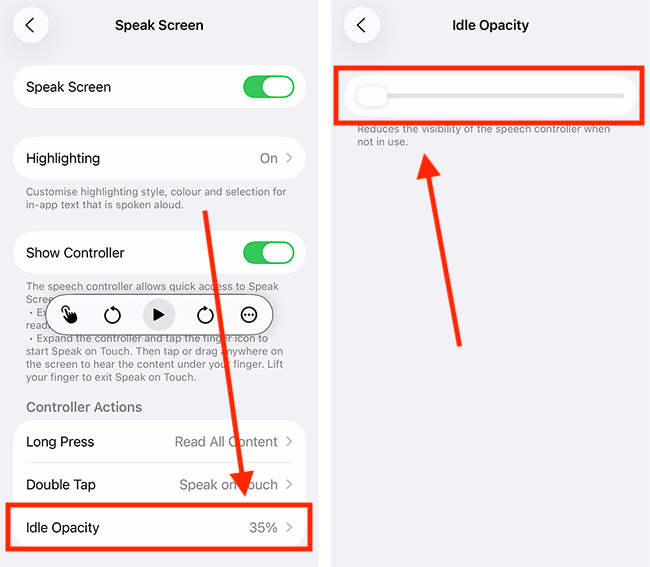
9. To keep the Speech Controller visible on your screen, turn on the Show Controller toggle switch. You will see the controller appear in the middle of the screen. After a few seconds of inactivity, the controller will minimize into a small button - tap the button to expand the controller.
Set up quick actions to be performed by long-pressing and double-tapping the controller button
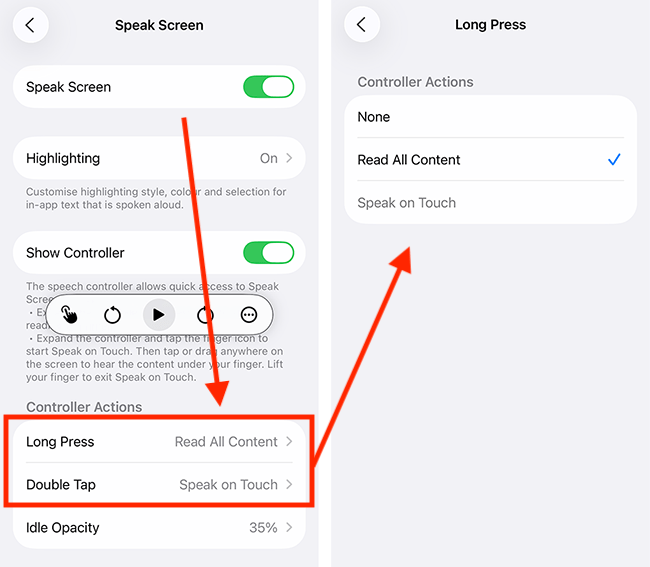
10. You can perform two quick actions – Read All Content and Speak on Touch – using long-press or double-tap gestures on the minimised button. These gestures are pre-configured. If you'd prefer to swap them around or turn them off, tap Long Press and Double Tap, then assign the action you want each gesture to perform.
Make the Speech Controller easier to see
11. When the controller is minimized, the button is semi-transparent, which can make it hard to see. To improve visibility, tap Idle Opacity. On the next screen, use the slider to adjust the opacity to your preference.
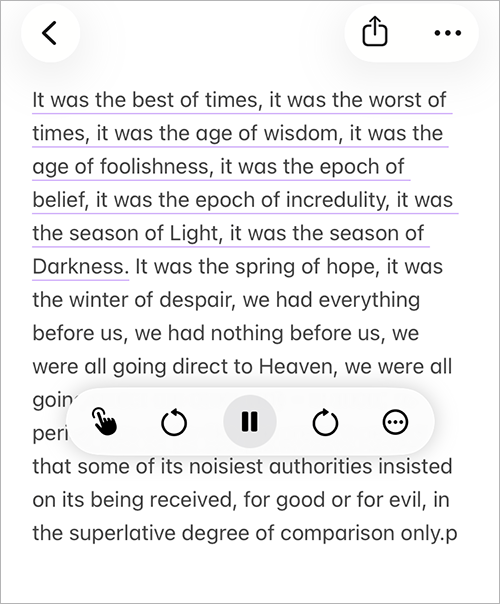
Using Speak Screen
12. To use Speak Screen, swipe down with two fingers from the top of the screen. This will activate the feature and read aloud the contents of your screen. A floating controller will appear in the middle of the screen, allowing you to:
- Play or pause the reading
- Skip backward or forward through the text
- Adjust the speaking rate
If you’ve set the controller to always show, you can tap its button and then press the Play button to start reading.
Note: iPhones and iPads can also read aloud text found within photos using the same process described above.
Using the Speech Controller
13. The image below shows the Speech Controller. Descriptions of each button are provided afterward.
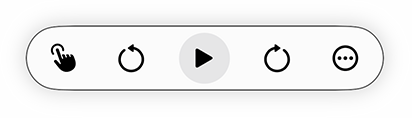
| The Speech Controller | |
| Button | Action |
 |
Play / Pause speech. |
 |
Move forward to the next paragraph or item. |
 |
Move backwards to the previous paragraph or item. |
 |
Speak on Touch – Tap the hand button, then tap or drag over any content you wish to hear. Lift your finger to stop playback. |
 |
More options – Tap the ellipsis button (…) to open the Options menu. |
| The Options Menu | |
 |
Stop and Hide – Stops speech and hides the controller. This option is not available if you have chosen to always show the controller. |
 |
Minimise the controller. |
| Speaking Rate – Tap to choose a new speaking rate. | |
 |
Open Reader – tap to open the text in the Accessibility Reader app. To learn more about the Accessibility Reader see our guide How to make reading or listening to content easier on your iPhone and iPad with Accessibility Reader in iOS 26. |
Need some more help?
Call our helpline 0300 180 0028 or email enquiries@abilitynet.org.uk
Need free IT Support at Home?
If you are older or disabled and need IT support at home, you can book a free home visit.