Call our helpline
0300 180 0028Short guide:
- Tap the Settings icon to open the Settings app. Scroll down and tap Accessibility.
- On the Accessibility screen, select Spoken Content.
- Tap Speak Screen to turn the toggle switch to on.
- You can also access and control Speak Screen using the on-screen Speech Controller. To enable it, tap Speech Controller, then tap the toggle switch for Show Controller.
- To activate Speak Screen, swipe down with two fingers from the top of the screen. The Speech Controller will appear onscreen and the contents of the screen will be read aloud.
- If you have enabled Show Controller, you can activate Spreak Screen through the Speech Controller. Tap the button to expand the Speech Controller, then tap the Play button to start Speak Screen.
Before and after
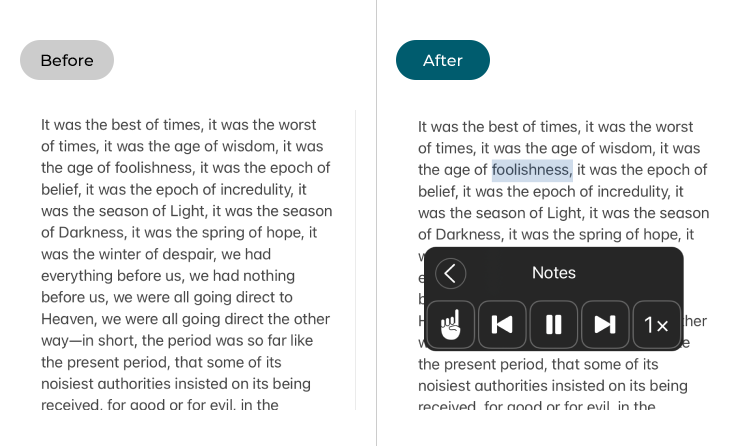
This section explains how to enable and use Screen Speak in iOS 17, with step-by-step instructions and pictures of the screen to help.
Open Settings
1. Tap the Settings icon to open the Settings app. Scroll down and tap Accessibility.
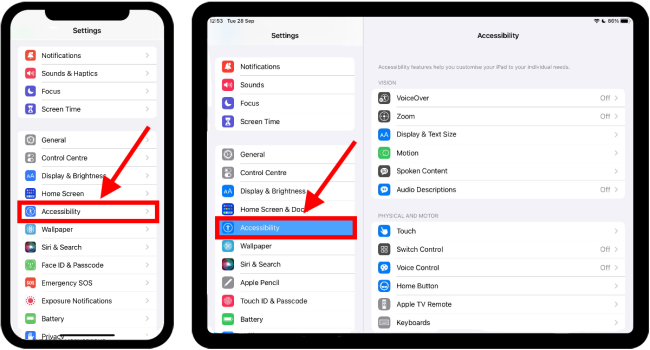
Select Spoken Content
2. In the Vision section, tap Spoken Content.
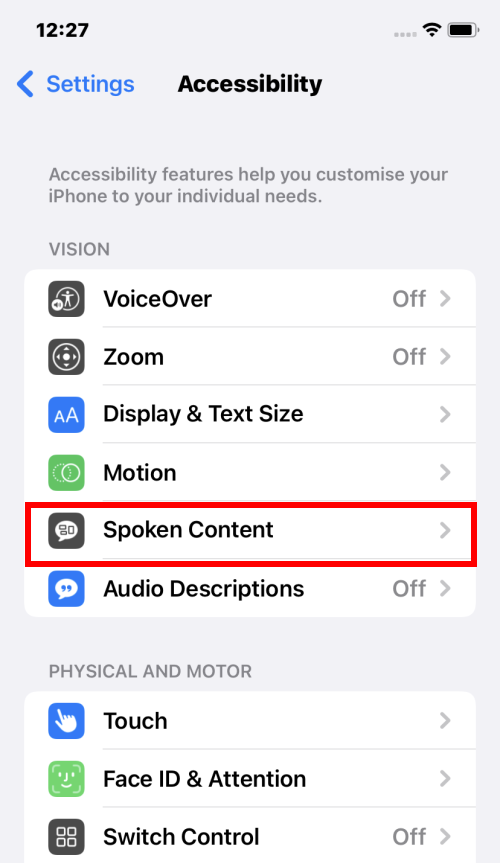
Enable Speak Screen
3. Tap Speak Screen to set the toggle switch to on. Speak Screen is now active.
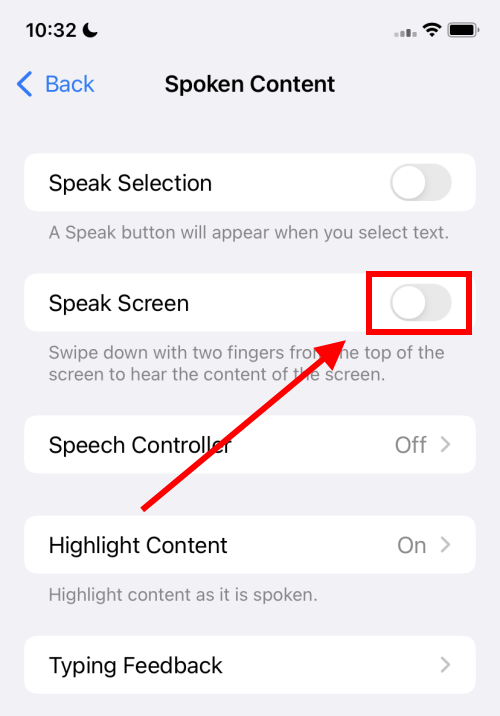
Enable the Speech Controller
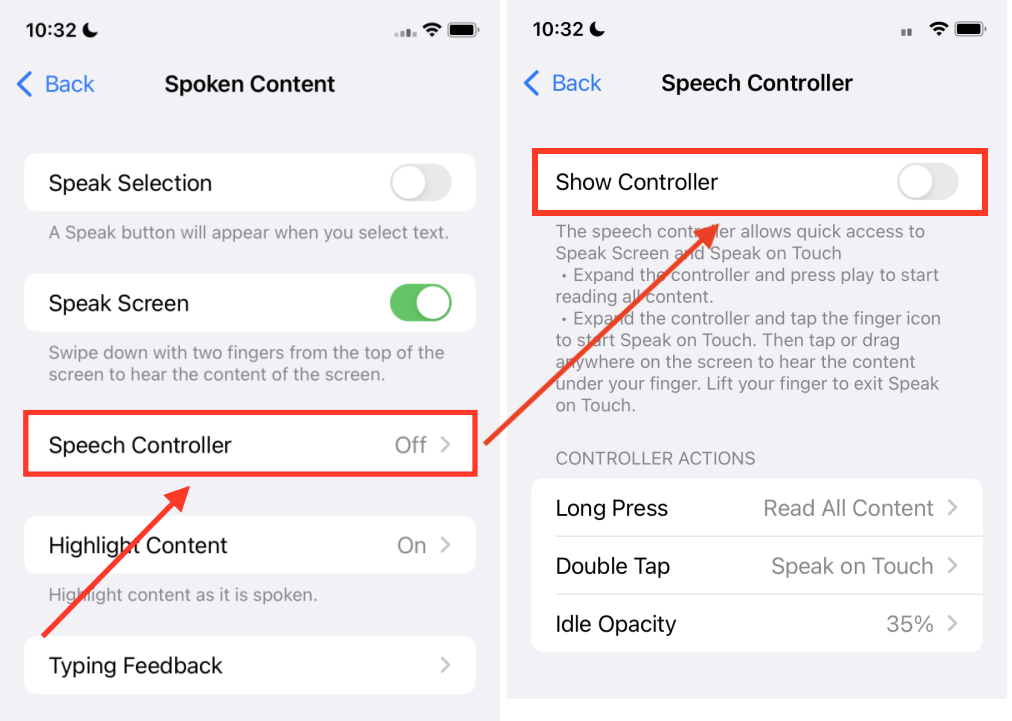
4. You can also access and control Speak Screen using the on-screen Speech Controller. To enable it in the Spoken Content settings, tap Speech Controller. On the next screen, tap Show Controller to set the toggle switch to on. The Speech Controller will appear in the bottom right of the screen. You can drag the controller to a different position around the edge of the screen if you prefer.
Make the Speech Controller easier to see
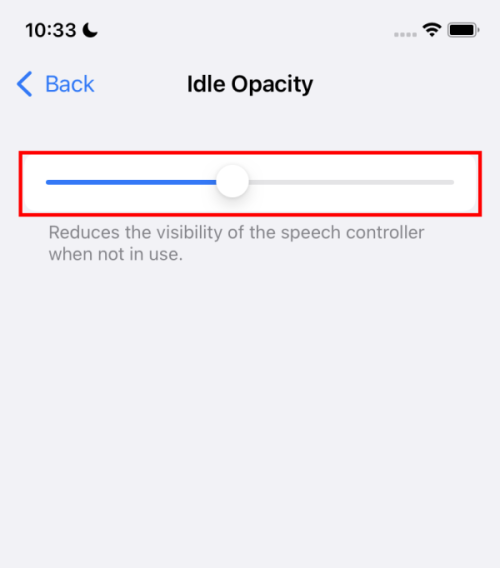
5. After a few seconds of inactivity the controller becomes semi-transparent, which can make it difficult to see. To change the opacity level, tap Idle Opacity then move the slider on the next screen to adjust the opacity.
Highlight text as its read aloud
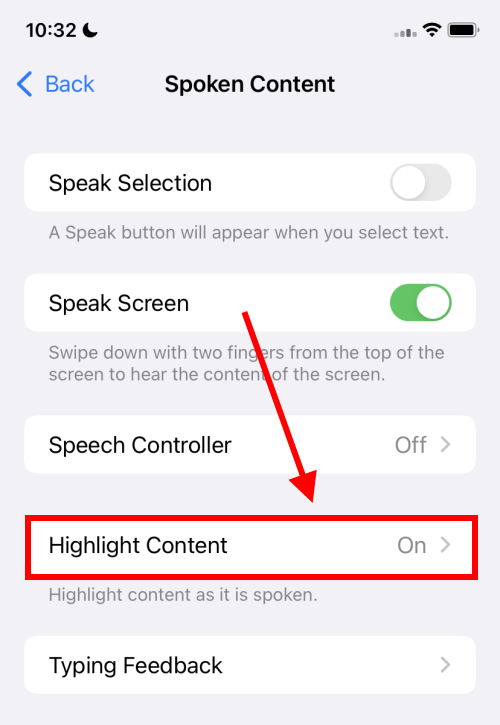
6. You can also set Speak Screen to highlight text as it's read aloud, and set how this works and looks. To set this up, tap Highlight Content.
Enable Highlight Content
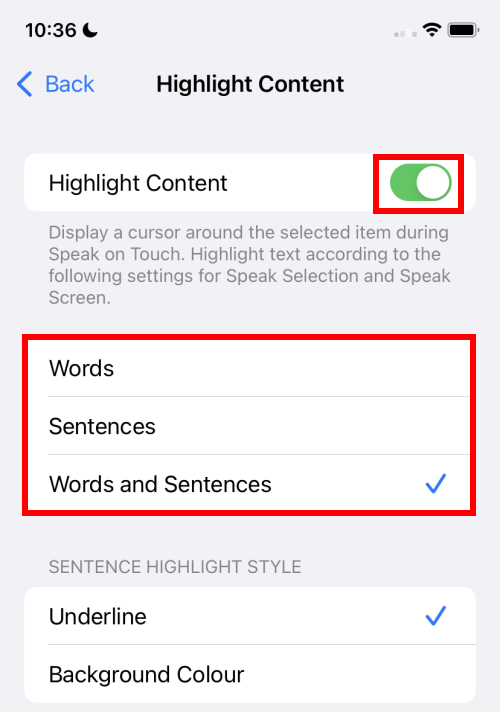
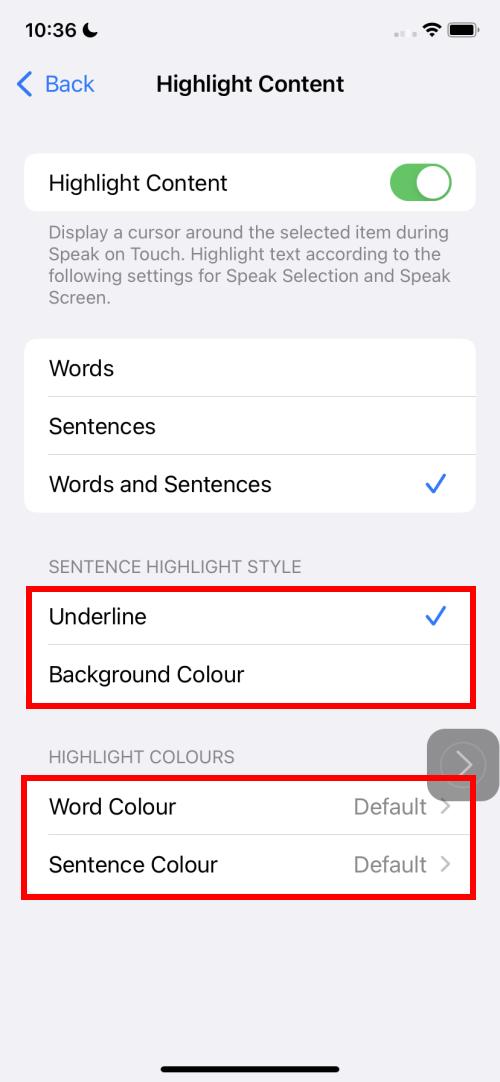
7. Tap Highlight Content to turn the toggle switch on, then select Words, Sentences or Words and Sentences to choose whether the highlight will appear on words as they’re spoken, on sentences, or both.
Style and colour your highlight
8. Choose a highlight style for your highlight, by selecting Underline or Background Colour. You can also tap Word Colour or Sentence Colour to select a colour for that type of highlight.
Using Speak Screen
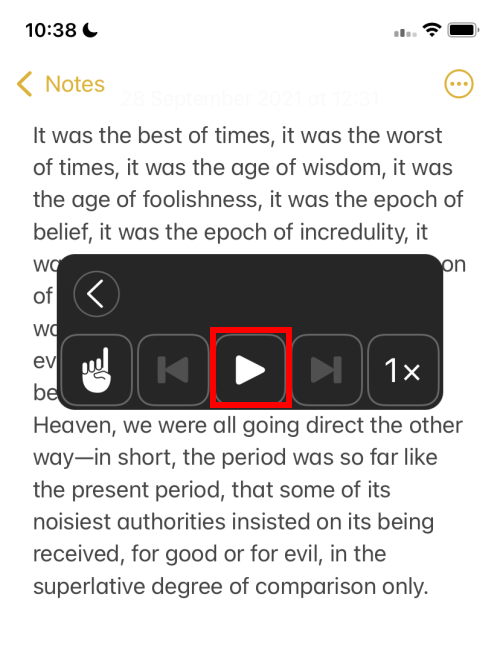
9. To activate Speak Screen, swipe down with two fingers from the top of the screen. The Speech Controller will appear on-screen and the contents of the screen will be read aloud. Alternatively, if you have enabled the Speech Controller, tap it and then tap the Play button.
iPhones and iPads can now read aloud the text in photos using the same process as described above.
Using the Speech Controller
This diagram shows the controls on the Speech Controller.
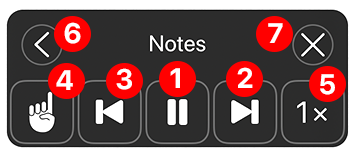
- Play / Pause speech
- Move forward to the next paragraph or item.
- Move backwards to the previous paragraph or item.
- Speak on Touch – select the hand icon then tap on / or drag to any content you want to hear. Lift your finger to exit Speak on Touch.
- Speech speed - Tap to cycle through 1x, 1.5x, 2x, 1/2x speed.
- Minimise the Speech Controller
- Close (not available when the Show Controller option is set to on) - close the controller and stops speech.