Short guide
- Click the Start button and then click Settings.
- In Settings, select Bluetooth & Devices. Clck Mouse on the right.
- Under Related settings in the right-hand panel, click Additional mouse settings.
- Click the Pointer Options tab, and look under Visibility. Check the box next to Show location of pointer when I press the Ctrl key. Click OK.
Before and after
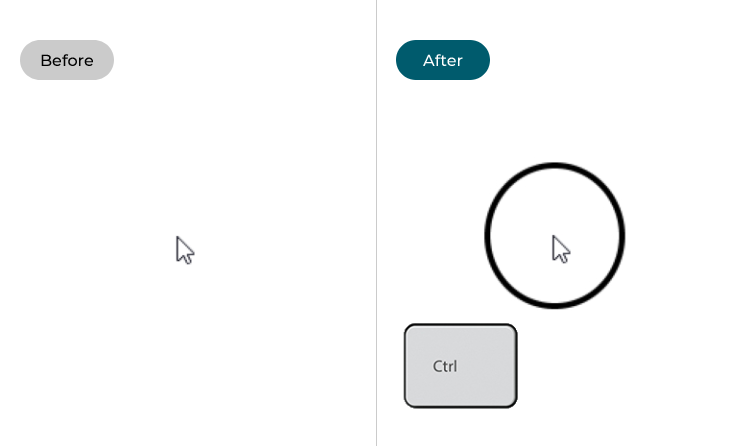
This section takes you through the steps in enabling the Ctrl key to show the location of the mouse pointer. It's a step-by-step guide complete with pictures of the screens to help.
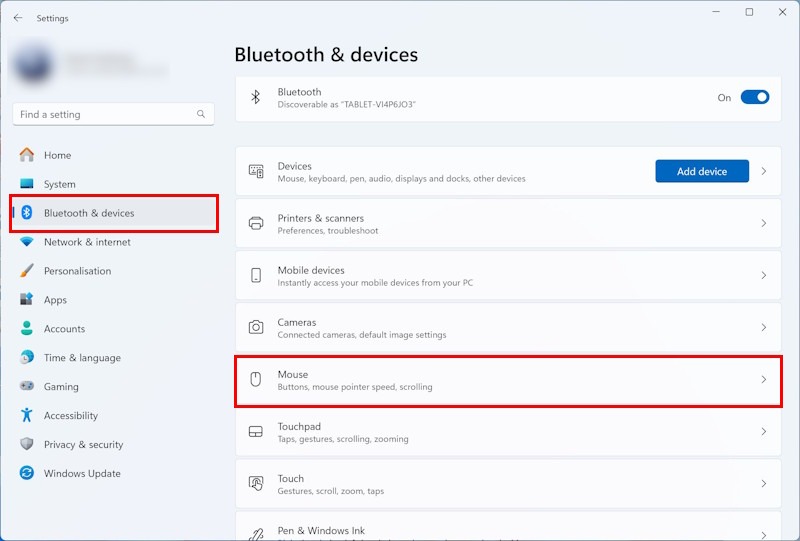
Open the Settings app
1. Open the Settings app by pressing the Windows logo key ![]() + I on the keyboard or by clicking the Start button, then Settings. Select Bluetooth & devices on the left then scroll down and click Mouse on the right.
+ I on the keyboard or by clicking the Start button, then Settings. Select Bluetooth & devices on the left then scroll down and click Mouse on the right.
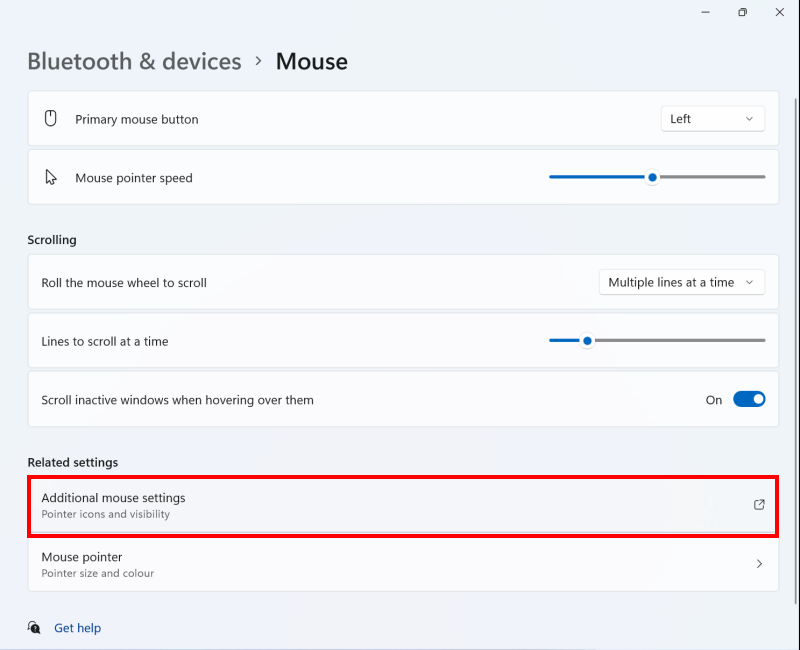
Find the Additional mouse options
3. Look under Related settings and click Additional mouse settings.
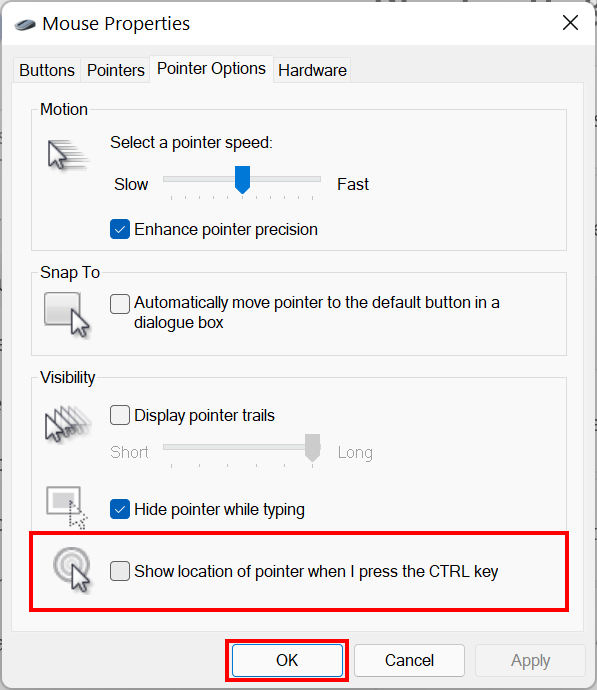
Change Pointer Options
4. Click the Pointer Options tab at the top. Look under Visibility and tick the box labelled Show location of the pointer when I press the CTRL key. Click OK.
Note: If this does not work it could be because someone else manages your computer settings (an IT department or administrator). If this is the case, you will need to contact them to access these settings or for further help.
Need some more help?
Call our helpline 0300 180 0028 or email enquiries@abilitynet.org.uk
Need free IT Support at Home?
If you are older or disabled and need IT support at home, you can book a free home visit.