Short guide:
- Open the Charms Bar, tap or click Settings, then select Control Panel.
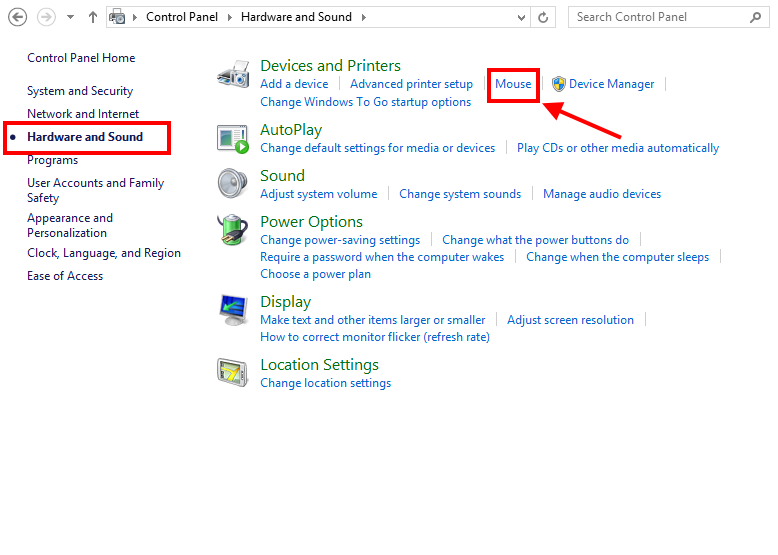
- In the Control Panel window, click Hardware and Sound in the left-hand column then look under Devices and Printers in the right-hand panel and click Mouse.
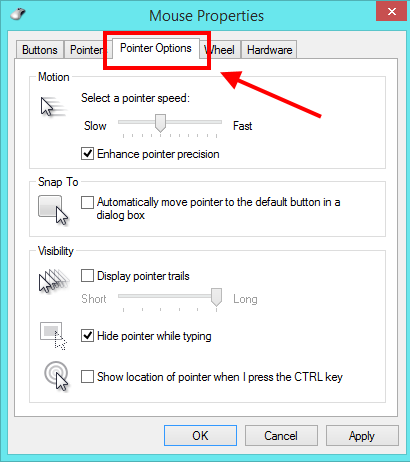
- When the Mouse Properties window opens, click the tab for Pointer Options.
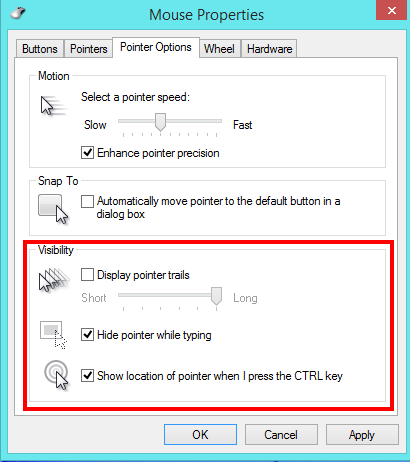
- Under Visibility tick the checkbox for Show location of pointer when I press the CTRL key.
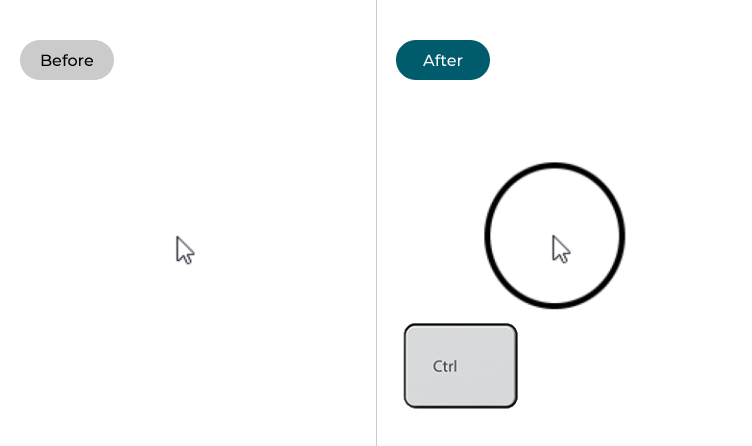
Before and after

This section takes you through the steps required to enable the show pointer location feature in Windows 8, complete with pictures of the screens to help you. You can also customise the pointer settings to make it easier to track the pointer down.
Open the Control Panel
1. Open the Charms Bar by moving the pointer to the upper-right or lower-right corner of the screen. Click Settings, then Control Panel.

Find the mouse settings
2. When the Control Panel window launches, click Hardware and Sound in the left-hand column. Now look under Devices and Printers at the top of the right-hand panel and click Mouse.

Click the Pointer Options tab.
3. In the Mouse Properties window, click the tab for Pointer Options.

Enable the Show location feature
4. Look under the Visibility settings and tick the Checkbox next to Show location of pointer when I press the CTRL key. You can also tick the checkbox next to Display pointer trails to activate a trail that follows the cursor, or Hide pointer while typing to hide the cursor when you're typing, so it doesn't get in the way. Click OK when you're finished.

Note: If this does not work it could be because someone else manages your computer settings (an IT department or administrator). If this is the case, you will need to contact them to access these settings or for further help.