Short guide:
- Open the Settings and select Accessibility.
- Scroll down to the Display section and tap Magnification.
- Tap the toggle switch for Magnification shortcut to turn it on.
- Tap the Magnification shortcut button to activate the zoomed-in view.
- Switch between full and partial screen views by tapping on the Change view button in the bottom-right corner.
Before and after
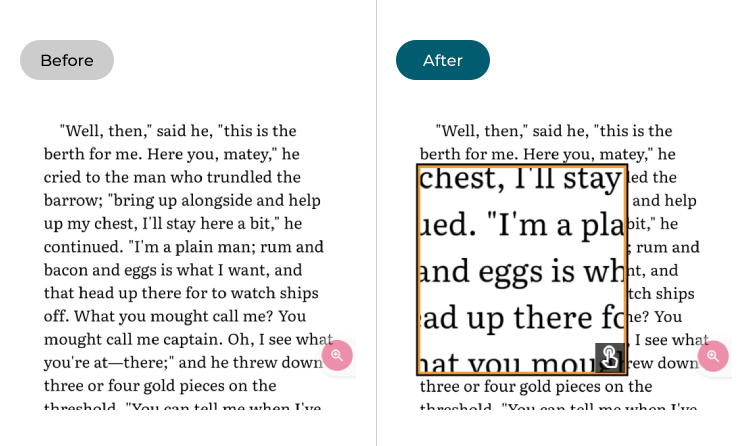
This section explains how to use the Magnification feature in Android 12. This is a step-by-step guide with pictures of the screens to help.
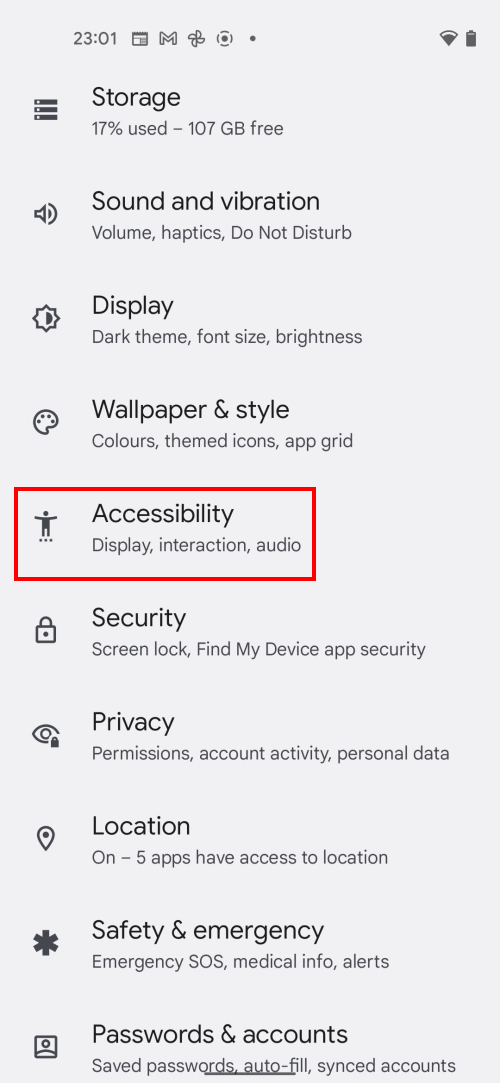
Open the Accessibility settings
1. Open the Settings and select Accessibility.
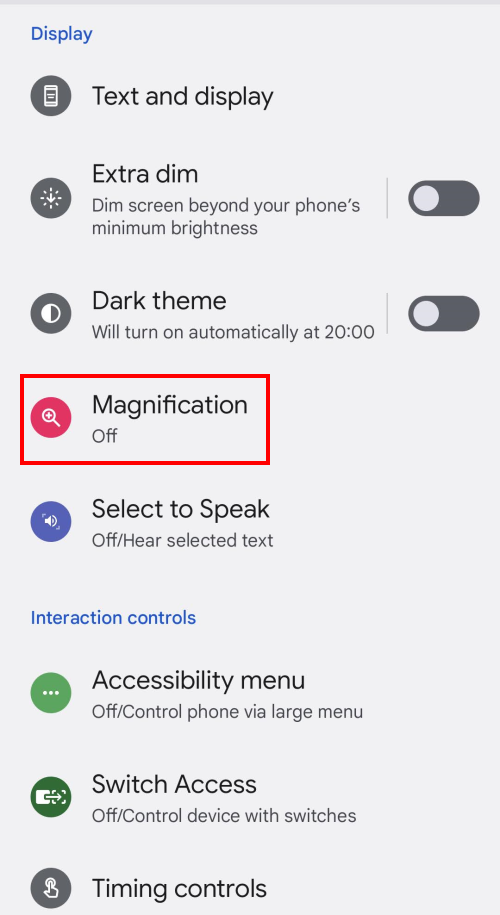
Find the Magnification tool
2. Scroll down to the Display section and tap Magnification.
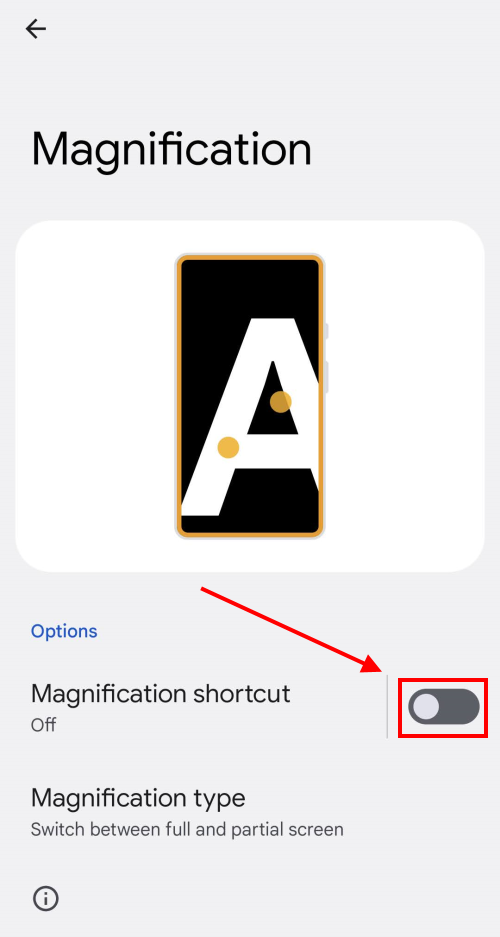
Enable the Magnification shortcut
3. Tap the toggle switch for Magnification shortcut to turn it on. You will receive a pop-up notification explaining how to use the shortcut. Tap OK to continue.
Activating magnification
4. Once you've turned it on, the Magnification shortcut button will appear on a semi-transparent, floating tab attached to the right side of the screen. Just tap the button to activate the zoomed-in view.
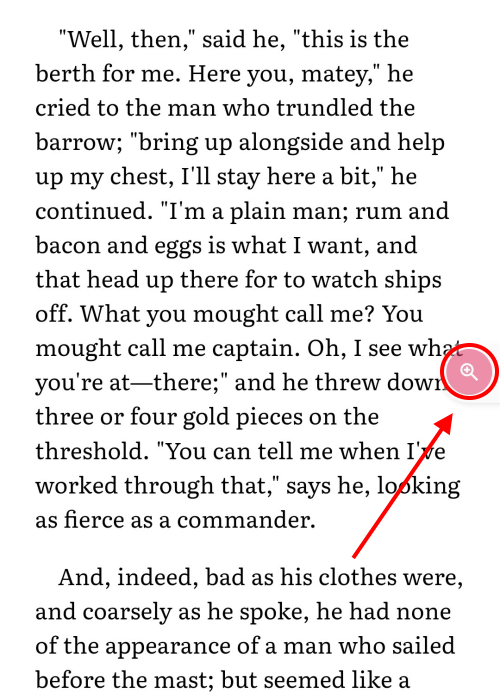
Switching between views
5. By default you get a magnified view that occupies the whole screen, but you can switch between full and partial screen views by tapping on the Change view button in the bottom-right corner of the screen.

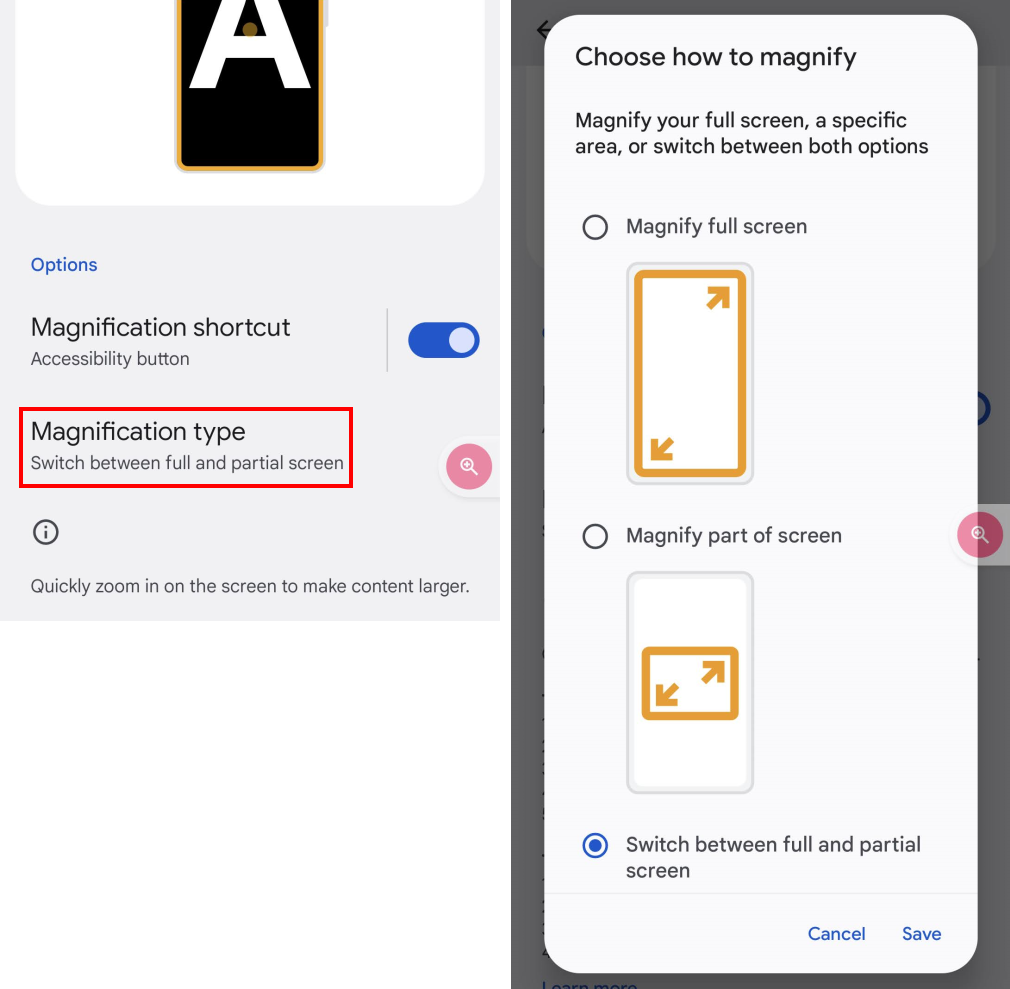
Selecting a new view
6. To start magnification in a specific view, go back to Settings > Accessibility > Magnification and tap Magnification view. Select your preferred view and tap Save.
Using magnification
7. While magnified you can tap the screen to zoom in, and pinch in or out to adjust the zoom level. Drag your finger or the magnified view around to move around the screen. Tap the Magnification shortcut button again to end magnification.

Note: We have written these instructions for devices running the standard version of the Android operating system. You may find some minor presentation differences if the manufacturer has customised the theme.
Need some more help?
Call our helpline 0300 180 0028 or email enquiries@abilitynet.org.uk
Need free IT Support at Home?
If you are older or disabled and need IT support at home, you can book a free home visit.