Note: An alternative to the method described in this guide for changing the size of items on the desktop is the new Text Size option in Accessibility settings. However, this option doesn’t allow you to adjust the icon and text sizes independently. See our guide How to make text larger on your Apple Mac computer using the Text Size options in macOS 26 Tahoe for more information.
Short guide:
- Click on the Finder app icon on the Dock to open it and make it the active app.
- Press the keyboard shortcut Cmd + Alt + H + M to hide all app windows.
- Click View in the toolbar, and select Show View Options.
- Click the drop-down menu for Text size and choose a new value.
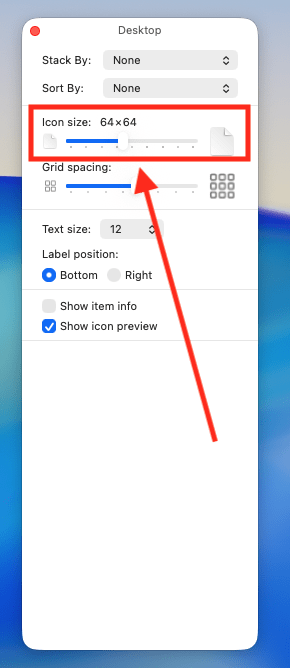
- Adjust the slider for Icon size to make the icons bigger.
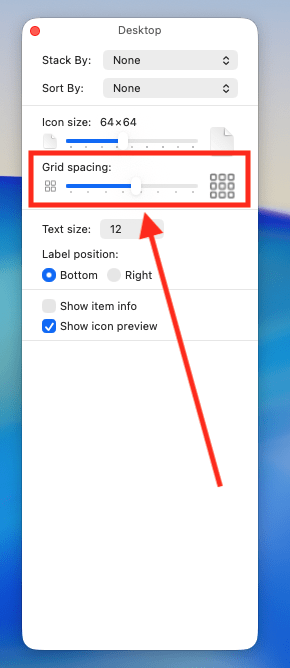
- If the desktop items have become bunched up, use the Grid spacing slider to space them out.
Before and after
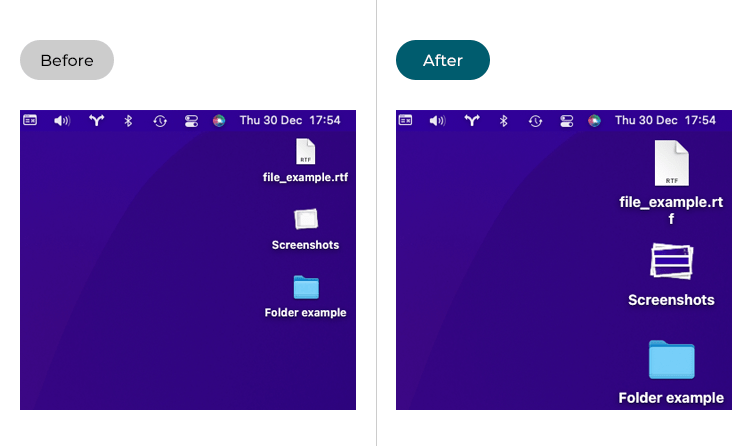
This section explains how to make the text and icons larger on the Desktop in macOS 26 Tahoe. This is a step-by-step guide with pictures of the screens to help.
Open the Finder app
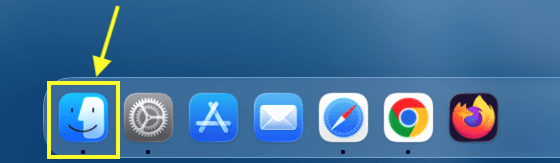
1. Even though you’re changing the size of text and icons for items on the desktop, you do this through the Finder app. Click the Finder icon in the Dock to open it and make it the active app.
Hide all windows
2. Next, hide all open app windows, including Finder’s. To do this, press the keyboard shortcut To do this, press the keyboard shortcut Cmd + Alt + H + M.
Open the View Options
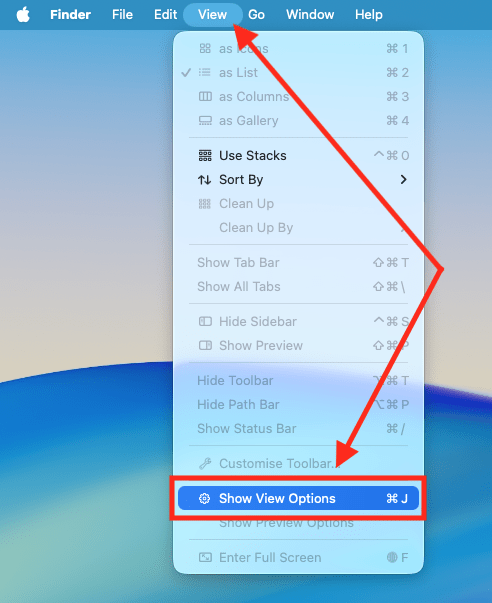
3. Click View on the toolbar at the top left of the screen, then select Show View Options
Make the text larger
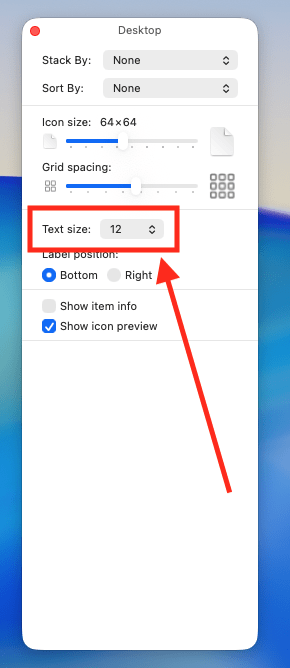
4. The Options window for the desktop will open. To make desktop items easier to read, click the drop-down menu for Text size and select your preferred setting.
Make the icons bigger
5. Adjust the slider for Icon size slider to make the icons bigger.
Space out the icons on the desktop
6. If the desktop items have become bunched up, adjust the slider for Grid spacing to space them out.
Close the View Options panel
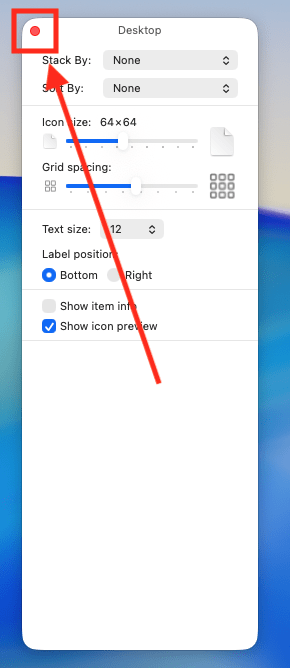
5. When you are happy with your settings, close the Options panel by clicking the Close button (red circle) in the top left corner of the panel or using the Cmd + W keyboard shortcut.
Note: If this does not work, it could be because your computer settings are managed by someone else (an IT department or administrator, for example). If so, you will need to contact them to access these settings or for help.
Need some more help?
Call our helpline 0300 180 0028 or email enquiries@abilitynet.org.uk
Need free IT Support at Home?
If you are older or disabled and need IT support at home, you can book a free home visit.