Short guide
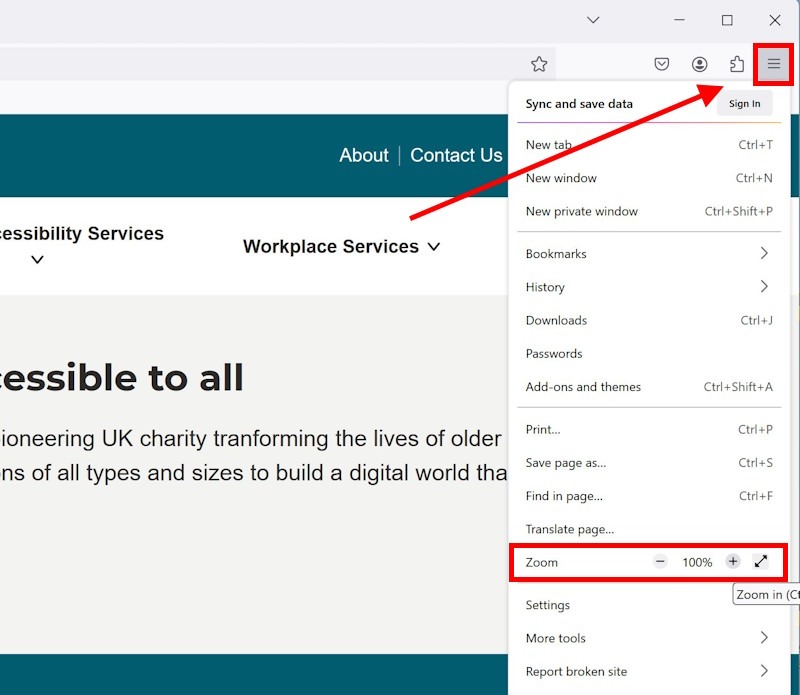
- Click the Menu button in the top-right corner of the browser window, then use the + (plus) and – (minus) buttons to zoom in and zoom out of the page.
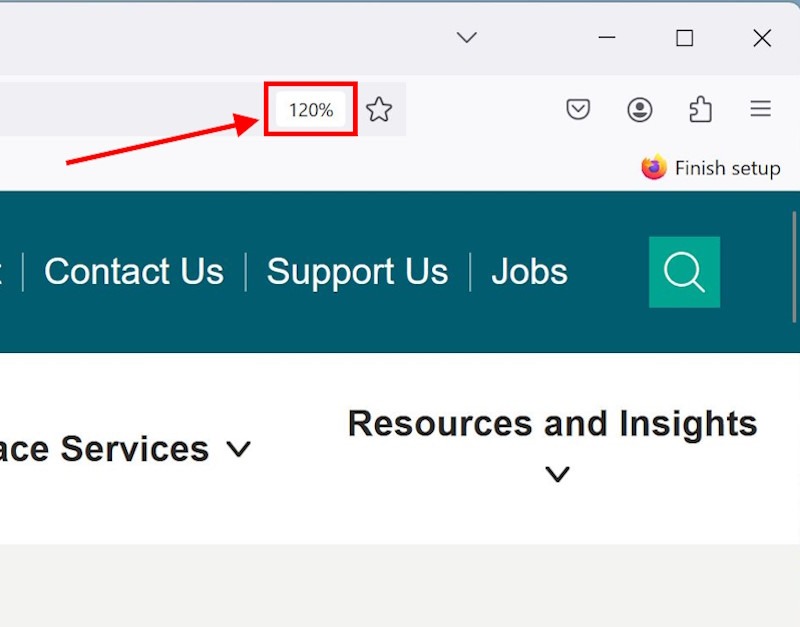
- Click on the Zoom percentage indicator in the address bar to return to the default size.
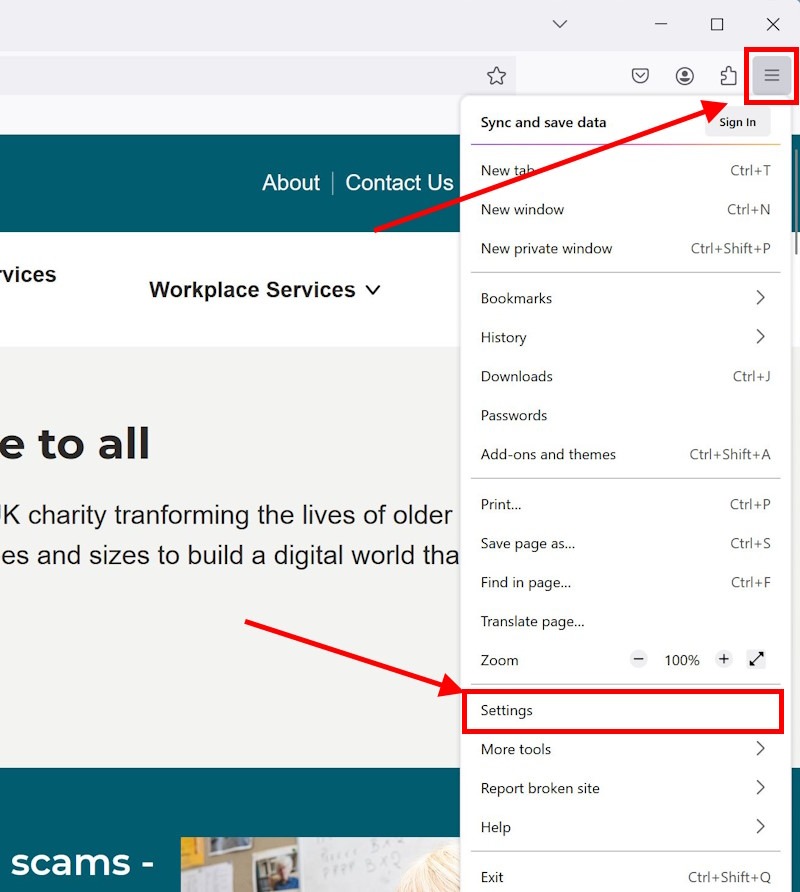
- Click the Menu button, then click Settings.
- Scroll down to Language and Appearance and use the dropdown menu to increase the Default Zoom.
- Click the checkbox for Zoom text only to have the zoom apply solely to text.
Before and after
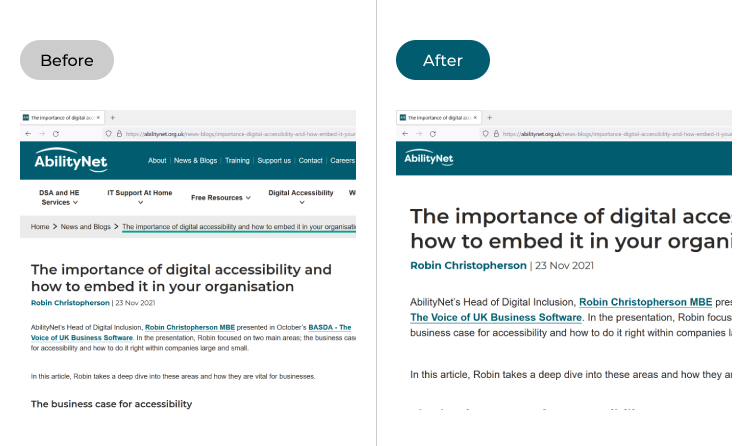
This section explains how to use the Zoom controls and adjust font sizes in the Firefox browser on Windows 11. This is a step-by-step guide with pictures of the screens to help.
Using the Zoom controls
1.The easiest way to make text larger is to use the Zoom controls. Click the Menu button in the top-right corner of the browser window, then use the + (plus) and – (minus) buttons to zoom in and zoom out of the page. You can also press the Ctrl and + (plus) keys to zoom in and the Ctrl and - (minus) keys to zoom out.
Return to the default size
2. When you use the Zoom controls, you’ll see a Zoom percentage indicator appear in the address bar. Click on this, or press Ctrl and 0 (zero) to return to the default size.
Open the Firefox settings
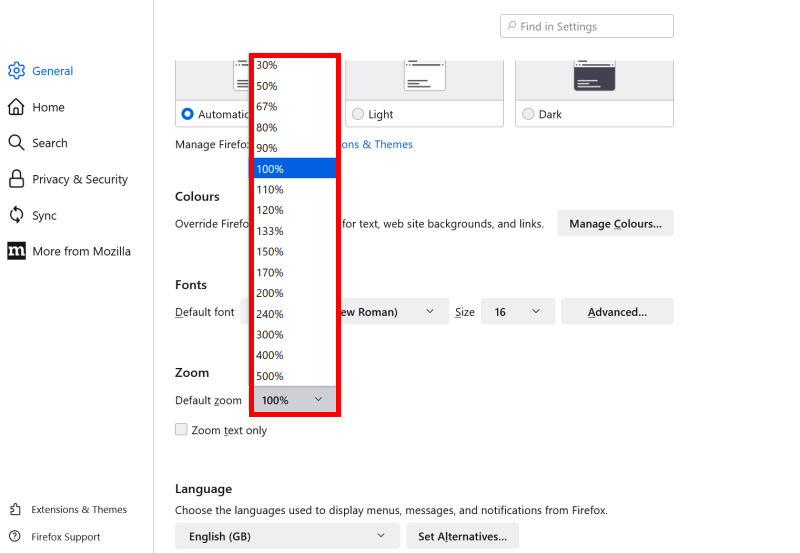
3. You can also increase the default zoom level in Firefox, or set the zoom to apply to just text on the web page, rather than images and buttons. Click the Menu button, then click Settings.
Increase the default zoom level
4. Scroll down to the Language and Appearance section and click the dropdown menu next to Default zoom. Select a new Default zoom level.
Make the zoom text only
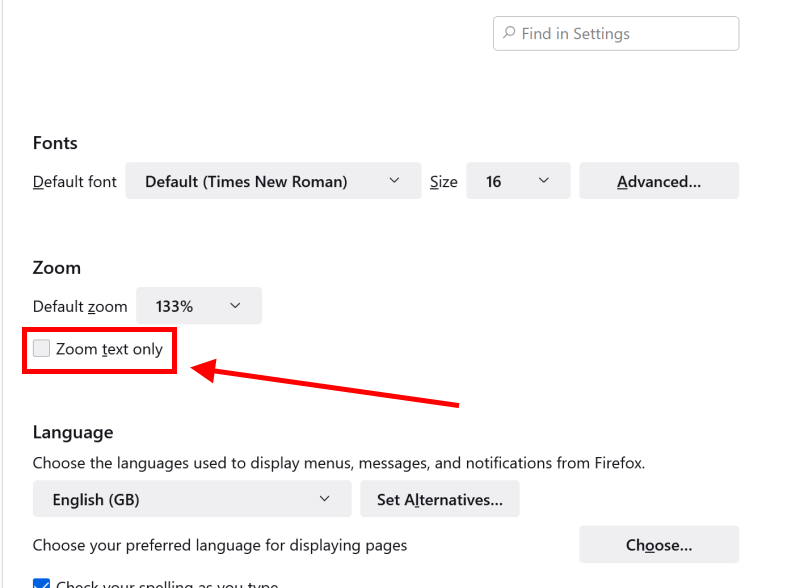
5. Click the checkbox for Zoom text only to have the zoom apply solely to text.
Change the default text size
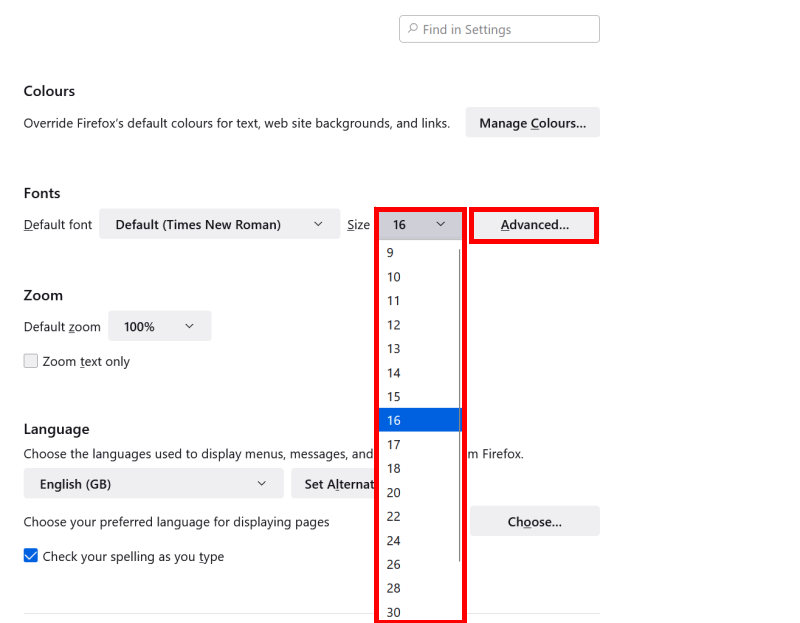
6. Another approach is to set a higher default text size. You can change this across all text by clicking on the Size dropdown menu for the Default font. Alternatively, click Advanced.
Set new text sizes
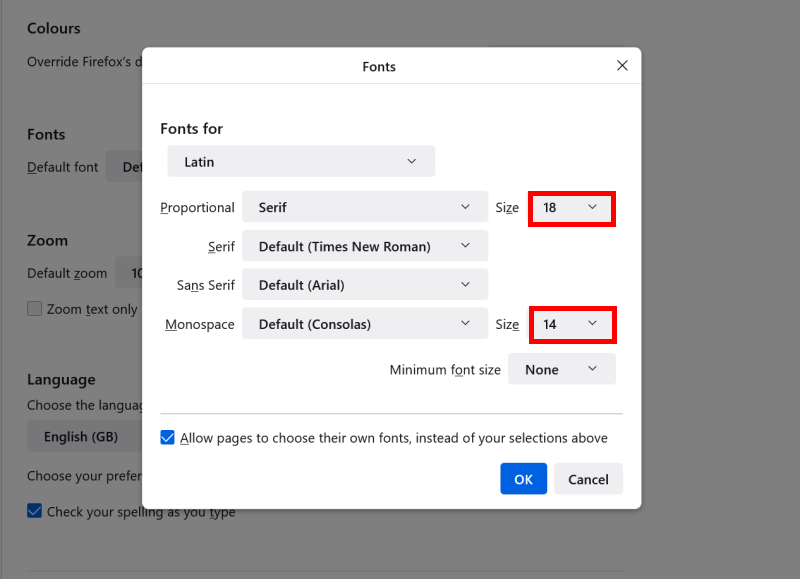
7. Here you can change the settings for the Proportional and Monospace fonts. Increase the Size for each.
Change the minimum font size
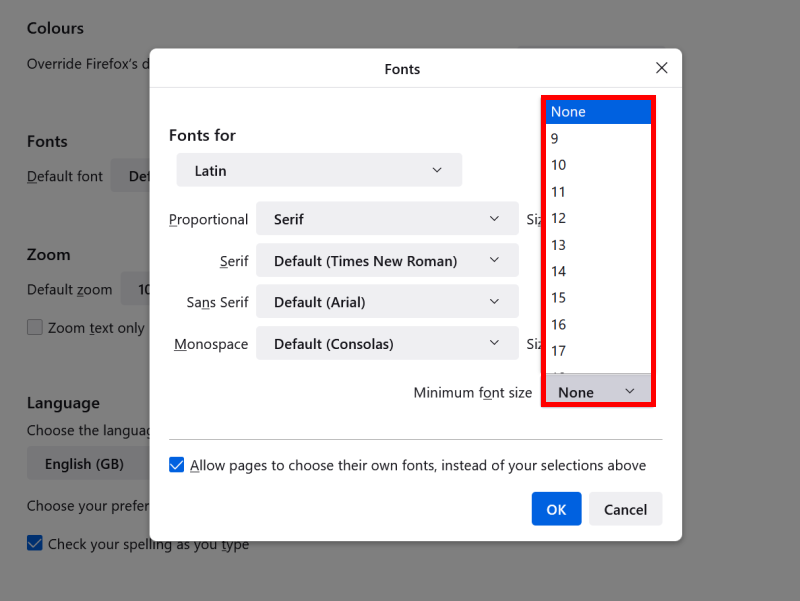
8. Click the dropdown menu for Minimum font size to increase the minimum font size. Increase this to a size that you can see comfortably.
Apply your changes
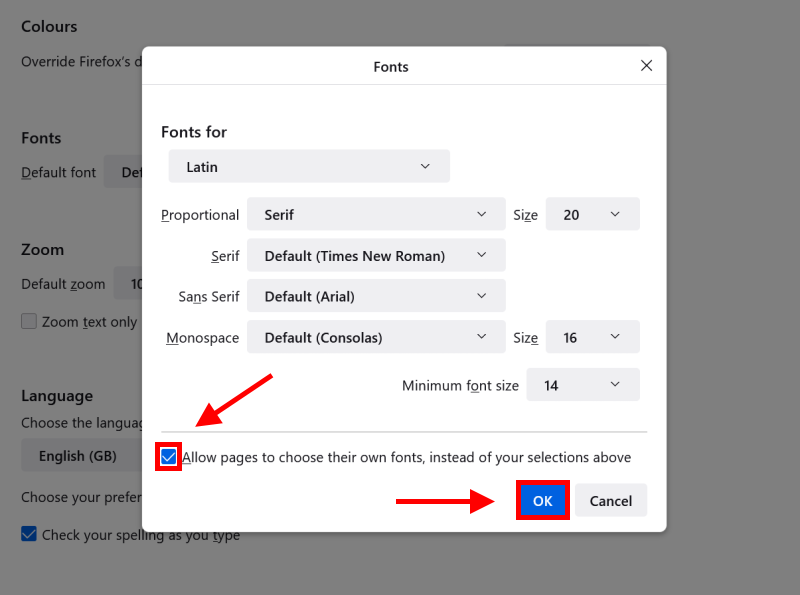
9. By default, your new settings will only apply when the designer of a website hasn’t set their own font sizes, but you can override their sizes with your own. Just click to untick the box marked Allow pages to choose their own fonts, instead of your selections above. Finally, click OK to apply your changes.
Note: If this does not work it could be because your computer settings are managed by someone else (an IT department or administrator for example). If so, you will need to contact them to access these settings or for help.