Short guide
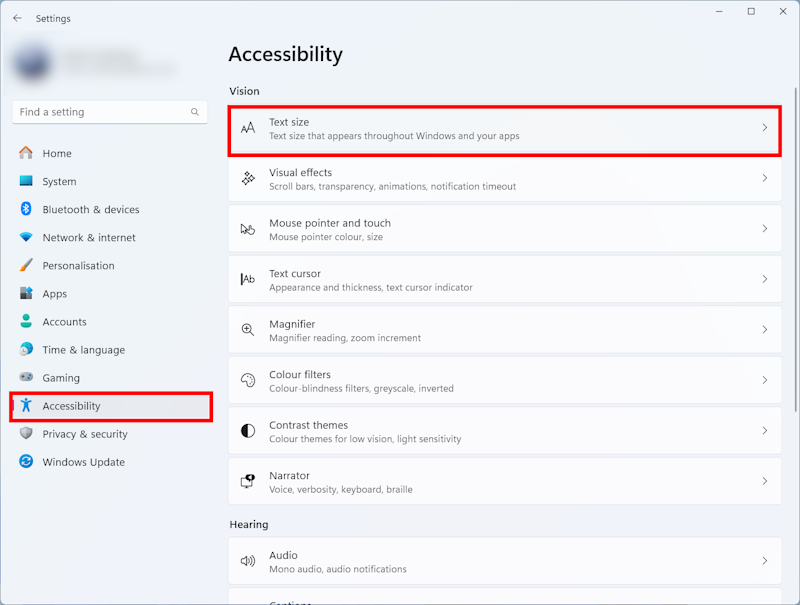
- Open the Accessibility settings by pressing the Windows key + U. Look under Vision and click Text size.
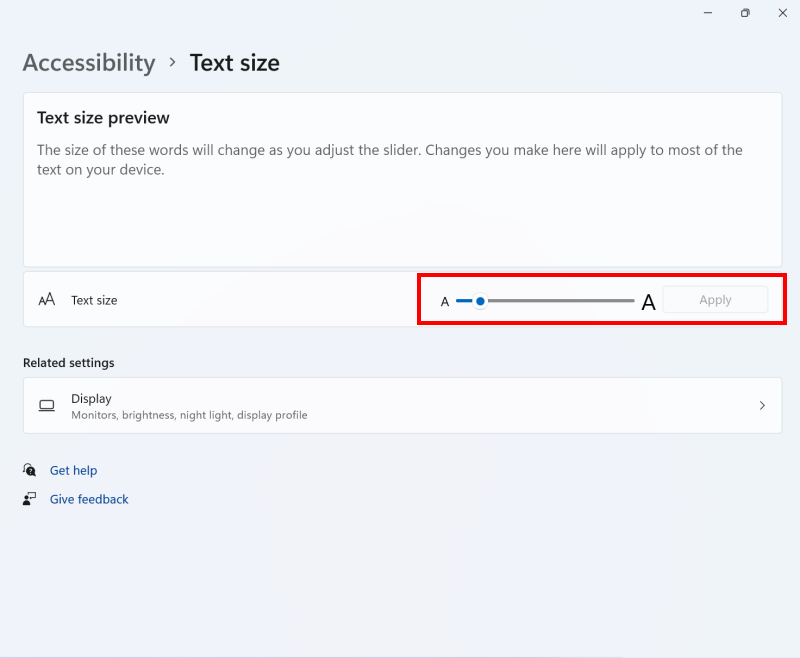
- Adjust the Text size slider until the sample text in the Text size preview is easy to read. Click Apply.
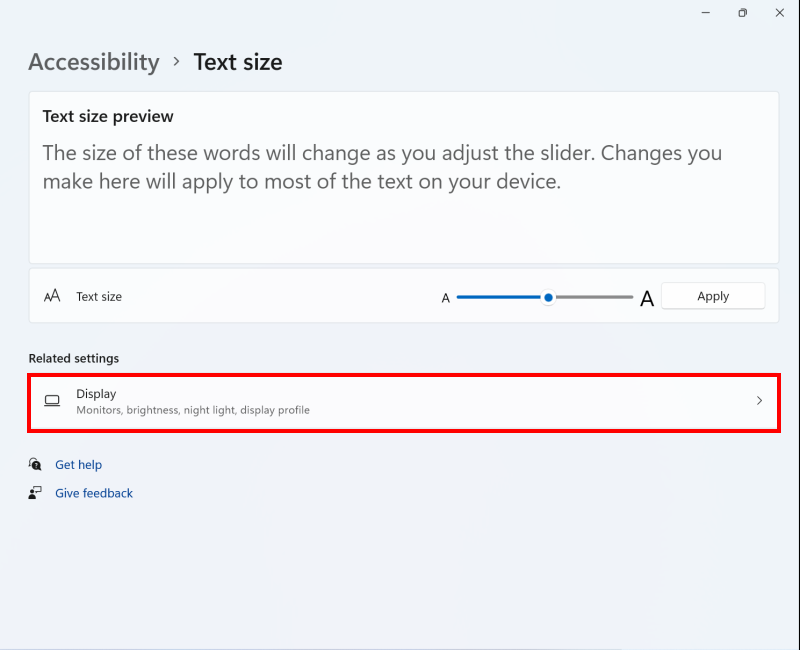
- If you need to make text in menus or on buttons larger, click Display under Related settings.
- Look under Scale & layout and click the drop-down menu for Scale. Choose a higher scaling percentage.
Before and after
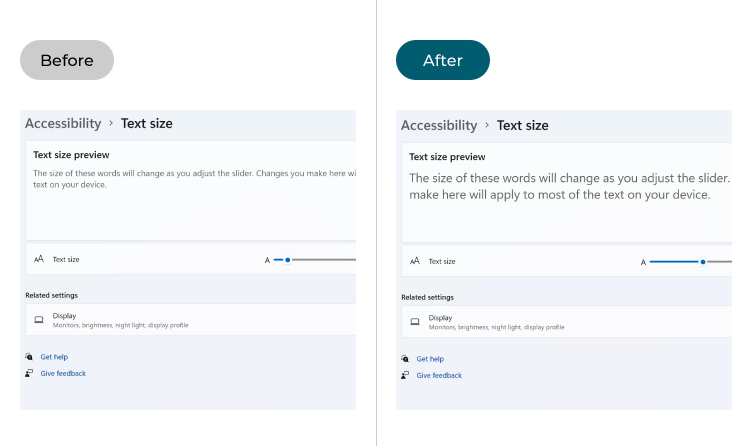
This section explains how to use the Accessibility and Display settings to make text larger in Windows 11. This is a step-by-step guide with pictures of the screens to help.
Open the Accessibility settings
1. Open the Accessibility settings by pressing the Windows key + U. Alternatively, click the Start button, then Settings, then Accessibility. Look under Vision and click Text size.
Increase the text size
2. Adjust the Text size slider until the sample text in the Text size preview is easy to read. Click Apply.
Open the Display settings
3. Adjusting the Text size will make most text in Windows larger, but it might not increase the size of text in menus or on buttons. There is another setting that can help there, though it also makes icons and buttons larger. Click Display under Related settings.
Change the Scale settings
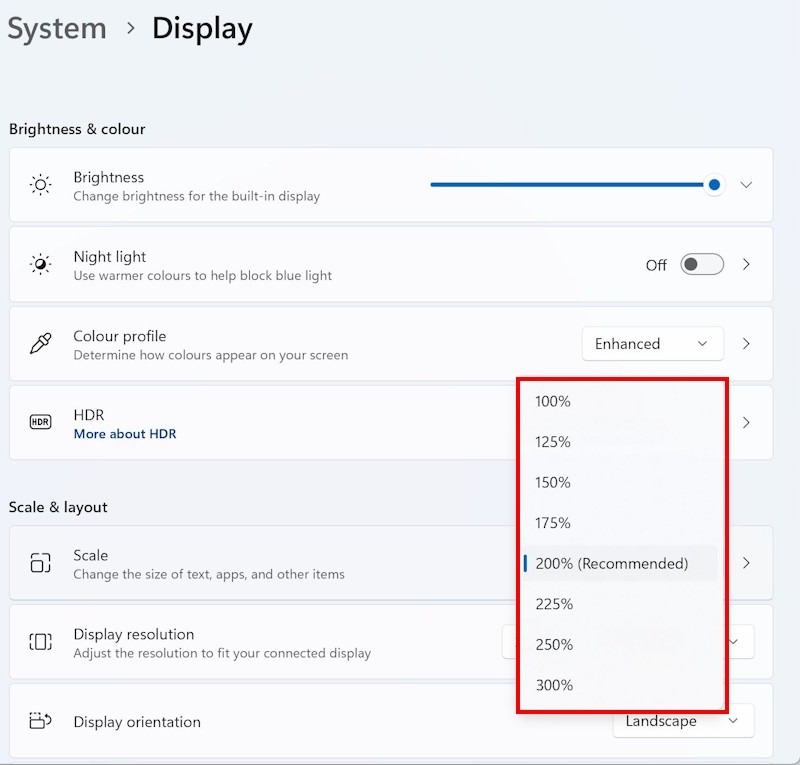
4. Look under Scale & layout and click the drop-down menu for Scale. Choose a higher scaling percentage from the menu.
Create a custom setting
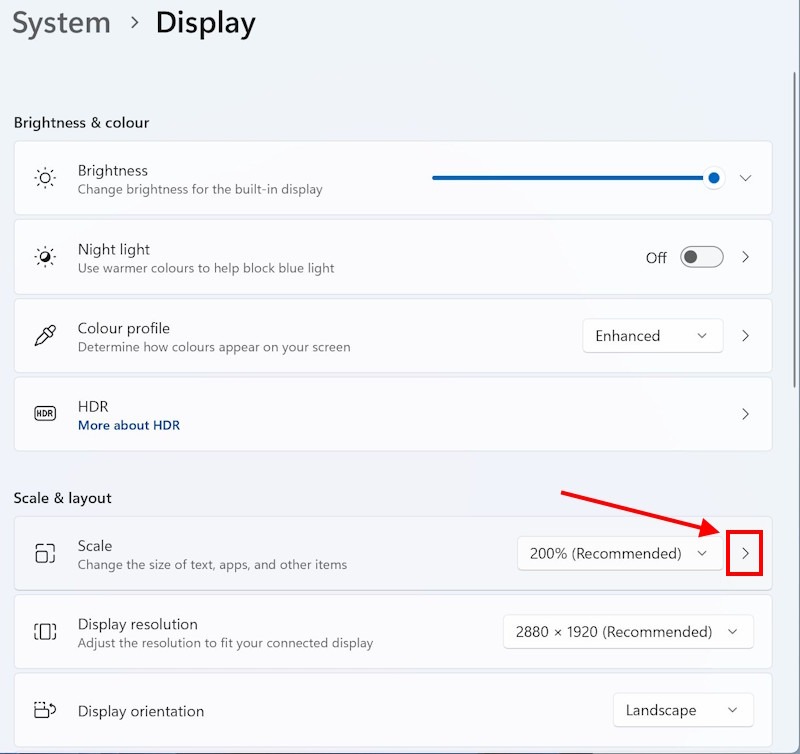
5. If the existing scale settings don't go far enough, you can also create your own custom scaling size. Click the right arrow > next to the Scale drop-down menu.
Set a higher scale
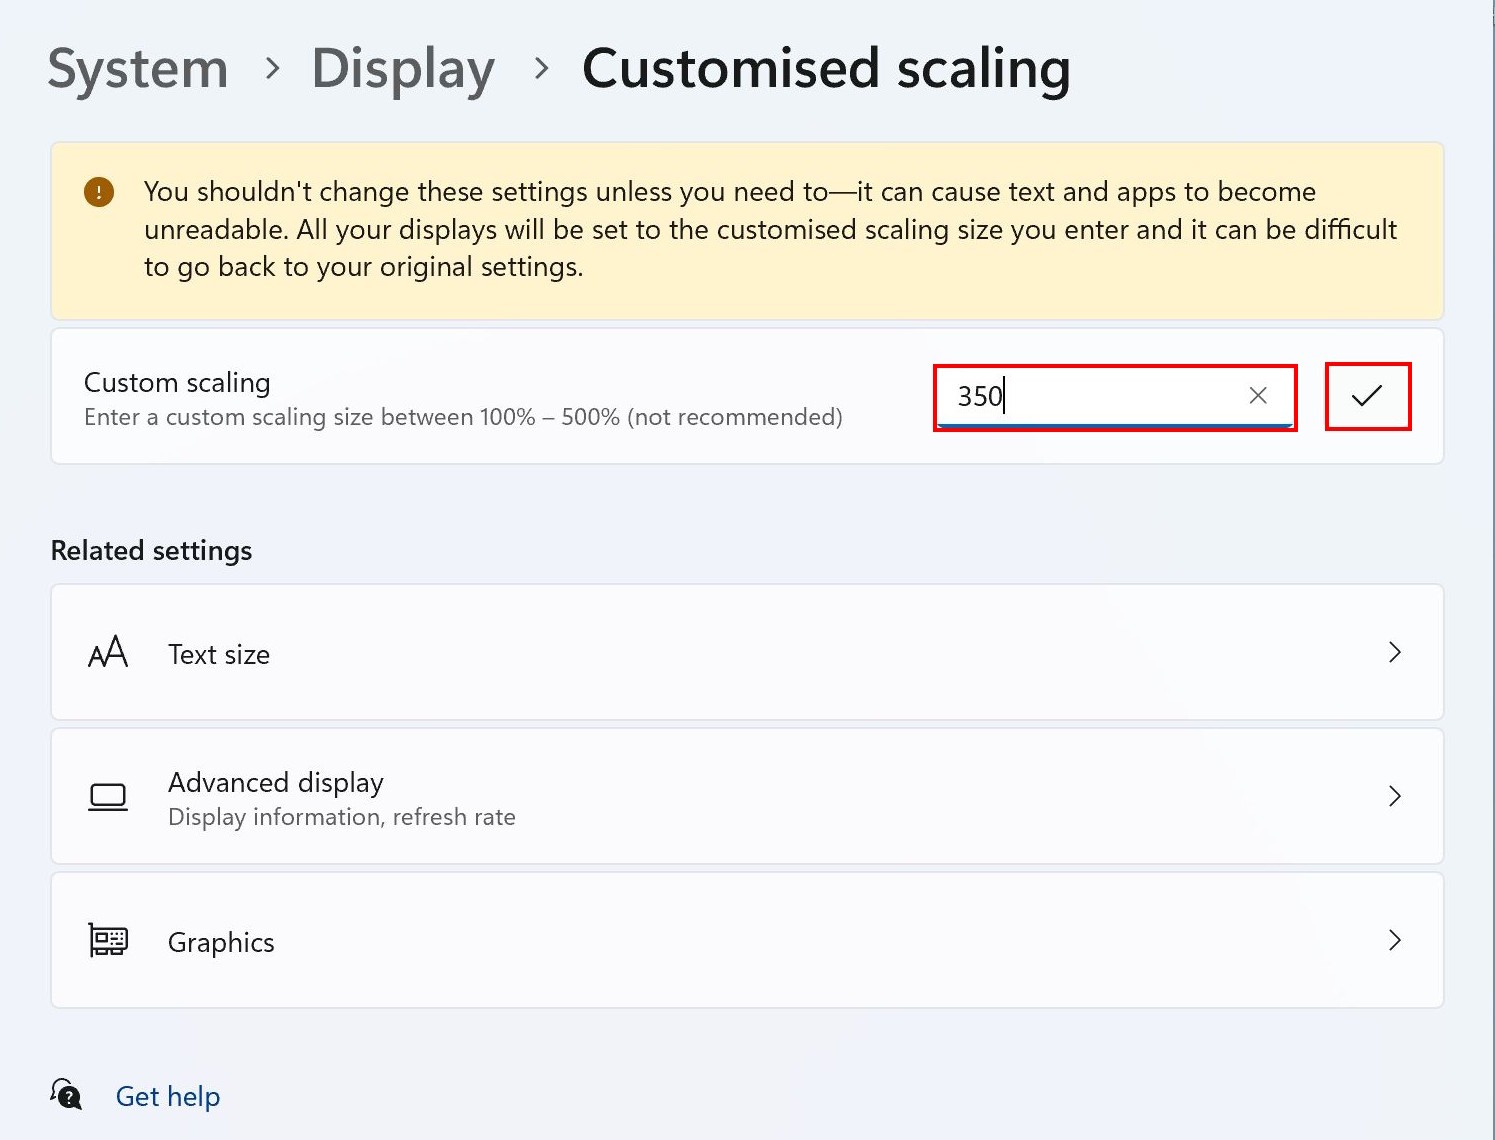
6. Enter your own Custom scaling percentage in the box, then click the Tick button. Windows 11 should now adapt to your new custom scale, though you may find that some icons, buttons and windows no longer appear as they should. If this gets in your way, try switching back to a lower Scale setting, as in step 4.
Note: If this does not work it could be because your computer settings are managed by someone else (an IT department or administrator for example). If so, you will need to contact them to access these settings or for help.