Short guide:
- Open a Finder window by clicking on the Finder icon
 in the dock.
 - Click on the List view button
 or press Cmd + 2.
 - Select View from the Menu Bar then select Show View Options or press Cmd + J.
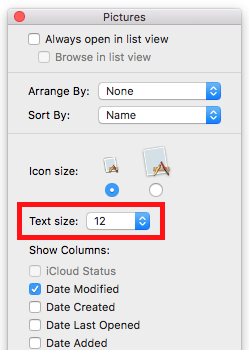
- Click on the drop-down menu next to Text size and choose a font size up to 16pt.
- You can also make the Icon size smaller or larger by clicking the small or large icon, located above Text size.
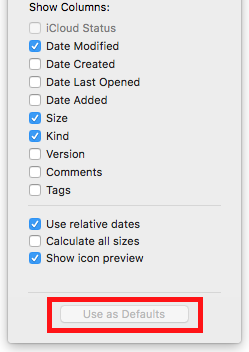
- Select Use as Defaults to apply these settings to all folders when the Finder is in List view. Repeat these steps to change the text size for each of the other view options shown above.
- Once you have made the changes, click the red Close button.
Before and after
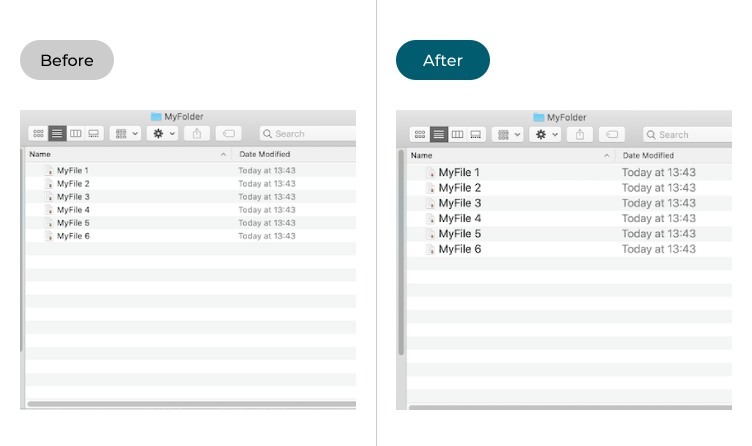
This section explains the steps to change the text size for all files and icons that you see in the Finder window, with pictures of the screen to help.
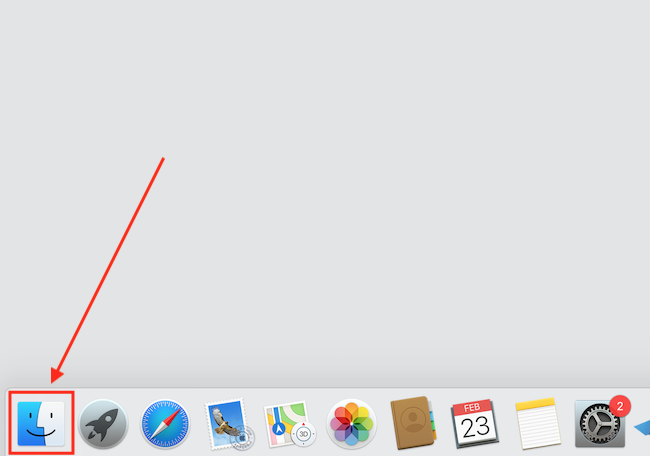
Launch the Finder
1. Click the Finder icon ![]() in the dock to open the Finder.
in the dock to open the Finder.
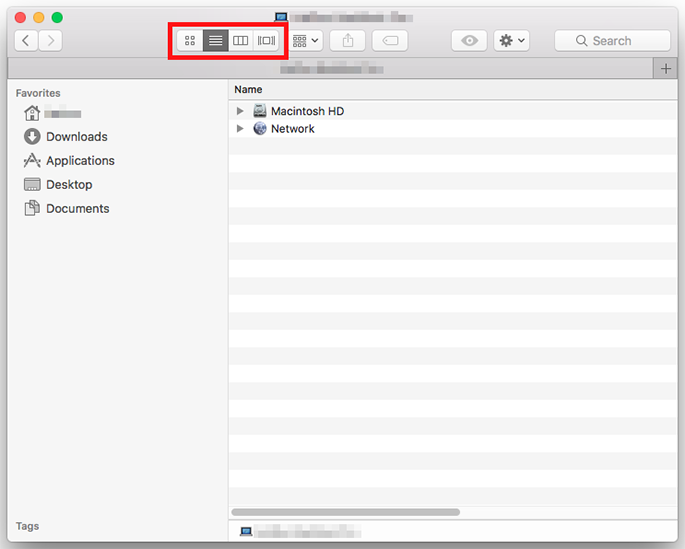
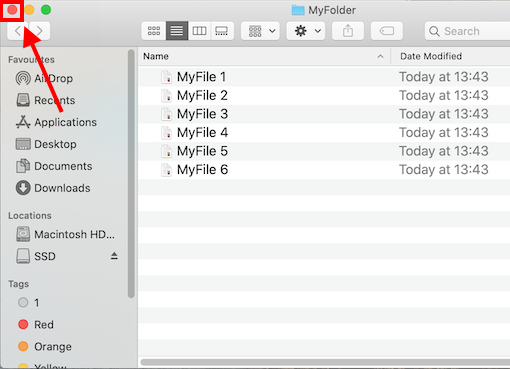
Switch to List view
2. If you're not already in it, switch to the List view by clicking on the List view button ![]() at the top of the Finder window or pressing Cmd + 2.
at the top of the Finder window or pressing Cmd + 2.
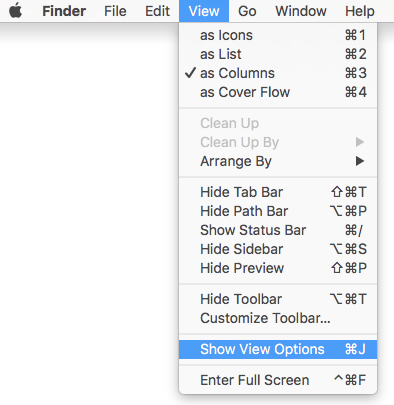
Find the View options
3. Select View from the Menu Bar then select Show View Options or press Cmd + J.
Change the text size
4. Click the drop down menu next to Text size and choose a font size of up to 16pt. You can also make the Icon size smaller or larger by clicking the small or large icon buttons, located above the Text size box.
Set the new size as the default
5. Click Use as Defaults at the bottom of the menu to apply these settings to all folders when Finder is in List view. If you don’t click Use as Defaults only the files in the current folder will have larger text.
Repeat the process
6. To apply the same changes to other views, you'll need to repeat this process for each view, selecting a different view in Step 2 then going through steps 3 to 5. When you're finished, click the red Close button.
Note: If this does not work it could be because your computer settings are managed by someone else (an IT department or administrator for example). If this is the case you will need to contact them to access these settings or for further help.
Need some more help?
Call our helpline 0300 180 0028 or email enquiries@abilitynet.org.uk
Need free IT Support at Home?
If you are older or disabled and need IT support at home, you can book a free home visit.