Call our helpline
0300 180 0028Short guide:
- Open the Finder app
 .
. - Along the top of the Finder window, click the icon for the type of Finder view you would like to change the text size for - each view needs to be edited separately. Choose from Icon, List, Column, and Gallery.
- Click View in the menu bar and choose Show View Options.
- Choose from the available options to increase the text size and the icon size.
Before and after
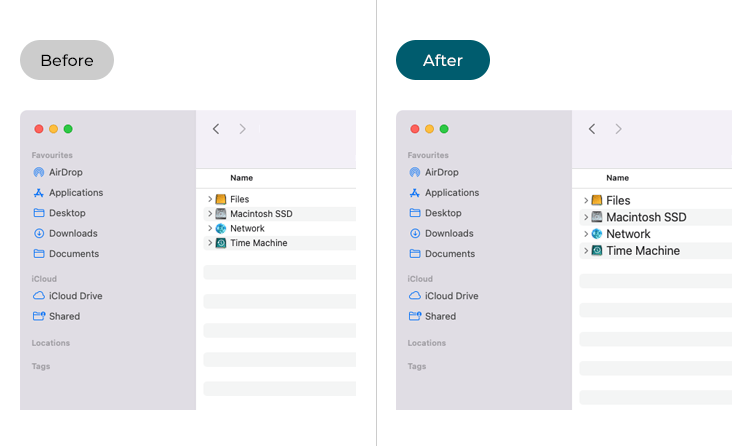
This section gives you step by step instructions on how to make the text and icons larger in the Finder app in macOS 13 Ventura, with pictures of the screens to help.
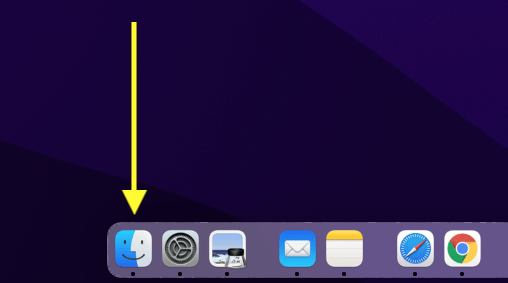
Open the Finder app
1. Click the Finder icon ![]() in the dock.
in the dock.
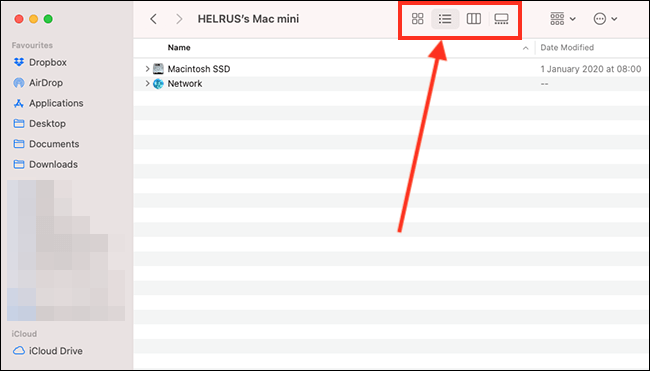
Choose which type of Finder view to edit
2. Along the top of the Finder window, click the icon for the type of view you would like to change the text size for:
![]() Icon view
Icon view![]() List view
List view![]() Column view
Column view![]() Gallery view
Gallery view
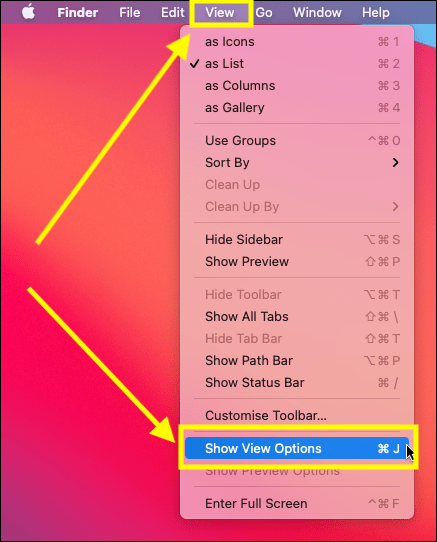
Open the View Options
3. Click View in the menu bar and choose Show View Options.
Change the text and icon sizes
The options available to you in the View Options panel depend on which Finder view you are editing. This guide shows the options for changing the text and icon size for the List view.
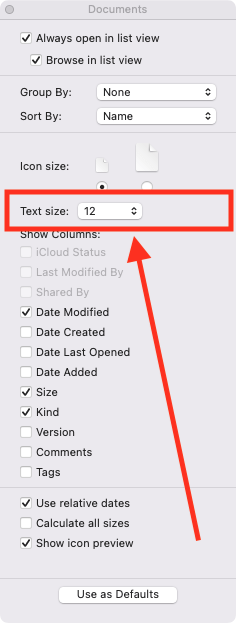
4. Click the drop-down menu for Text size and choose a new value.
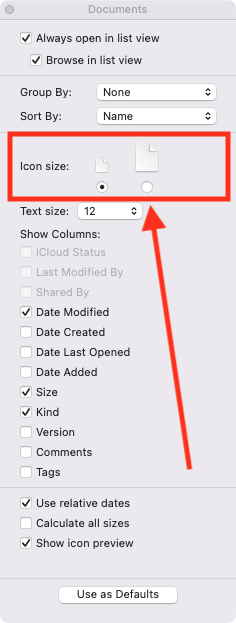
5. To show larger icons, click the larger size option.
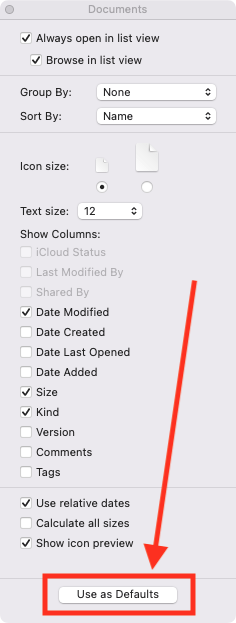
6. Select Use as Defaults to apply these settings to all folders when Finder is in this view. If you don’t click Use as Defaults, your new settings will only apply to the items in the current folder. Note: The Use as Defaults button will only become selectable when you change one of the settings.
While the View Options panel is open, you can repeat these steps for the other Finder views.
Close the View Options panel
7. When you are happy with your settings, close the View Options panel by clicking the Close button (red circle) in the top-left corner of the panel or using the Cmd + W keyboard shortcut.
Note: If this does not work it could be because your computer settings are managed by someone else (an IT department or administrator for example). If so, you will need to contact them to access these settings or for help.