Call our helpline
0300 180 0028Short guide:
- Press Ctrl + Alt + Z to enable ChromeVox. The orange rectangle will highlight the part of the screen that is active and being read.
- For a tutorial on ChromeVox, hold down the Search key and press the O and T keys. Press the Esc key to exit.
- To see a list of all the keyboard shortcuts you can use, click on the ChromeVox logo icon in the top-left.
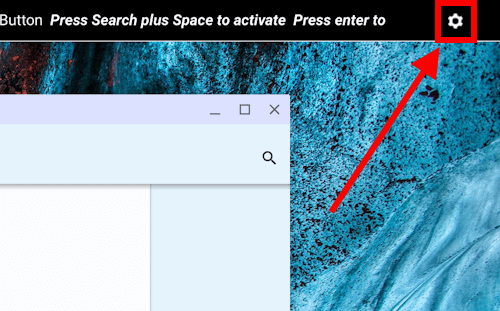
- To open ChromeVox settings, click on the Settings icon in the top-right of the screen. Adjust how ChromeVox works and the voice it uses through these settings.
Before and after
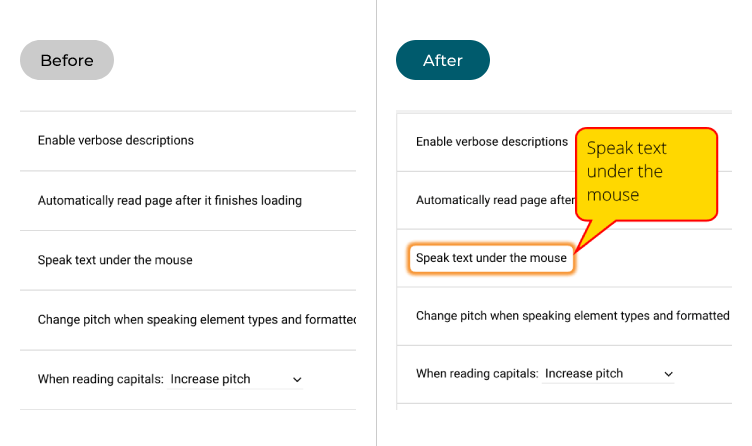
This section covers the steps you need to follow to enable and use the ChromeVox screen reader in Chrome OS, complete with pictures of the screen to help.
Launching ChromeVox
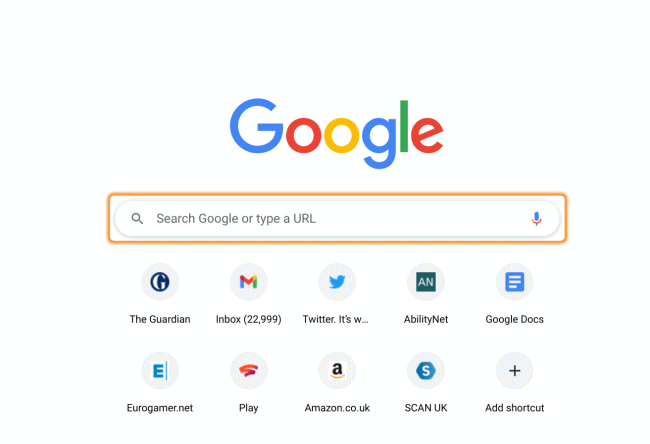
1. The easiest way to launch ChromeVox is to use its keyboard shortcut. First, check the volume of your device is set to a comfortable level because ChromeVox will begin speaking as soon as it is enabled. Press Ctrl + Alt + Z. The ChromeVox toolbar will appear at the top of the screen. And an orange rectangle will highlight the part of the screen that is active. Here you can see it around the Google search box. Any text in that area should be read.
Use the tutorial
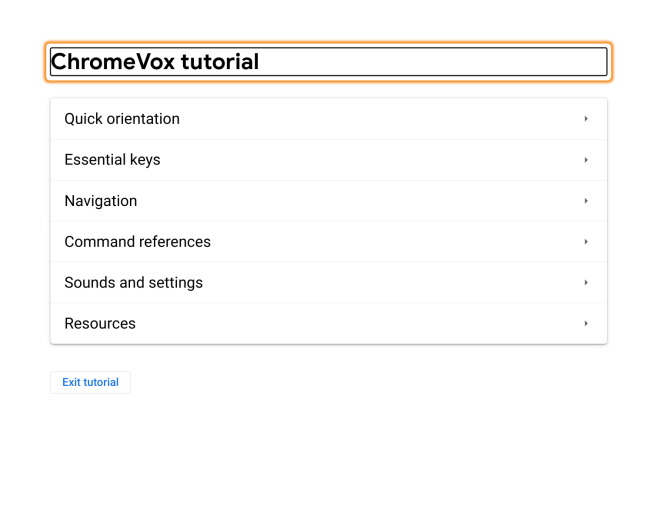
2. For a tutorial on ChromeVox, hold down the Search key and press the O and T keys. Press Esc to exit the tutorial.
ChromeVox keyboard shortcuts
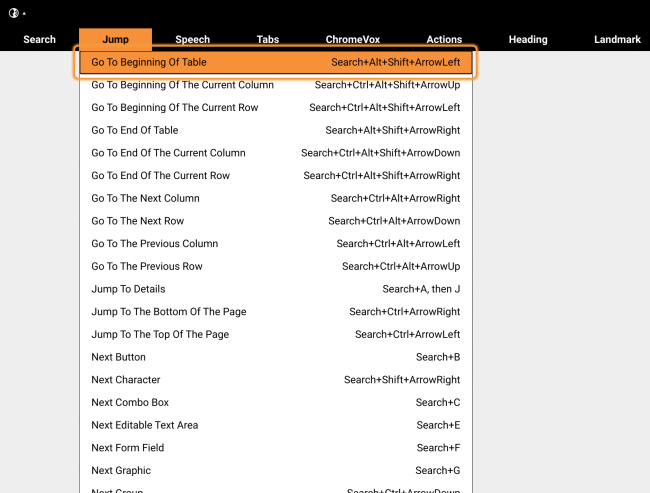
3. To see a list of all the keyboard shortcuts you can use with ChromeVox, click on the ChromeVox logo icon in the top-left of the screen.
Open the ChromeVox settings
4. To open ChromeVox settings, click on the Settings button in the top-right of the screen.
Customising ChromeVox
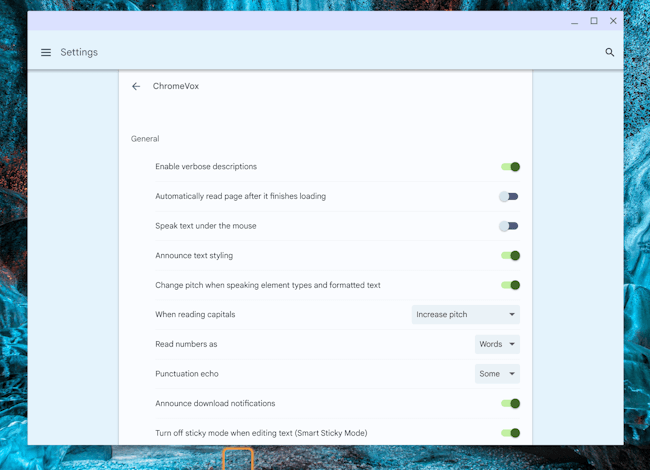
5. Use the ChromeVox options to enable or disable verbose descriptions and control how ChromeVoc handles numbers, punctuation, capital letters and formatted text.
Enable Speak text under the mouse
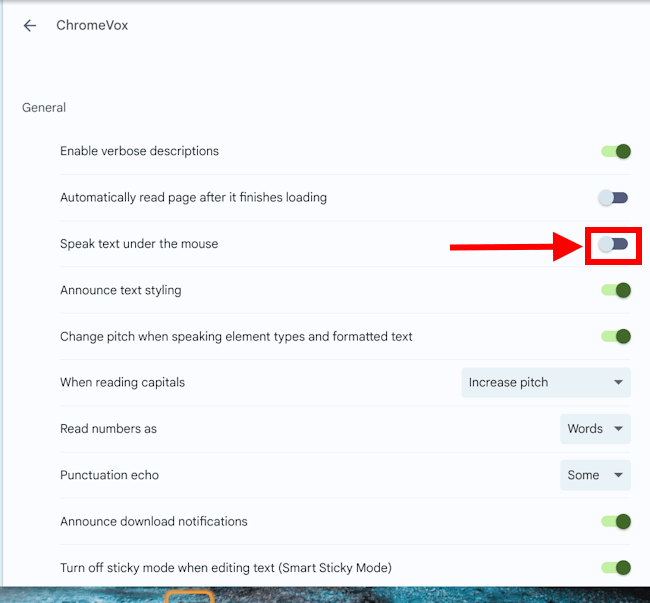
6. Click the toggle switch for Speak text under the mouse to get ChromeVox to read aloud any text under the pointer.
Change the ChromeVox voice
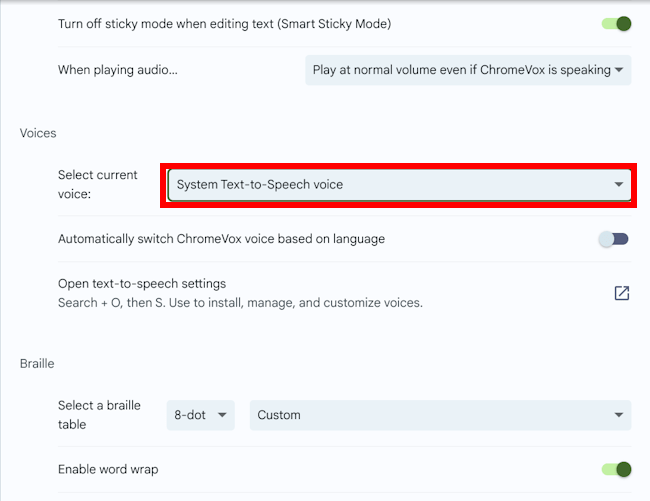
7. Scroll down and click on the Select current voice option to change the voice ChromeVox uses, or click the toggle switch for Announce text styling to make ChromeVox tell you which style or formatting has been applied to a word or sentence.
Note: If this does not work it could be because someone else manages your computer settings (an IT department or administrator). If this is the case, you will need to contact them to access these settings or for further help.