Short Guide:
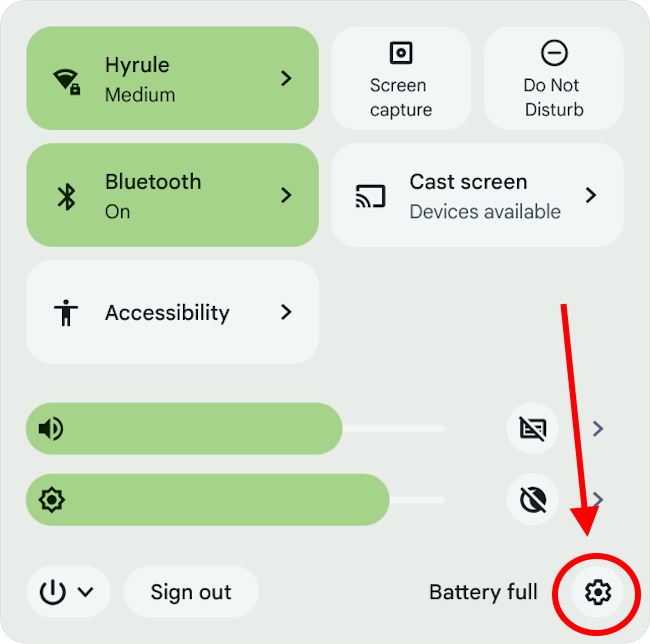
- Click the Time widget in the bottom right corner of the screen, then click the Settings button.
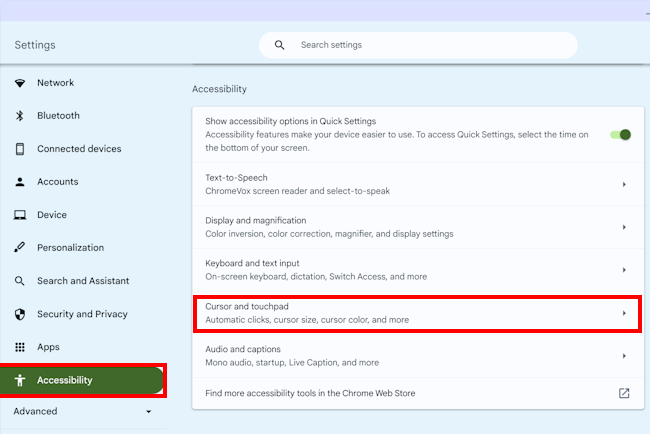
- In Settings, select Accessibility from the left-hand menu, then Cursor and touchpad from the right-hand panel.
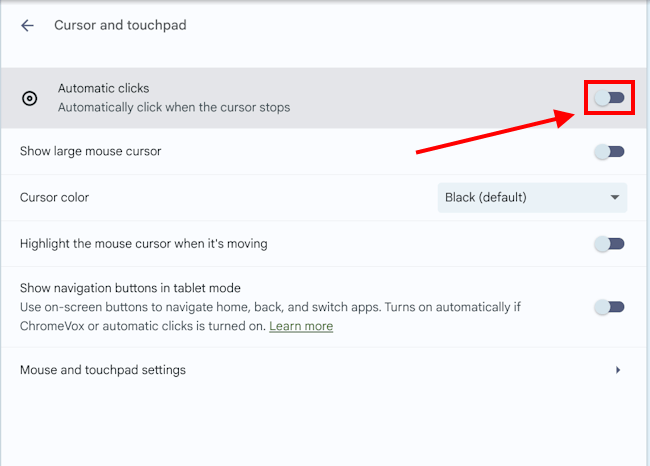
- Click Automatic clicks to set the toggle switch to On.
Before and after
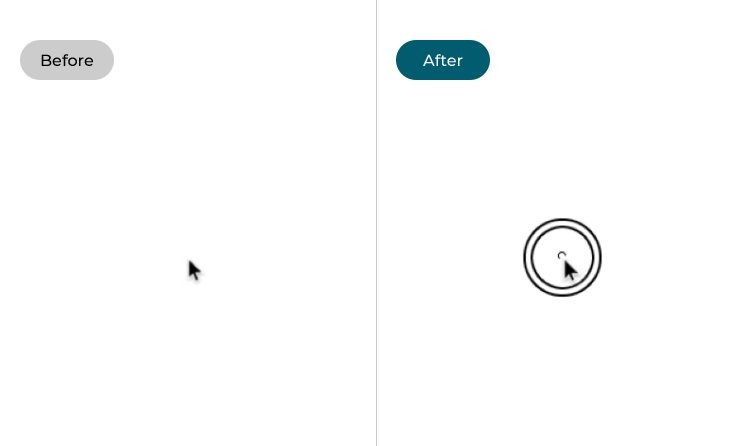
This section takes you through each step to enable automatic clicking when the pointer stops in Chrome OS, with pictures of the screen to help.
Open settings
1. Click on the Time widget in the bottom-right corner of the screen to open the Quick Settings menu. Click the Settings button ![]() .
.
Find the Cursor and touchpad features
2. Select Accessibility from the left-hand column, then click Cursor and touchpad in the right-hand panel.
Enable Automatically click when the cursor stops
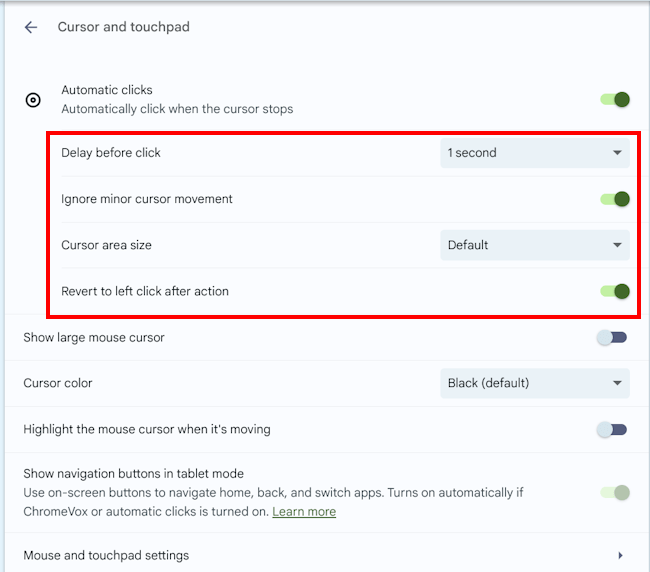
3. Click the toggle switch next to Automatic clicks to turn it on. Now, when you stop moving the cursor you will see a ring appear around it. If the cursor stays still for a set time, it will click on whatever is underneath.
Change the settings
4. You can change how automatic clicking works by customising the following settings:
- Delay before click: The length of time between the cursor stopping and a click action being performed.
- Stabilize click location: When this option is enabled, the ring will stay in the one place until you move the cursor outside it.
- Revert to left click after action: When this option is enabled, the click action reverts to a left click after you perform a different action, such as a double-click or right-click.
- Movement threshold: This sets how far you need to move the cursor before pausing before it will automatically register a click.
Using Automatically click when the cursor stops
5. By default, when you enable Automatically click when the cursor stops, stopping the cursor or pointer will result in a left click. However, you can choose a different action to perform from the Click Action menu that appears on the screen. You can choose:
- Left click
- Right click
- Double click
- Click and drag
- Scroll - Scroll around the screen.
- Pause automatic clicking
- Toggle menu position - move the menu to a different corner of the screen.
