Call our helpline
0300 180 0028Note: Point and Speak should not be relied upon in circumstances where you may be harmed or injured, in high-risk situations or emergencies, or for navigation.
Note: Point and Speak is only available on iPhone Pro and Pro Max models (starting from iPhone 12 Pro) and iPads Pro from 2020 onwards.
Detection Mode contains several features to help visually impaired users. This guide covers Point and Speak. The other detection modes are covered in separate guides, listed below.
- People Detection can help users locate the people in their surroundings. People Detection can determine the distance to a person, aiding in maintaining physical or social distance.
- Door Detection can help users locate doors in their surroundings. Door Detection can estimate how far away a door is and inform users how to open the door.
- Image Descriptions gives descriptions of the objects and people detected in a user's surroundings.
For more information on using the Magnifier app, read our guide How to use your device to magnify objects in iOS 17 for iPhone or iPad
Short guide:
- Open the Magnifier app
 .
. - In the Magnifier app, tap the settings button
 and choose Settings.
 - Tap the + (plus) button in the Other Controls section to add Detection Mode to the Secondary Controls.
- Tap Done in the top-right corner.
- Tap the Detection Mode button
 and choose the Point and Speak button
  .
. - Your device will read aloud the item you are pointing at and a description will appear on the screen.
- To customise the settings for Point and Speak, tap the settings button .
- On the next screen, tap Point and Speak in the Detection Modes list.
Before and after
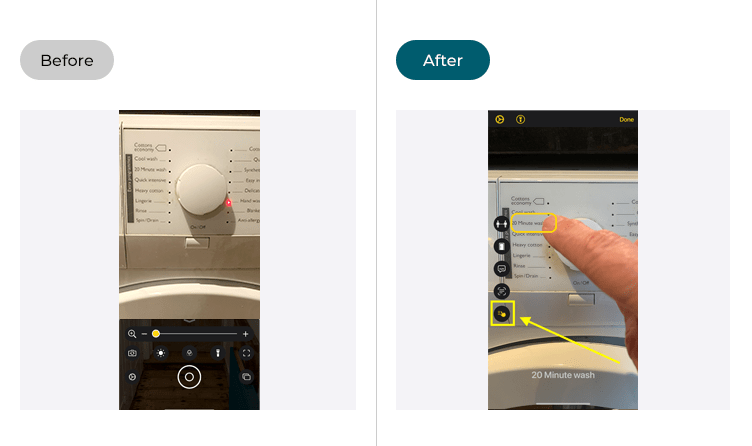
This section gives you step-by-step instructions on how to use Point and Speak in iOS 17, with pictures of the screens to help.
Open the Magnifier app
1. Tap the Magnifier icon ![]() on your Home screen.
on your Home screen.

Note: The Magnifier icon may appear in a different place on your home screen.If you don't see the icon on your home screen, you can find the Magnifier app in your App Library. Just swipe right through your Home pages until you find it. Then, tap the Magnifier icon in the Utilities folder.
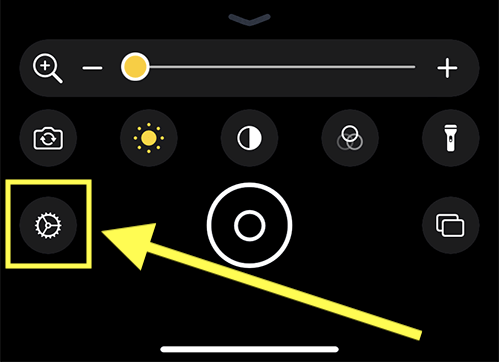
Open Magnifier settings
2. Tap the settings icon ![]() on the Magnifier screen and choose Settings.
on the Magnifier screen and choose Settings.
Add Detection Mode to the Secondary Controls
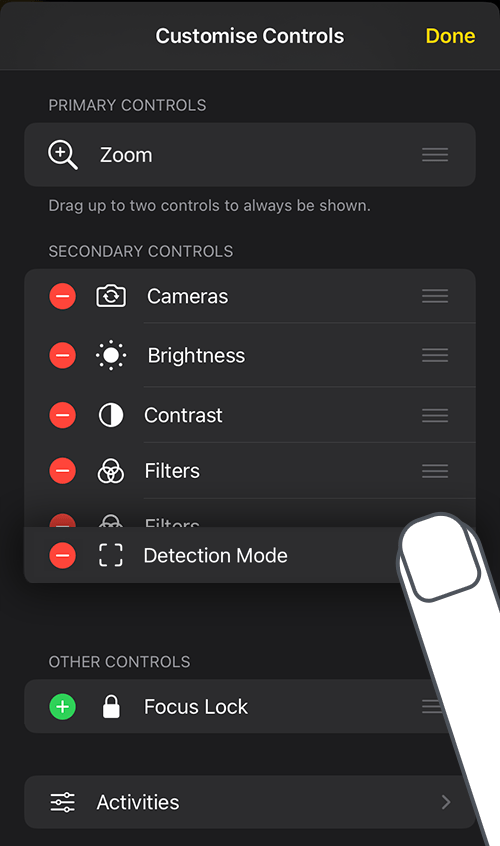
3. To use Door Detection, Detection Mode needs to be one of the secondary controls. Scroll down to the Other Controls section and tap the green + (add) button for Detection Mode to move it to the Secondary Controls section.
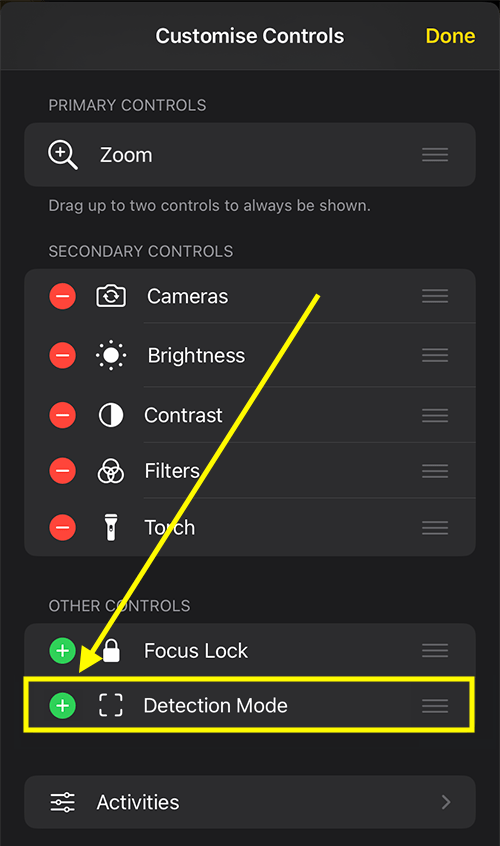
4. You can drag Detection Mode to a new position in the Secondary Controls list.
Close Magnifier settings
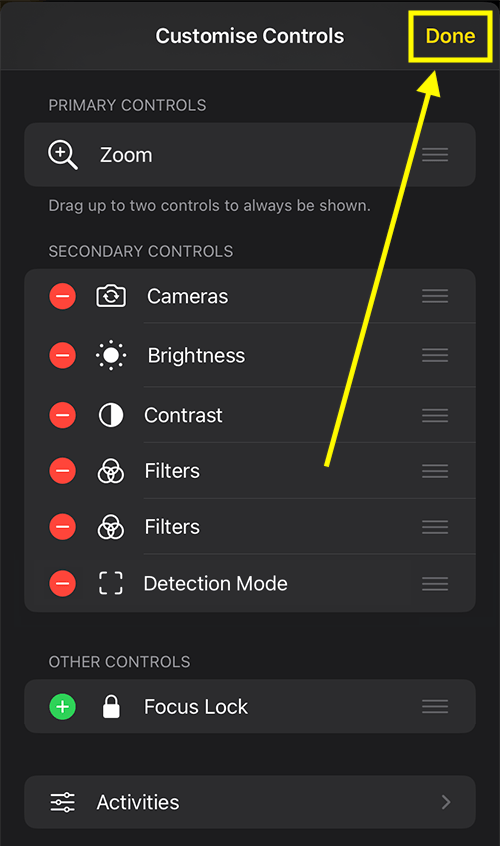
5. Tap Done in the top-right corner to return to the main Magnifier screen.
Turn on Detection Mode
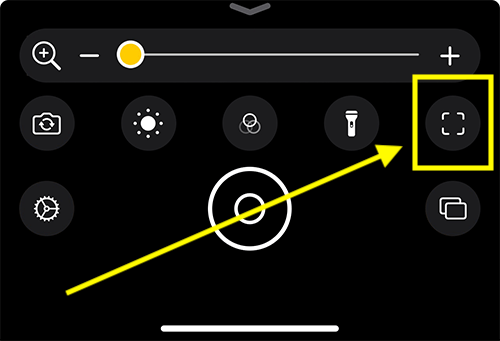
6. Tap the Detection Mode button ![]() .
.
Read aloud all text found in the Magnifier window
7. To read aloud all the text found in the Magnifier window, tap the Text Detection button ![]() . Your device will read aloud the text and show large text versions on the screen.
. Your device will read aloud the text and show large text versions on the screen.
Use Point and Speak to read aloud the text labels on objects that you point at
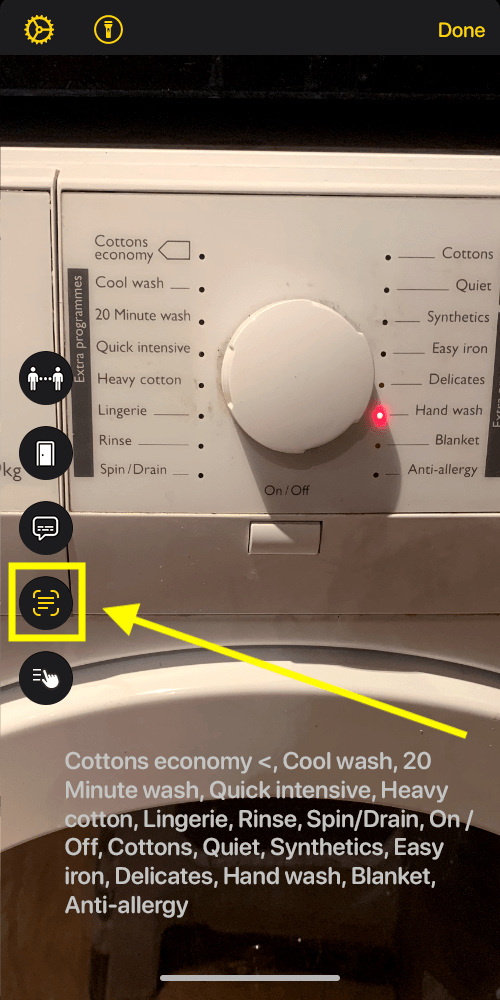
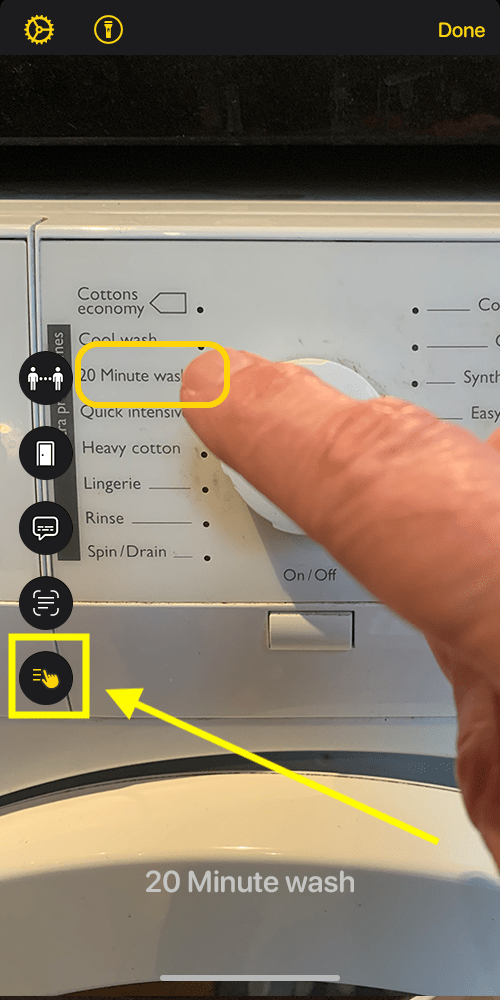
8. With Point and Speak users can point at a label to have it read aloud. This is useful when the Magnifier detects many labels, such as buttons on a kitchen appliance. Your device will keep reading the labels aloud as you move your finger from one button to another. Tap the Point and Speak button ![]() to activate it.
to activate it.
Note: You can use other detection modes while using Point and Speak by tapping their buttons.
Turn on the torch if there is not enough light
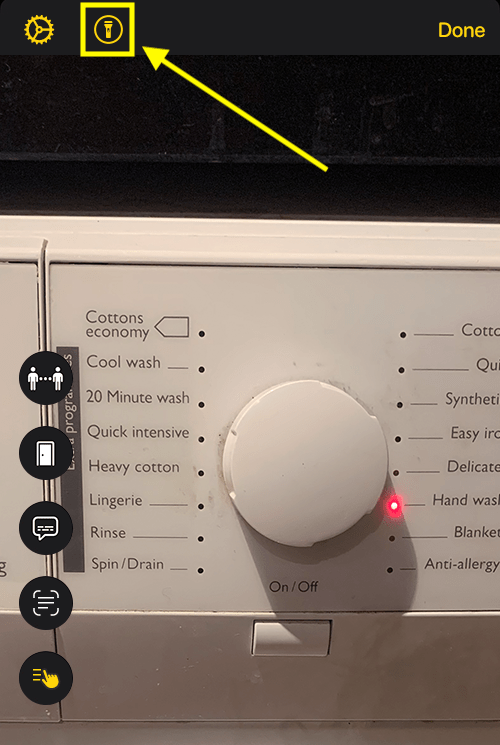
9. If there is not much light where you are pointing, your device may not be able to detect text labels. Turning on the torch should help. To turn on the torch, tap the Torch button at the top of the screen.
Customise Point and Speak
10. To customise Point and Speak, tap the settings button ![]() in the top-left corner.
in the top-left corner.
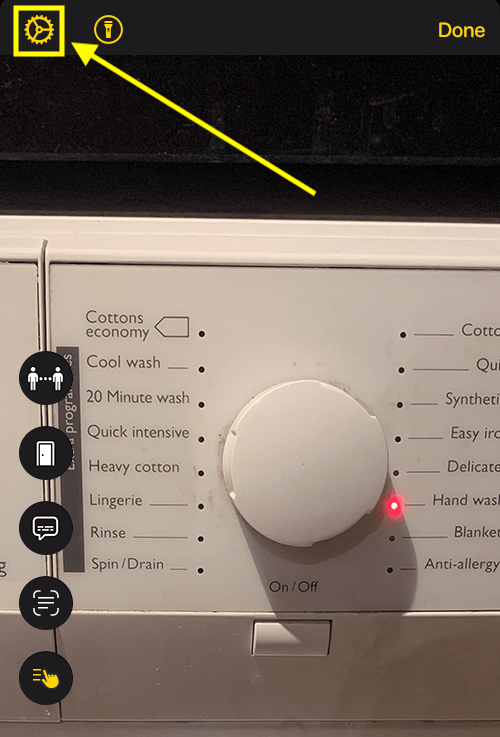
11. Next, tap Point and Speak in the Detection Modes list.

Choose which types of feedback you receive when a text label is detected
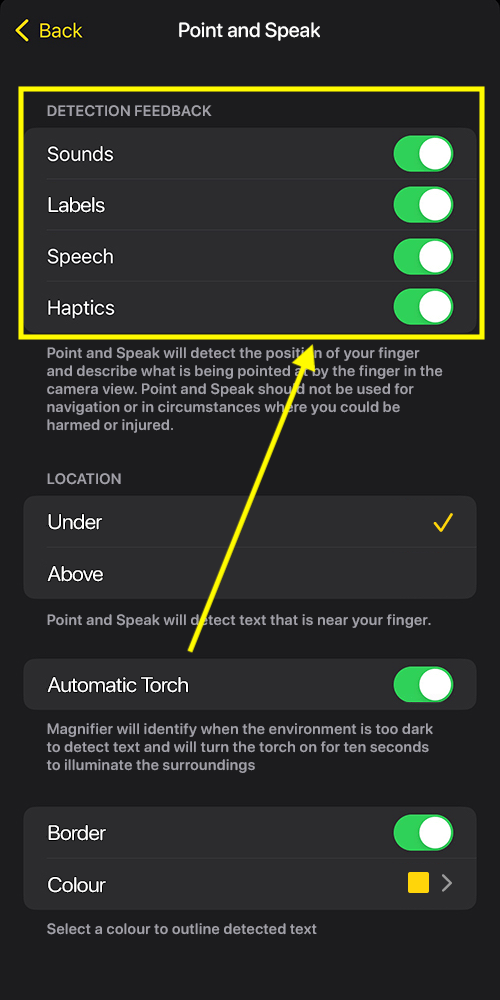
12. Turn on the toggle switches for all the types of feedback you would like to receive. The feedback options are:
- Sound: Hear a sound when text is detected
- Labels: A label appears on the screen, showing what text was detected.
- Speech: Your device will read aloud the text you are pointing at.
- Haptics: You will feel a vibration when text is detected.
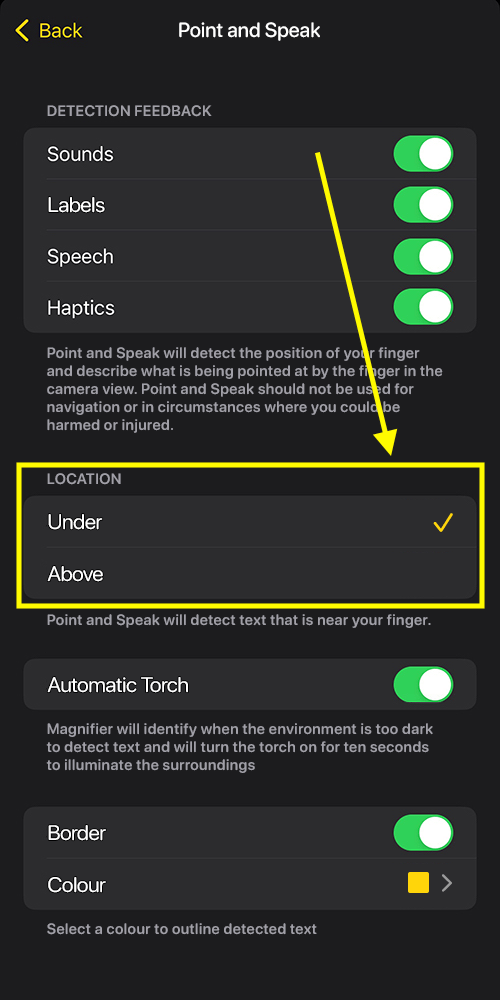
Choose how Point and Speak detects text
13. By default, Point and Speak detects text that is below your finger. Choose between Under and Above.
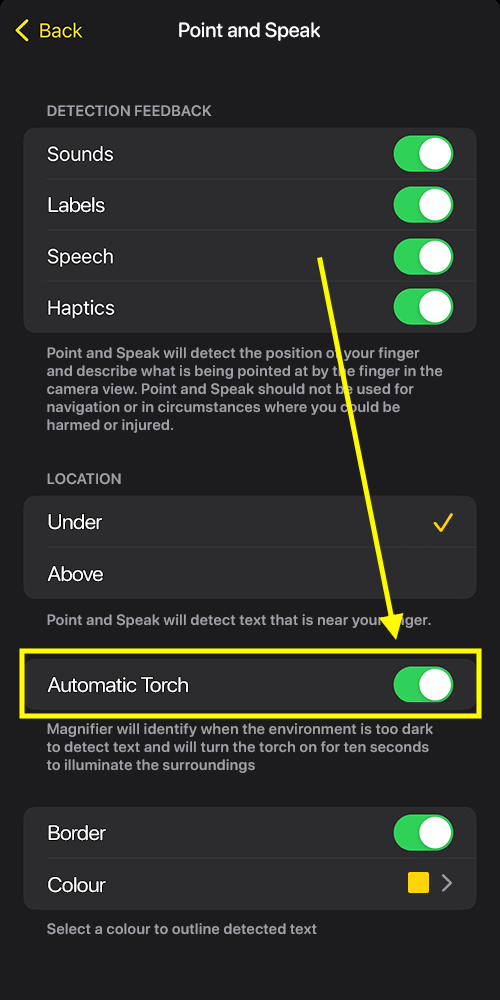
Automatically turn on the torch when it is too dark to detect text
14. When it's too dark to detect text, the Magnifier turns on a torch to light up the area for 10 seconds. Tap the toggle switch for Automatic Torch to turn it on.
Highlight detected text
15. By default, Point and Speak highlights the text being pointing at with a yellow border. To hide the border, tap the switch for Border to turn it off. You can also change the outline color by tapping Colour and selecting an option.

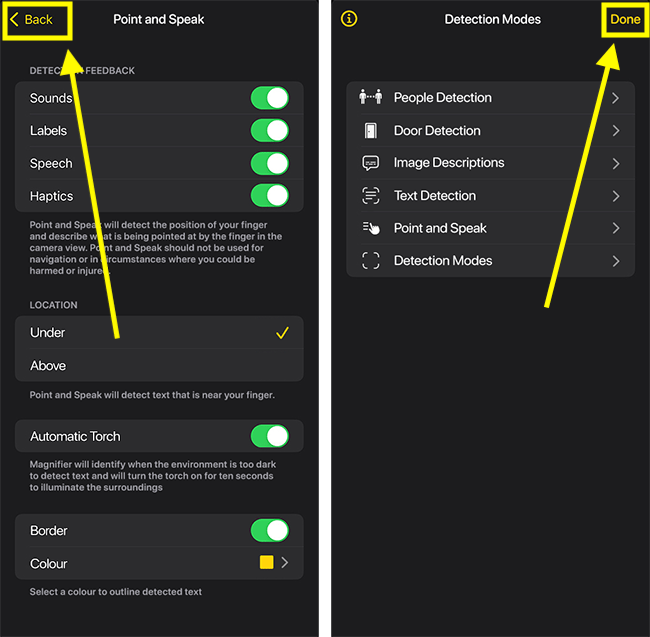
Close Magnifier settings
16. When you are happy with your Point and Speak settings, tap Back in the top-left corner. Next, tap Done to close the Detection Mode settings.
Need some more help?
Call our helpline 0300 180 0028 or email enquiries@abilitynet.org.uk
Need free IT Support at Home?
If you are older or disabled and need IT support at home, you can book a free home visit.