Call our helpline
0300 180 0028Short guide:
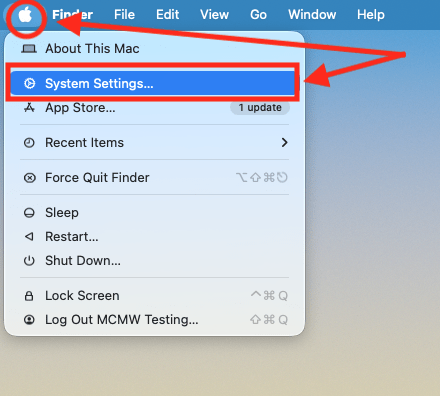
- Click the Apple icon
 in the top left corner of the screen and select System Settings.
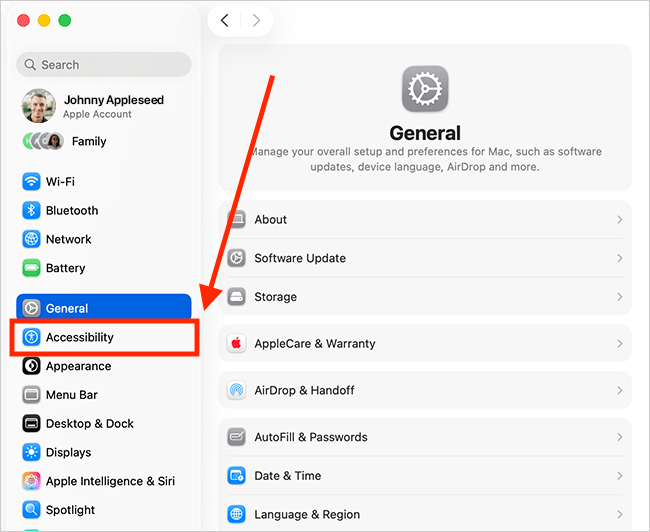
 - Click Accessibility in the sidebar.
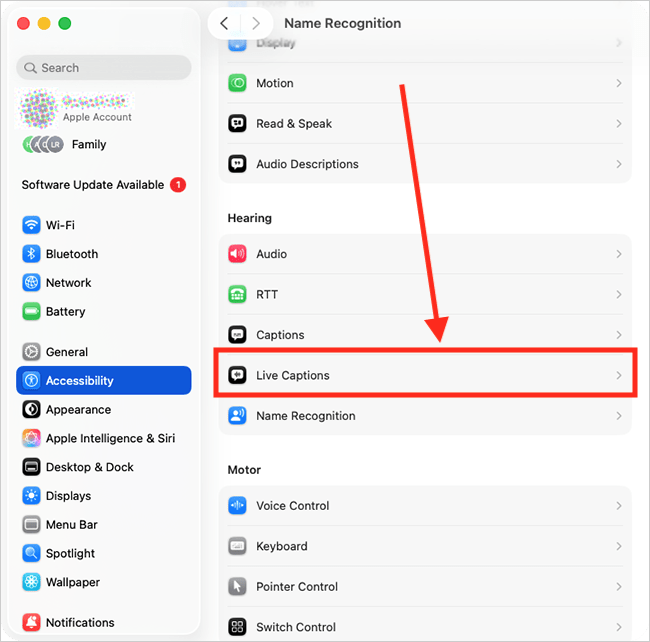
- Select Live Captions from the list of Accessibility options on the right.
- On the next screen, click the toggle switch for Live Captions to turn it on.
- The Live Captions window will appear at the bottom of the screen —you can drag it to move it anywhere you like.
- You can view transcriptions for the audio playing on your computer or for in-person conversations and audio playing in your surroundings, using the built-in microphone. To choose, click the Live Caption button
 in the menu bar along the top-right of the screen, then select Computer Audio or Microphone as the source.
 - You can customise the appearance of Live Captions — font, font size, text colour, background colour — on the Live Captions page in System Settings (see steps 1-3).
Before and after
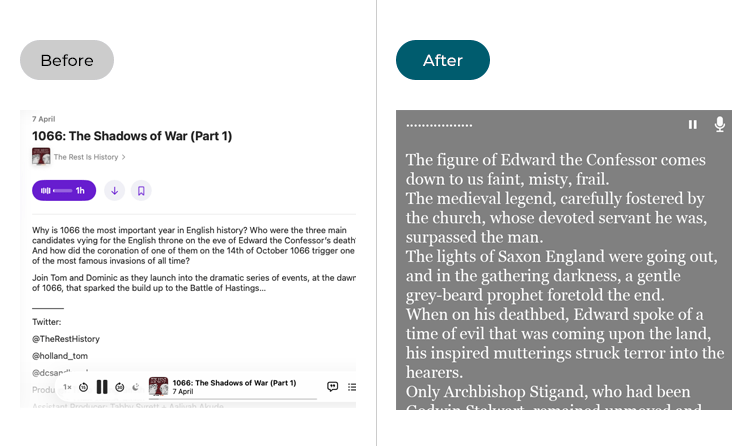
This section explains how to enable the Live Captions feature in macOS 26 Tahoe. This is a step-by-step guide with pictures of the screens to help.
Open System Settings
1. Click the Apple icon in the top left corner of the screen and choose System Settings from the menu.
Open the Accessibility settings
2. In the System Settings window, click Accessibility in the sidebar.
Find the Live Captions settings
3. Select Live Captions from the list of Accessibility options on the right.
Turn on Live Captions
4. On the next screen, click the toggle switch for Live Captions to turn it on.
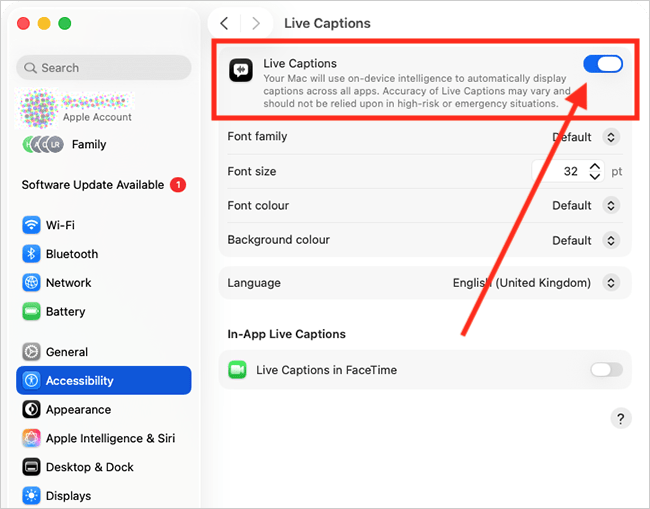
5. When Live Captions is turned on, the transcriptions window appears at the bottom of the screen, listening for audio playing on your computer. Note: You can drag the window to move it anywhere you like.

Change the appearance of Live Captions
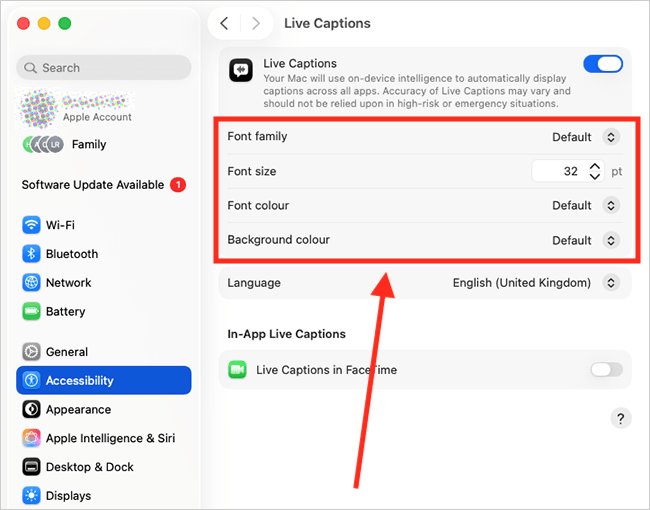
6. You can customise the appearance of Live Captions to suit your preferences. The table below lists the features you can adjust (also, see the screenshot below the table)
| Live Captions settings | |
| Font Family | Click the drop-down menu for Font Family and choose the font that is most legible for reading. |
| Font Size | Use the Font Size picker to set your preferred reading size. |
| Font Colour | To change the text colour, click the Font Colour picker, select Choose Custom Colour, and use the swatches to pick a new colour. |
| Background Colour | To change the background colour of the transcriptions window, click the Background Colour picker, select Choose Custom Colour, and use the swatches to pick a new colour. |
Only use Live Captions with FaceTime
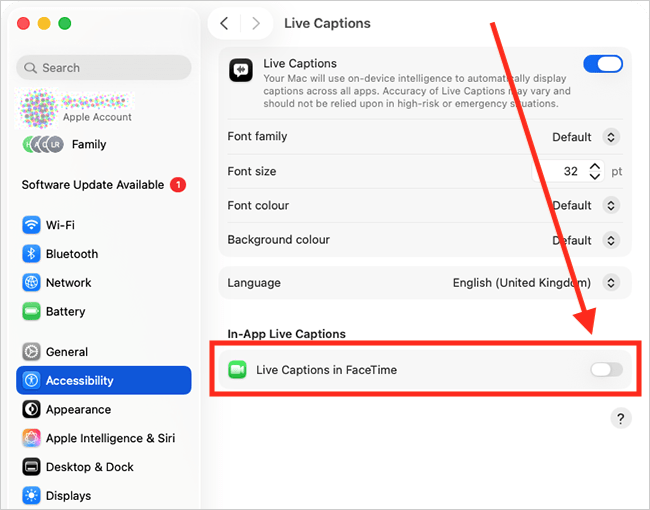
7. By default, Live Captions will transcribe audio from all apps on your computer. To have it transcribe audio only when using the FaceTime app, turn on the toggle switch for FaceTime.
Close System Settings
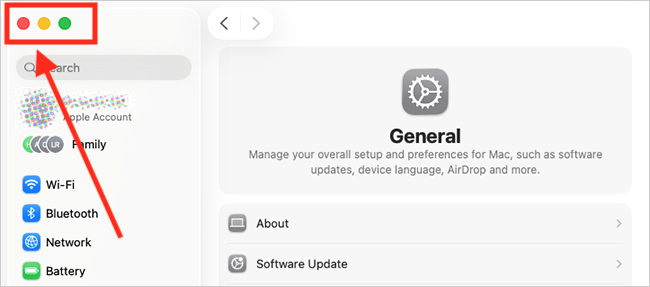
8. When you are happy with your settings, close System Settings by clicking the Close button (red circle) in the top-left corner of the window or using the Cmd + W keyboard shortcut.
Using Live Captions
9. Live Captions can transcribe audio playing on your computer or in-person conversations and audio playing in your surroundings, using the built-in microphone. To choose which audio you want transcribed, click the Live Captions button in the menu bar at the top-right of the screen, then select Computer Audio or Microphone.
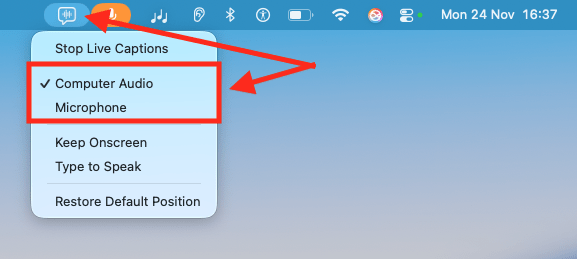
10. Alternatively, you can click the microphone button  in the top-left of the transcriptions window to toggle between computer audio and microphone.
Make the Live Captions window larger
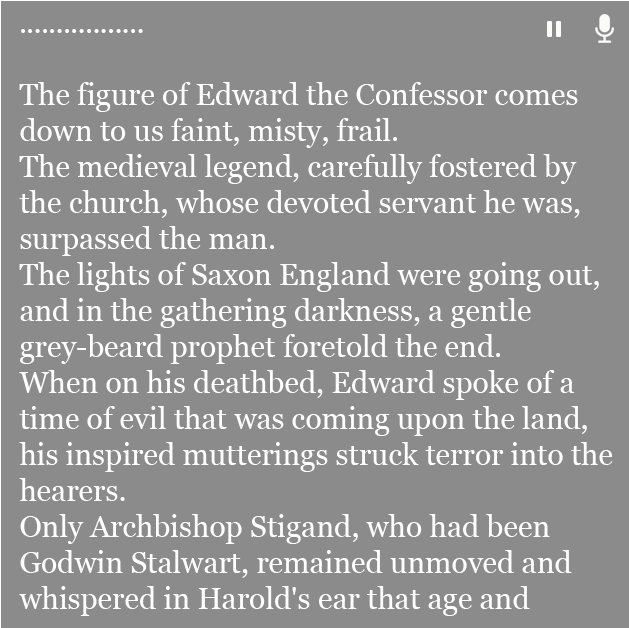
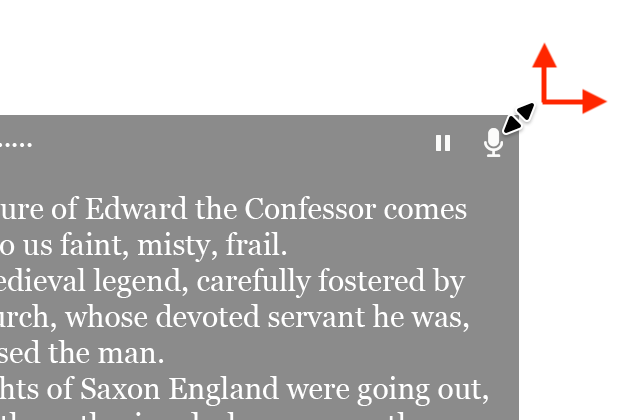
11. To make transcriptions easier to read when there is a lot of text, resize the transcription window by dragging one of its corners outward or upward. A tall, narrow window with fewer words per line is easier to read than a short, wide one. You can also scroll up and down in the transcriptions window to navigate through the transcribed text.
Move the Live Captions window
12. You can click and drag the transcriptions window to move it anywhere you like.
Pause transcriptions
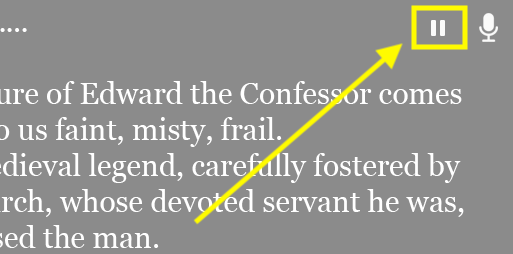
13. To pause transcriptions, click the Pause button in the top-right of the transcriptions window. To resume transcriptions, click the Play button.
Type to speak
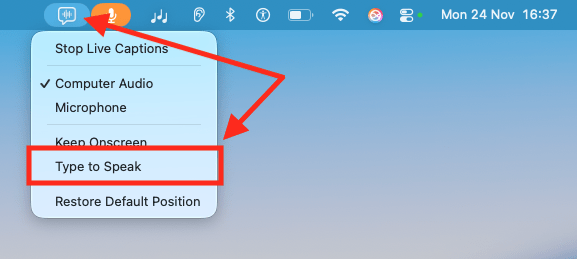
14. While using Live Captions, you can type text in the transcriptions window and have it read aloud by your computer. Click the Live Captions button in the menu bar along the top-right of the screen, then click Type to Speak.
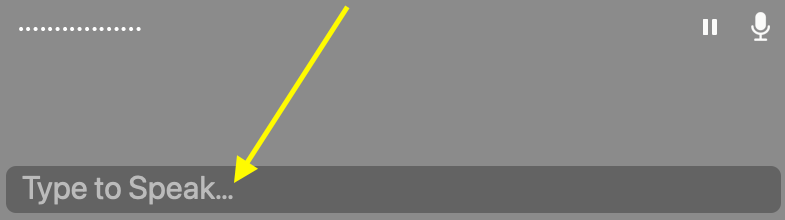
15. Next, click on the transcriptions window where it says Type to Speak… Type your phrase, then press the Enter key. Your computer will speak the phrase.
Always show the Live Captions window
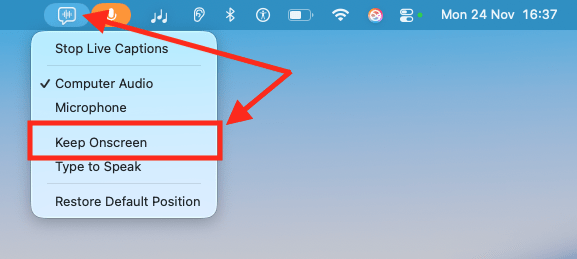
16. The transcriptions window is hidden automatically when no audio is detected. To keep the window visible, click the Live Captions button in the menu bar along the top-right of the screen, then click Keep Onscreen.
Restore the Live Captions window to its default size and position
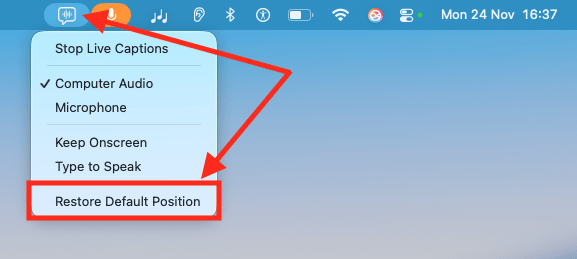
17. To restore the Live Captions window to its default size and position, click the Live Captions button in the menu bar along the top-right of the screen, then click Restore Default Position.
Need some more help?
Call our helpline 0300 180 0028 or email enquiries@abilitynet.org.uk
Need free IT Support at Home?
If you are older or disabled and need IT support at home, you can book a free home visit.