For extra help using a mouse or touchpad with your iPhone or iPad, see our guide Make it easier to use a mouse or trackpad with your iPhone or iPad in iOS 26
Short guide:
- Open the Settings app and tap Bluetooth.
- Make sure the toggle switch for Bluetooth is turned on.
- Put your mouse or trackpad into pairing mode, then select it from the Other Devices list to pair it.
- You can now start using your mouse or touchpad. The pointer appears as a small translucent arrow with a red border.
You can customise the appearance and behaviour of the pointer in two places. - To adjust tracking, scrolling, and the secondary-click behaviour, go to Settings > General > Trackpad & Mouse.
- For all other options, go to Settings > Accessibility > Pointer Control.
Before and after
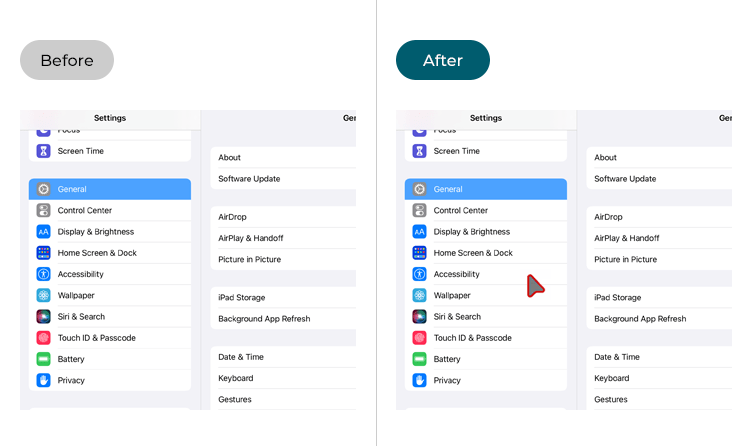
This section explains how to use a mouse or trackpad with your iPhone or iPad in iOS 26. This is a step-by-step guide with pictures of the screens to help.
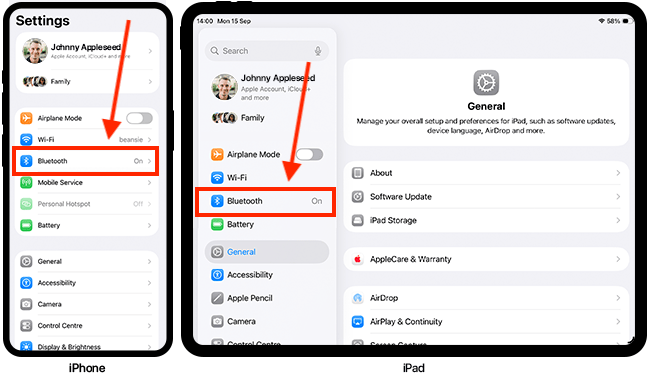
Open the Bluetooth settings
1. Tap the Settings icon ![]() on your Home screen to open the Settings app, then tap Bluetooth.
on your Home screen to open the Settings app, then tap Bluetooth.
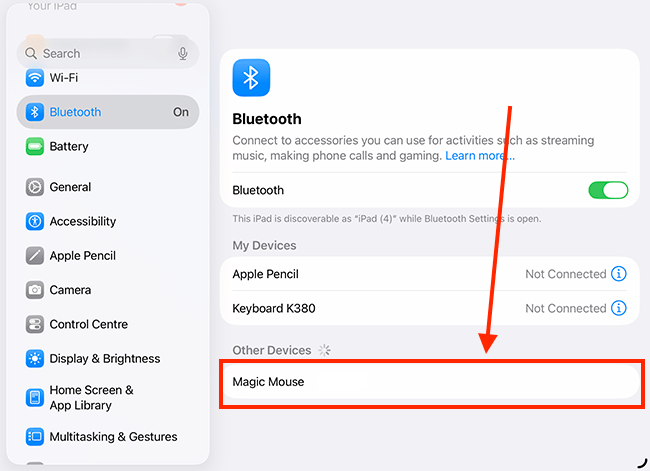
Pair your mouse or trackpad
2. Make sure Bluetooth is turned on – the toggle switch will be green. Next, put your mouse or trackpad into pairing mode – check the instructions that came with your device for more information, or search for advice online. Your device should appear in the Other Devices section. Tap the name of your device to pair it.
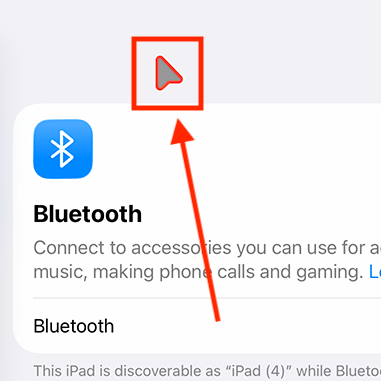
Using your mouse or trackpad
3. You can now start using your mouse or trackpad. The pointer is a small translucent arrow with a red border. You can move it around the screen and click on items just as you would on any computer.
Trackpad and Mouse settings
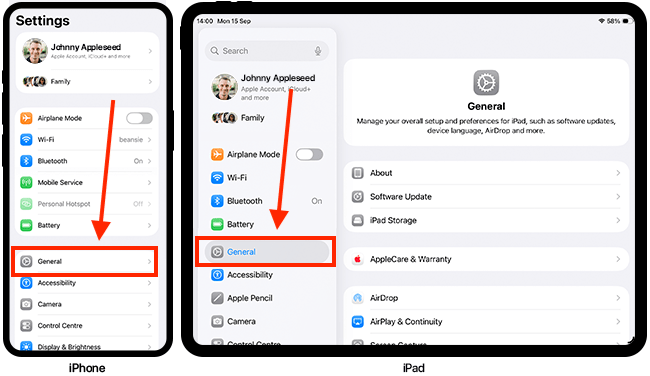
4. To change the settings for your trackpad or mouse, open the Settings app and tap General.
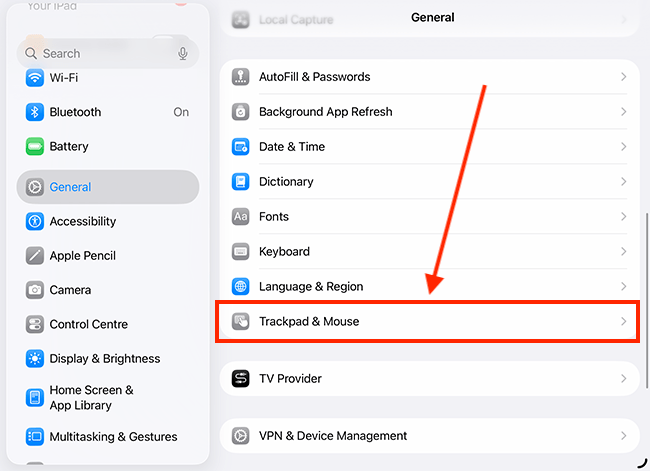
4. On the General screen, scroll down and tap Trackpad & Mouse.
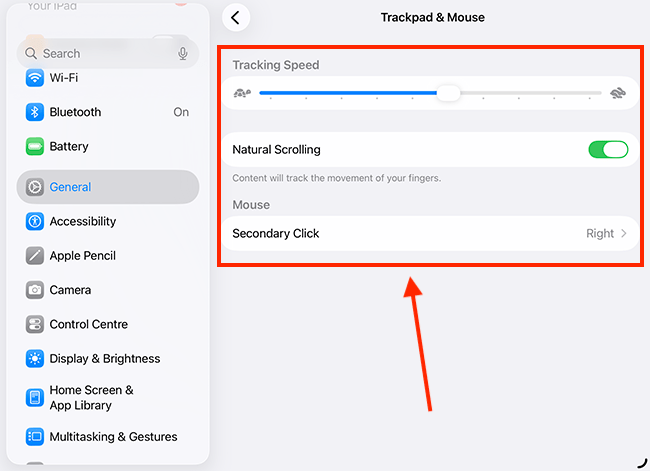
4. The table below lists the settings available on the Trackpad & Mouse page. You can further customise the appearance and behaviour of the pointer in your device’s Accessibility settings, which we’ll cover later in this guide.
| Setting | Description |
| Tracking Speed | Use the Tracking Speed slider to adjust how quickly the pointer moves across the screen. |
| Natural Scrolling | When Natural Scrolling is enabled, the page content moves in the same direction as your fingers as you scroll. |
| Secondary Click | Seconday Click (also known as right-click) is used to bring up a context menu with specific options for the item you click on. Typically, this is done using the button on the right side of your mouse. If you would like to switch this to the left side button – particulalry useful for left-handed users – tap Secondary Click, then select Left. |
Further customisations
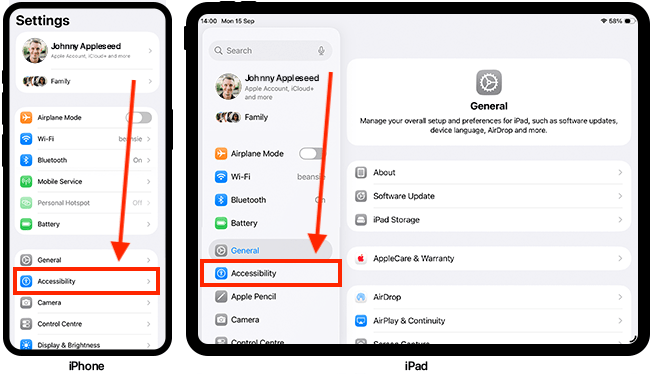
4. You can customise the pointer's appearance and scrolling speed in the Pointer Control accessibility settings. To open the Accessibility settings, tap the Settings icon ![]() on your Home screen to open the Settings app, then tap Accessibility
on your Home screen to open the Settings app, then tap Accessibility
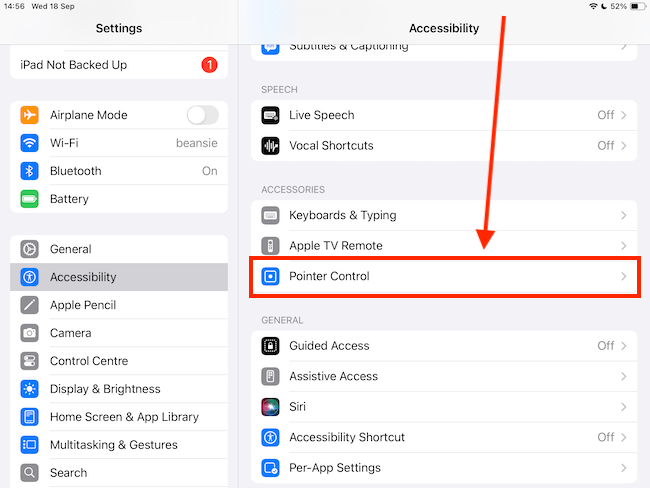
Find the Pointer Control settings
5. On the Accessibility screen, scroll down to the Accessories section and tap Pointer Control. Note: This setting only appears when a pointing device is connected to your iPhone or iPad.
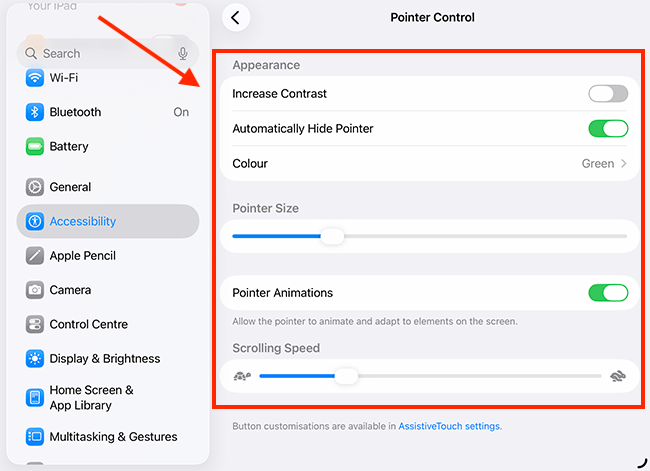
Customise Pointer Control
6. The table below lists the settings available on the Pointer Control page.
| Setting | Description |
| Increase Contrast | To make the pointer darker and easier to see against the page, turn on the toggle switch for Increase Contrast. |
| Automatically Hide Pointer | After a few seconds of inactivity, the pointer is hidden. To prevent this, turn off the Automatically Hide Pointer toggle switch. |
| Colour (and border width) | You can change the colour of the pointer’s border to suit your personal preference. Tap Colour, then choose from the available options. You can also adjust the pointer’s border size using the Border Width slider to increase its visibility. |
| Pointer Size | To change the size of the pointer, adjust the slder for Pointer Size. |
| Pointer Animations | Subtle animations occur as you move over certain items, giving the pointer a more responsive feel. To disable these animations, turn off the toggle switch for Pointer Animations. |
| Scrolling Speed | Adjust the slider for Scrolling Speed to control how quickly a page moves when you use the mouse wheel or a scroll gesture (by moving two fingers up, down, left, or right). |
Return to the Home screen
7. When you are happy with your settings, you can return to the Home screen by swiping up from the bottom of the screen or pressing the Home button on devices with a physical Home button.
Need some more help?
Call our helpline 0300 180 0028 or email enquiries@abilitynet.org.uk
Need free IT Support at Home?
If you are older or disabled and need IT support at home, you can book a free home visit.