Note: While Windows 11 gives you the ability to customise the appearance of closed captions, these settings will only apply to videos that you have downloaded and that contain closed caption text. They don’t apply to videos you watch online in the BBC iPlayer or on YouTube, as these have their own customisable settings.
Short guide
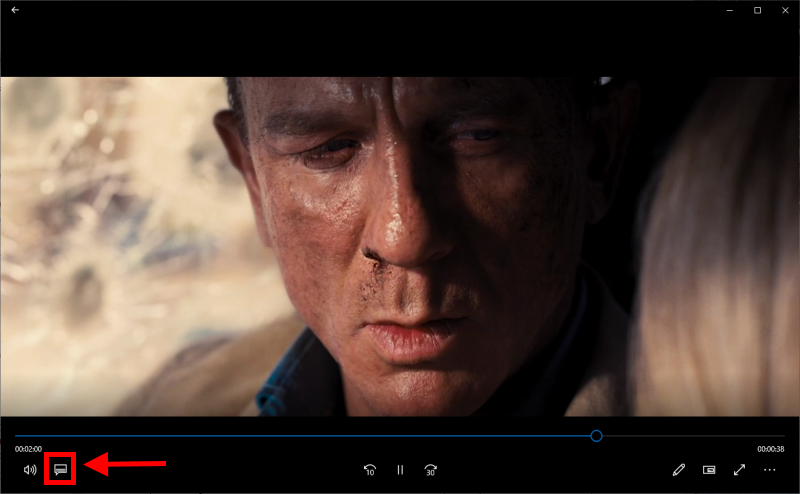
- Switch closed captions on, where available, by clicking in the video player window then clicking on the audio and subtitles icon or CC icon at the bottom of the playback window.
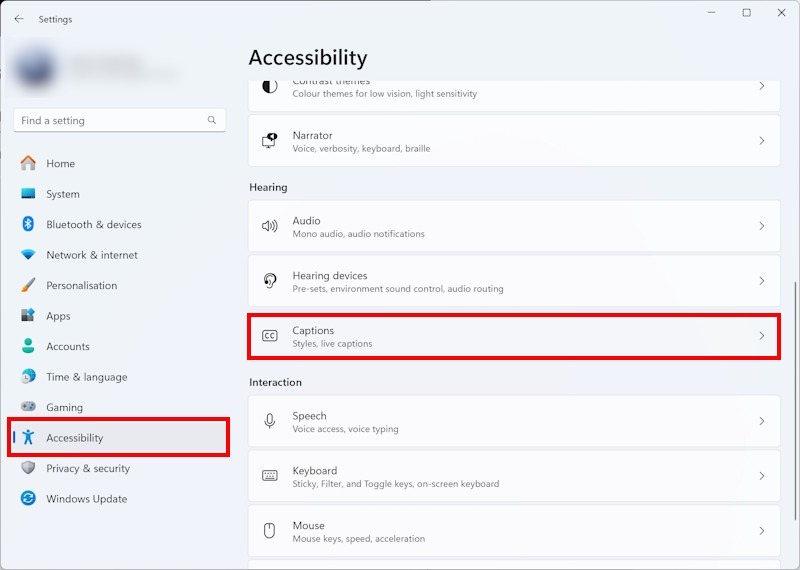
- To customise caption styles, open the Accessibility settings by pressing the Windows key + U. Select Captions.
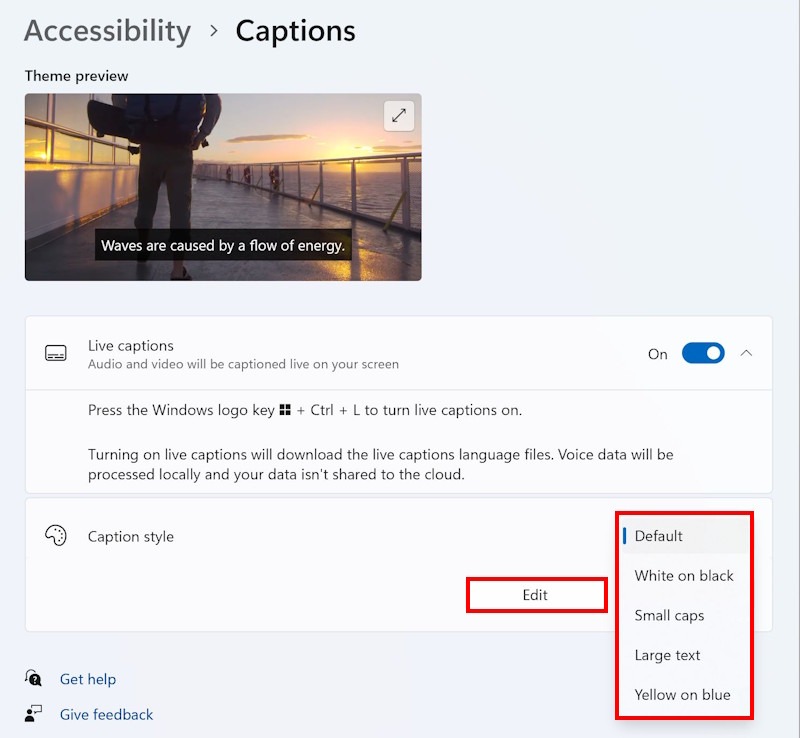
- Select a Caption style from the drop-down menu or click Edit to create or customise your own.
- Select a closed caption element then a colour swatch to apply a colour to it.
- Click the Opacity, Size, Font and Effects drop down menus to select new options for the closed caption text.
- Enter a name for your new caption style to save it.
Before and after
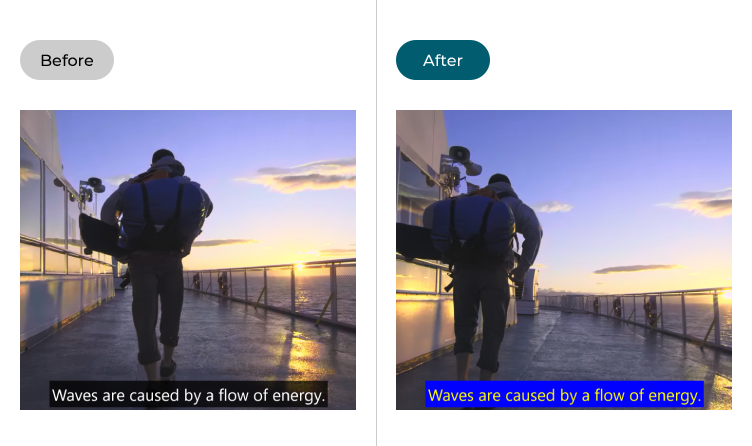
This section explains how to enable closed captions in Windows 11’s built-in apps, and how to select and customise closed caption styles. This is a step-by-step guide with pictures of the screens to help.
Turning closed captions on
1. How you enable closed captions on a video will differ depending on the application and the source. For instance, in YouTube you click on the CC icon at the bottom of the video player. Within the Windows 11 media player and the Movies and TV app, you can click or tap anywhere within the video, then click on the audio languages and subtitles option that appears in the bottom left of the playback window. Select the closed captions of your choice.
Customising closed captions
2. To customise closed captions, open the Accessibility settings by pressing the Windows key + U on the keyboard or by clicking Start > Settings > Accessibility. Select Captions from the Hearing section on the right.
Select or edit a caption style
3. Select a Caption style from the drop-down menu or click Edit to create or customise your own.
4. Choose new colours
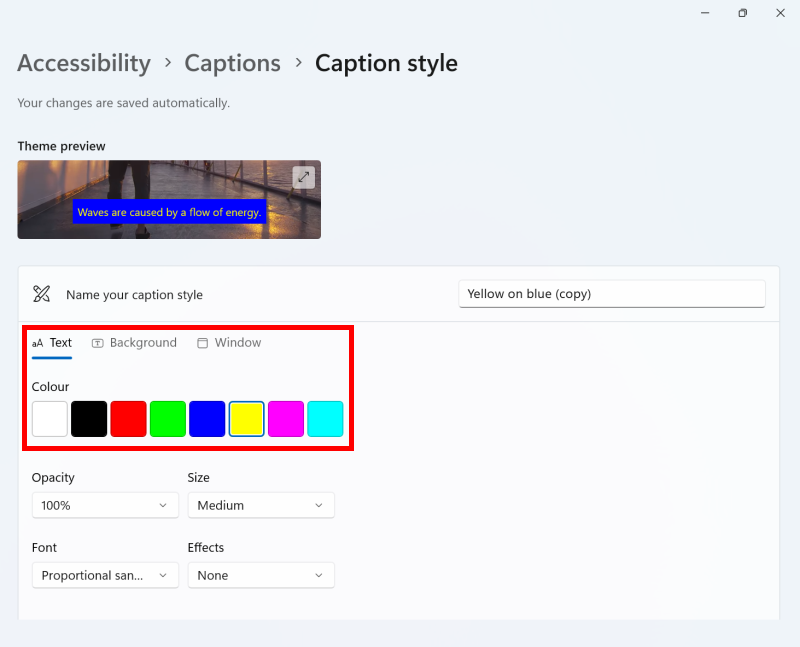
4. Click the Text, Background or Window button to select the closed captions element you want to change, then select a new colour for that element from the eight swatches provided.
Change the font, size, effects and opacity settings
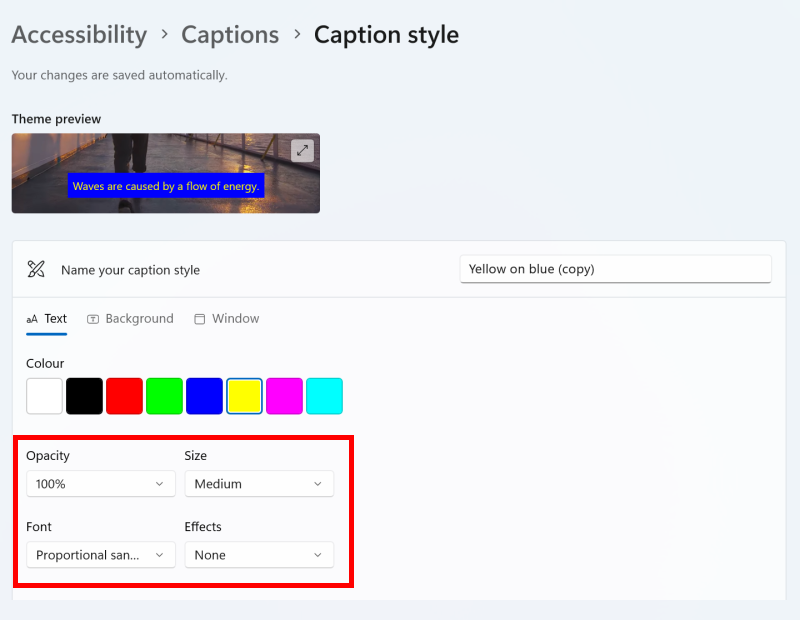
5. Use the Opacity, Size, Font and Effects dropdowns to select new options for the closed caption text. You can preview the results in the Theme preview sample video. The Size menu is particularly useful if you find the existing styles too small to read. Try setting Size to Large or Extra Large.
Name your caption style
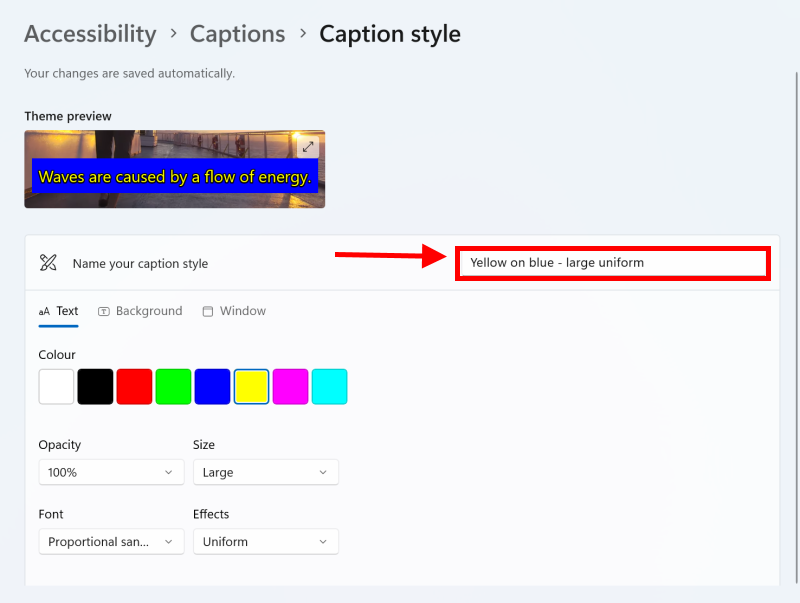
6. When you’re happy with your new caption style, click where it says Name your caption style to enter a new name and save it.
Note: If this does not work it could be because your computer settings are managed by someone else (an IT department or administrator for example) in which case you will need to contact them to access these settings or for further help.