Call our helpline
0300 180 0028Short guide
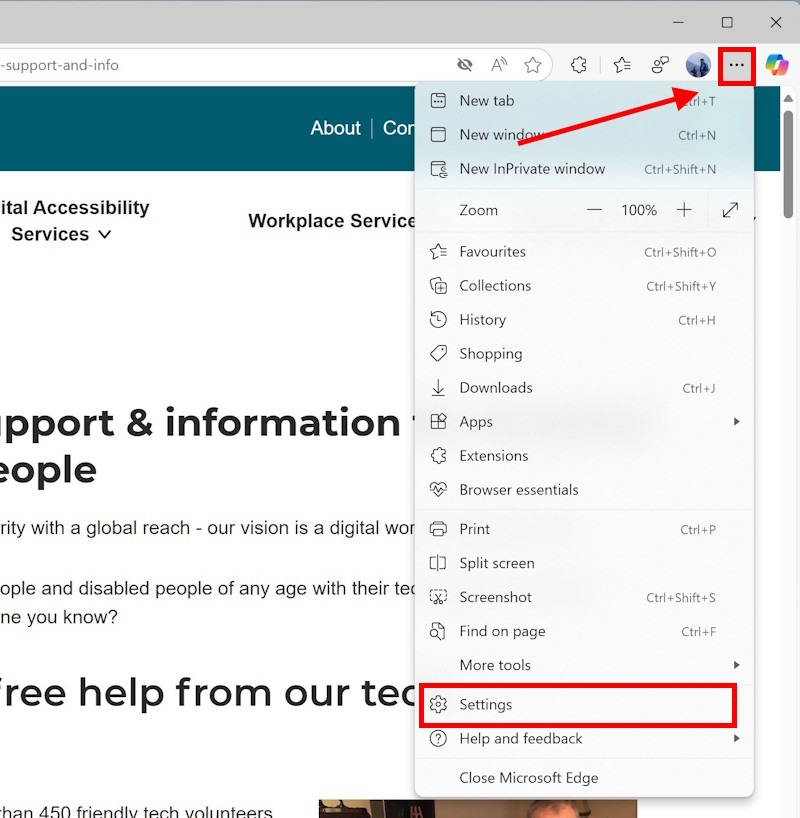
- Click on the Options button in the top-right corner of the Edge browser and select Settings.
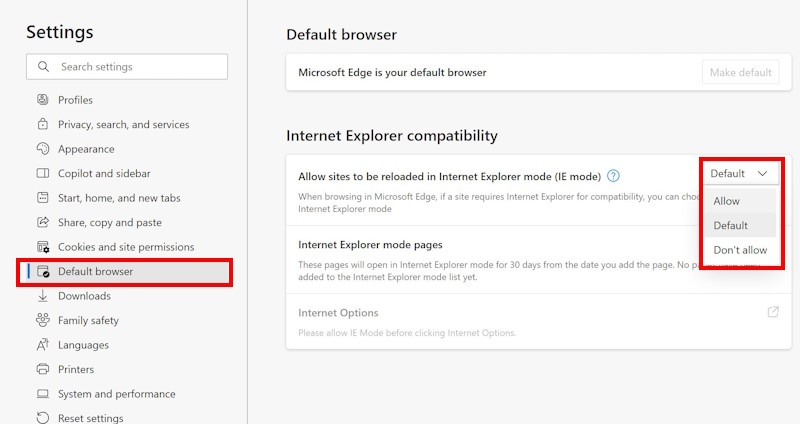
- Click on Default browser on the left.
- Click the dropdown menu for Allow sites to be reloaded in Internet Explorer mode. Select Allow.
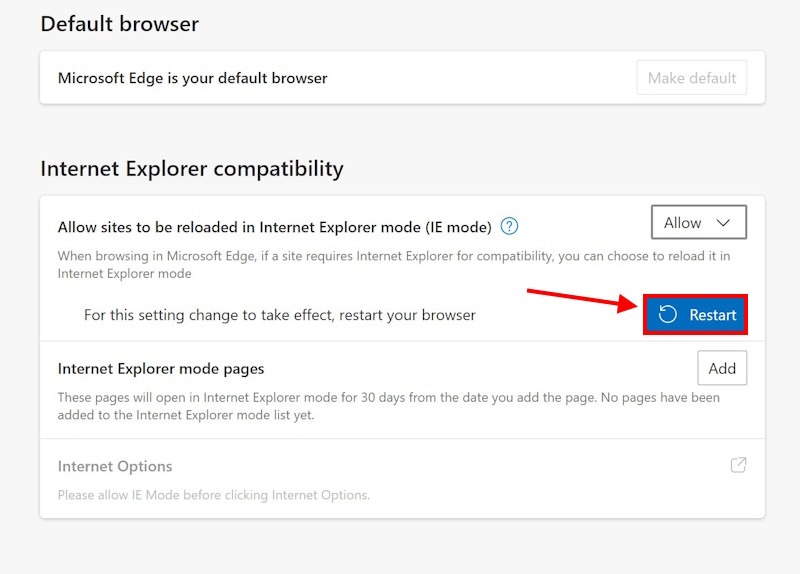
- If you’re prompted to restart the browser, click Restart.
- To switch to Internet Explorer mode, click the Options button and select Reload in Internet Explorer mode.
- Click Leave to return to Microsoft Edge’s standard mode, or click Show in toolbar to add an exit button to the toolbar.
Before and after
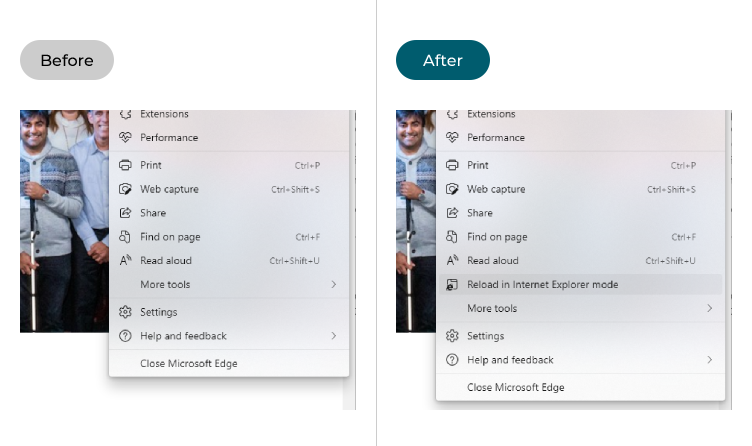
This section explains how to enable and use Internet Explorer mode in the Edge browser for Windows 11. This is a step-by-step guide with pictures of the screens to help.
Open the Edge settings
1. To enable Internet Explorer mode, click on the Options button in the top-right corner of the Edge browser and select Settings.
Allow Internet Explorer mode
2. Click on Default browser on the left-hand side, then click on the dropdown menu for Allow sites to be reloaded in Internet Explorer mode. You may see a message explaining Internet Explorer mode. If so, click Got It! Return to the drop-down menu and select Allow.
Restart the browser
3. If you’re prompted to restart the browser, click Restart.
Switching modes
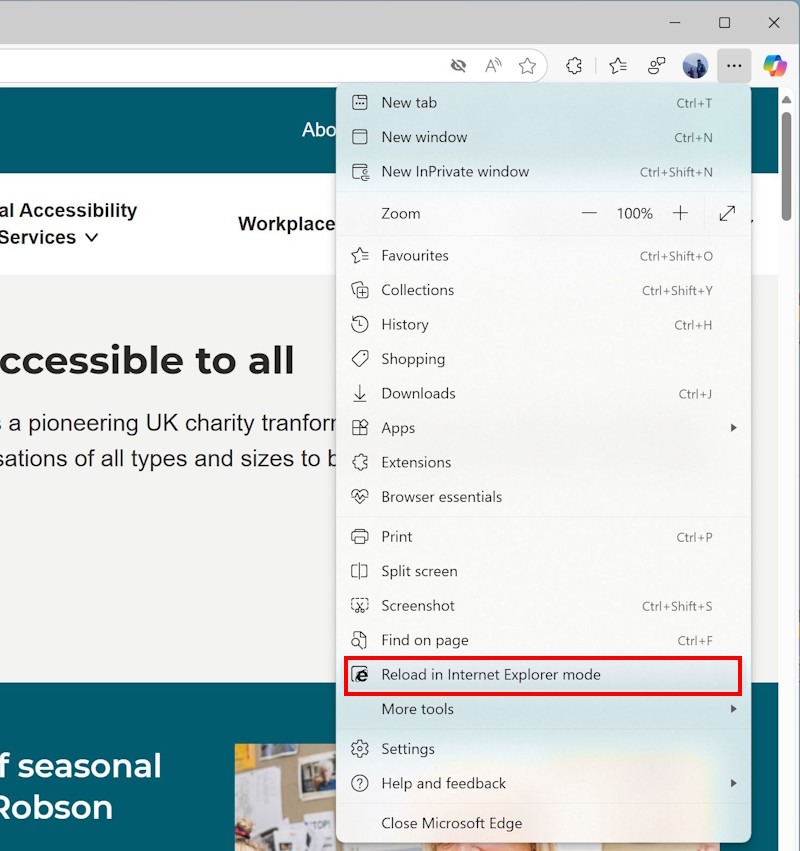
4. If you’re using a website in the Edge browser and you want to switch to Internet Explorer mode, click the Options button and select Reload in Internet Explorer mode.
NOTE: The AbilityNet site, like most modern websites, will work better in the Edge browser’s standard mode than in Internet Explorer mode. Only switch to Internet Explorer mode if a site or tool or its features aren’t working.
Leaving Internet Explorer mode
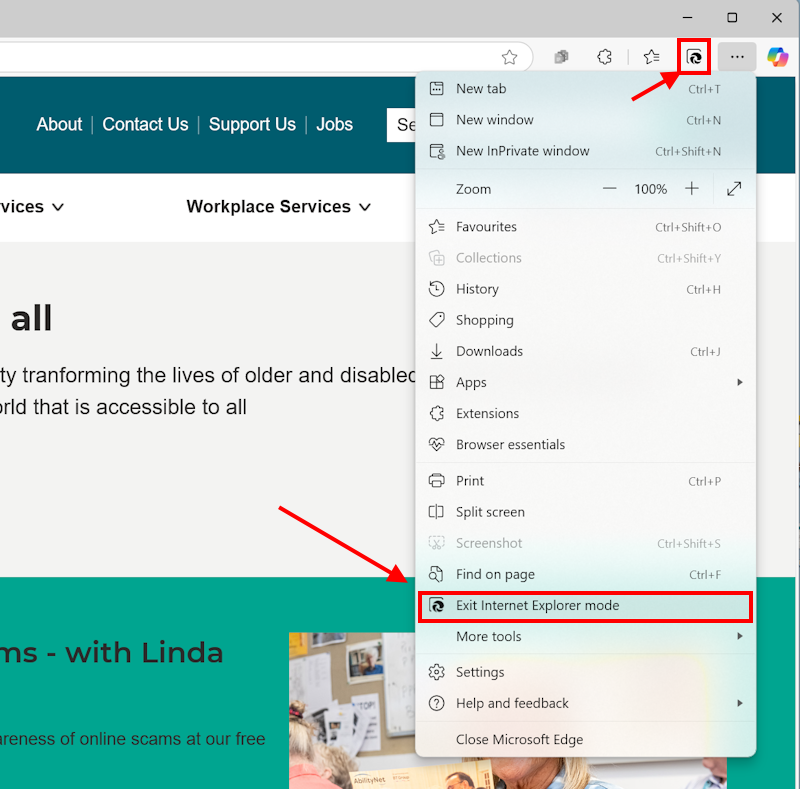
5. When you reload a web page in Internet Explorer mode, you’ll get a warning message. You can close the message or click Open in Microsoft Edge to return to Microsoft Edge’s standard mode. Click Show in toolbar to add an Exit button to the toolbar. Clicking this will switch back to Edge's normal mode, or you can click the Options button and select Exit Internet Explorer mode.
Switch to Internet Explorer mode automatically
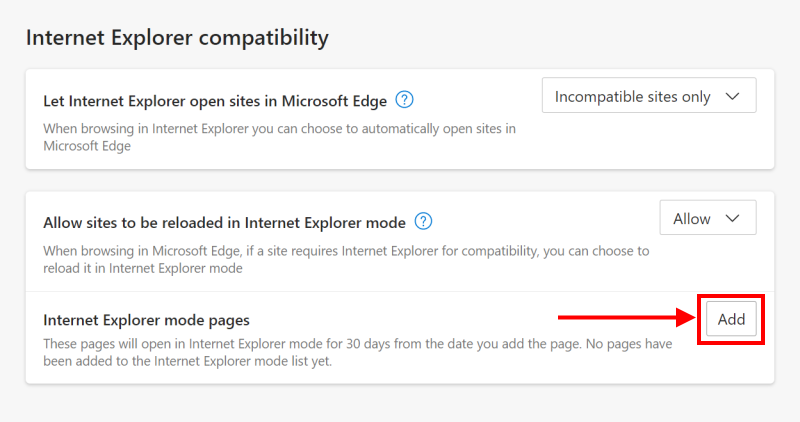
6. You can also add websites or web pages to Internet Explorer mode so that they load in it automatically. They will only do so for the next 30 days. Click the Options button then Settings then Default Browser. Click the Add button next to Internet Explorer mode pages.
Add a website or web page
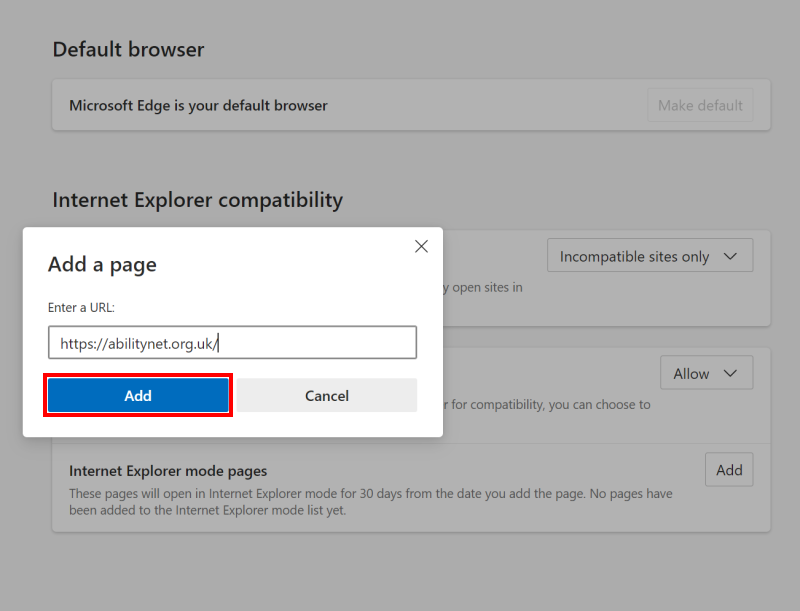
7. Enter the web address of the site or page, including the HTTP:// or HTTPS:// prefix. Click Add and the site will be added to the Page list.
Note: If this does not work it could be because your computer settings are managed by someone else (an IT department or administrator for example). If so, you will need to contact them to access these settings or for help.