Short guide
- Open the Settings app by pressing the Windows key + I. Click System then Display.
- Click the toggle switch for Night light to turn it on.
- Click the right arrow > next to the toggle switch. Use the Strength slider to adjust the Night light’s strength.
- Click the toggle switch for Schedule night light to schedule when it turns on and off. Either leave it at the default or select Set hours.
- Select Turn on and Turn off times using the time controls.
Before and after
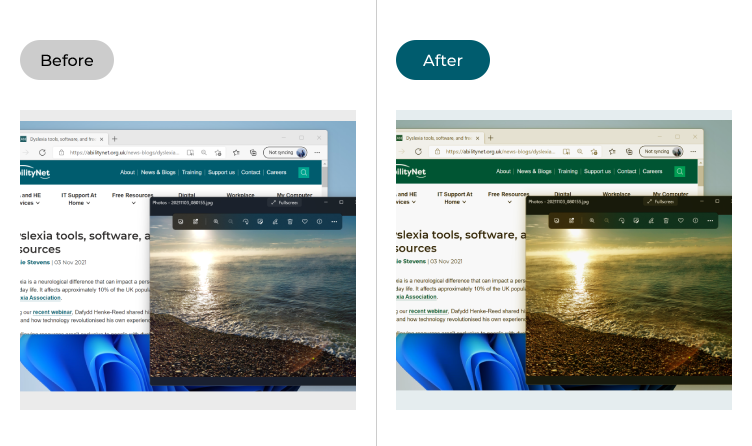
This section explains how to activate the Night Light feature in Windows 11, and how to schedule when it turns on and off. This is a step-by-step guide with pictures of the screens to help.
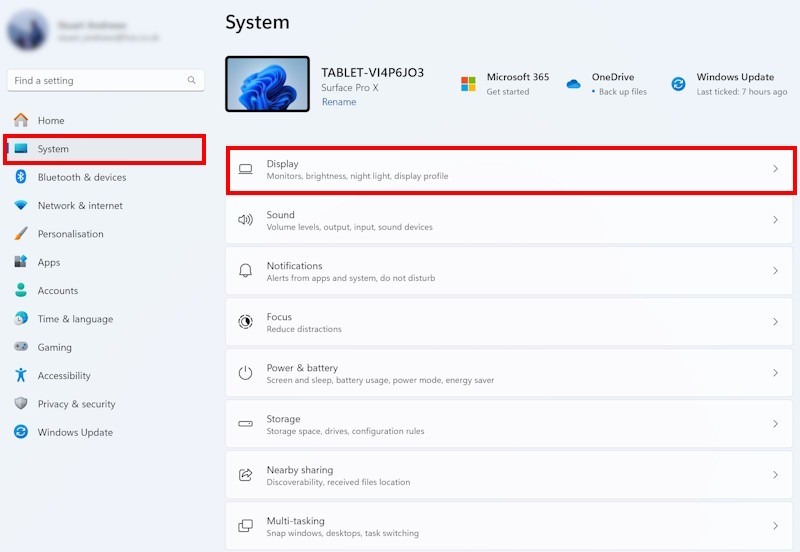
Open the Display settings
1. Open the Settings app by pressing the Windows key + I on the keyboard. Click System on the left, then Display on the right.
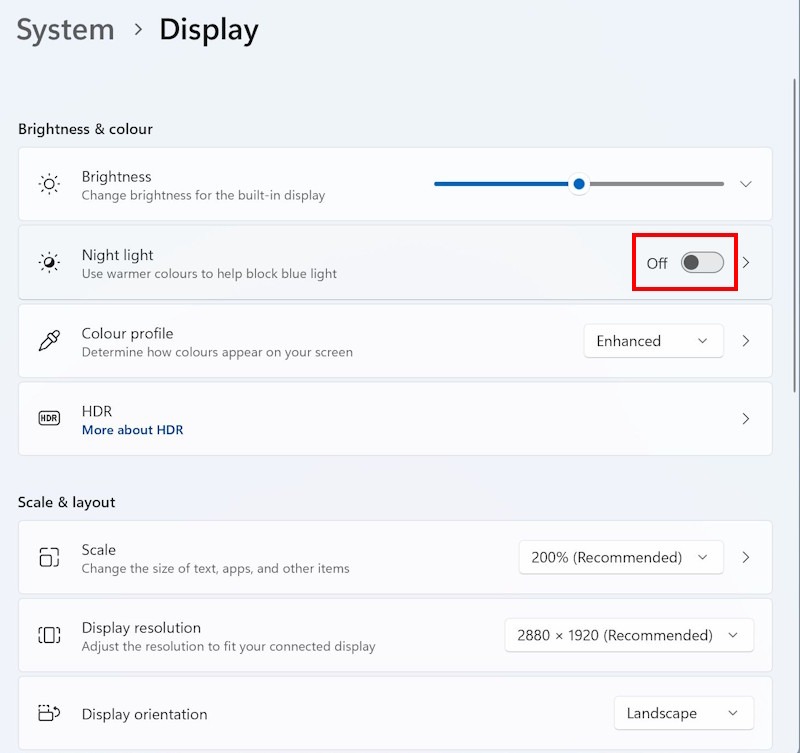
Switch Night light on
2. Look in the Brightness & colour section and click the toggle switch for Night light to turn it on.
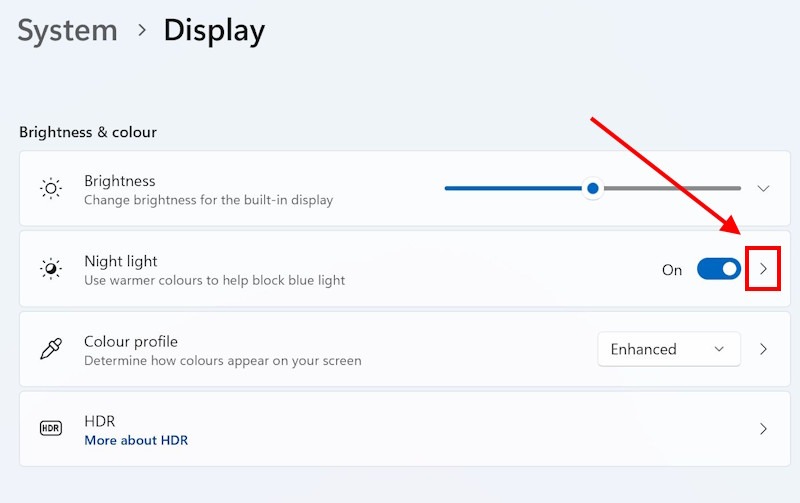
Adjust the Night light settings
3. To adjust the Night light’s strength and configure it so that it turns on automatically, click the right arrow > next to the toggle switch.
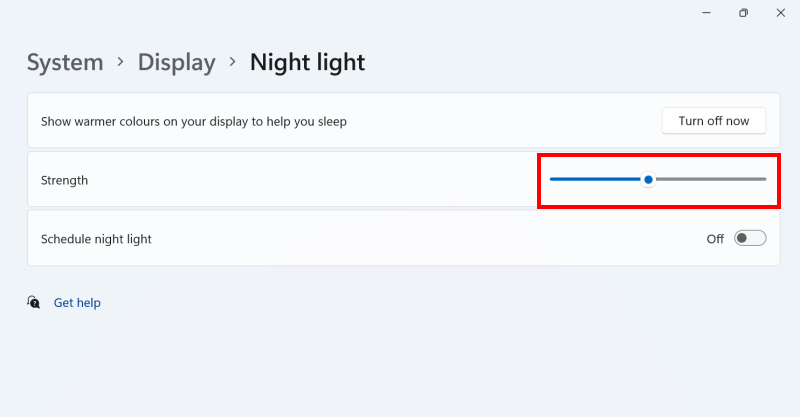
Change the strength
4. Use the Strength slider to adjust how far the Night light adjusts your screen’s colours to minimise the blue light output.
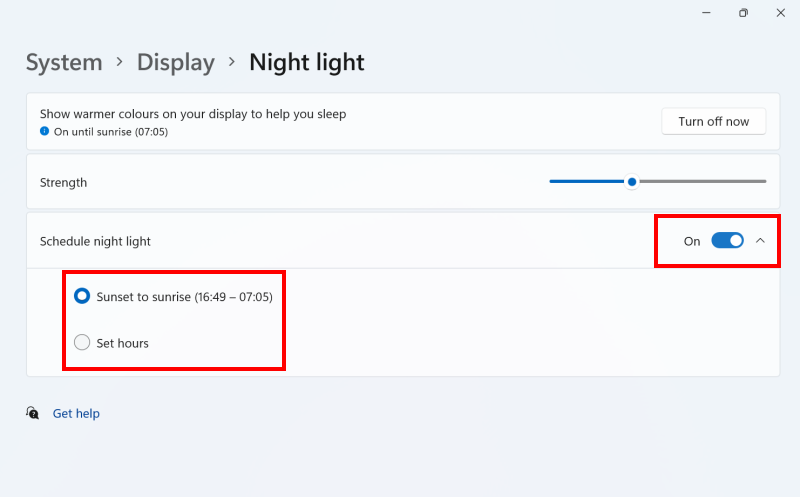
Schedule when Night light turns on
5. Click the toggle switch for Schedule night light to turn it on. By default it switches on at sunset and switches off at sunrise, but click the round radio button next to Set hours if you would rather have it turn on and off at specific times.
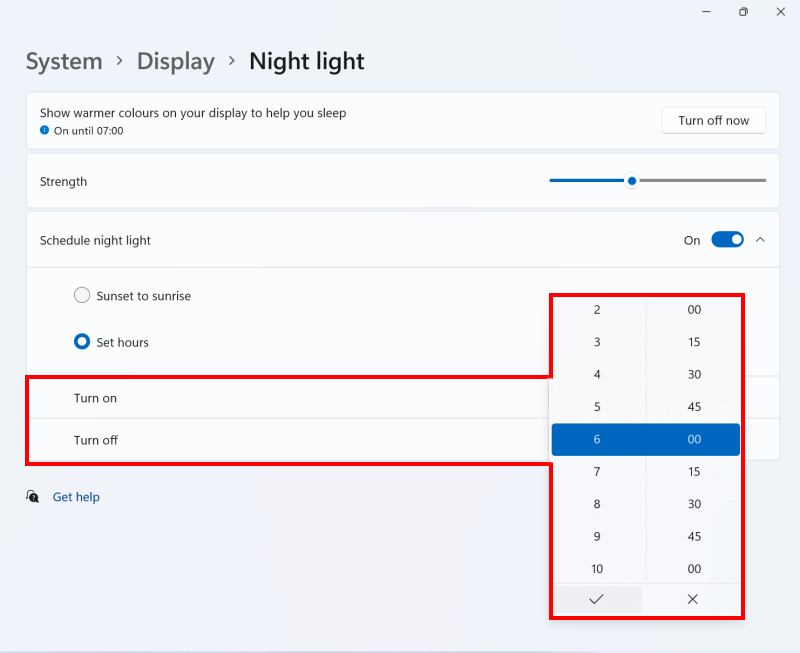
Set on and off times
6. Use the Turn on and Turn off time controls to select the hour and minute when the Night light will start and end. Click the Tick button at the bottom of each time control to set the time.
Note: If this does not work it could be because your computer settings are managed by someone else (an IT department or administrator for example). If this is the case you will need to contact them to access these settings or for further help.
Need some more help?
Call our helpline 0300 180 0028 or email enquiries@abilitynet.org.uk
Need free IT Support at Home?
If you are older or disabled and need IT support at home, you can book a free home visit.