Short guide:
- Click the Apple icon
 in the top left corner of the screen and select System Preferences.
 - Click Accessibility.
- In the sidebar, click Switch Control. On the right, if not already selected, select the General tab.
- Tick the checkbox for Enable Switch Control.
- By default, press the Space bar on your keyboard to start scanning the Switch Control Home panel. Press the Space bar again to select the highlighted item. You can add more switches under the Switch tab.
Before and after
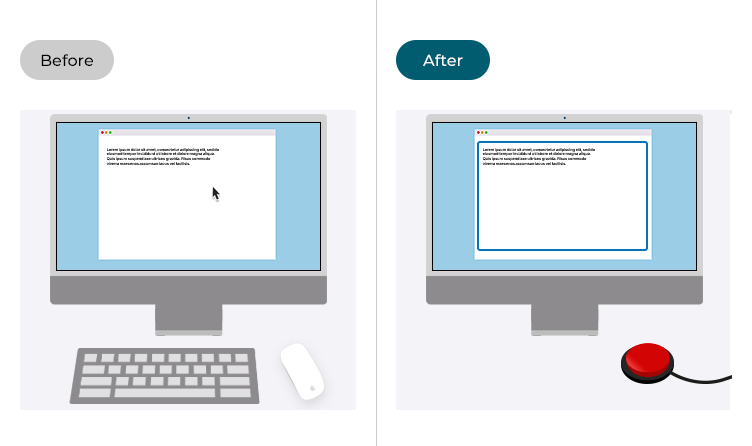
This section gives you step by step instructions on how to enable Switch Control in macOS 12 Monterey, with pictures of the screens to help.
How to enable Switch Control
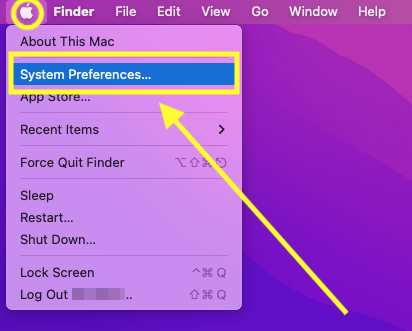
Open System Preferences
1. Click the Apple icon ![]() in the top left corner of the screen and choose System Preferences from the menu.
in the top left corner of the screen and choose System Preferences from the menu.
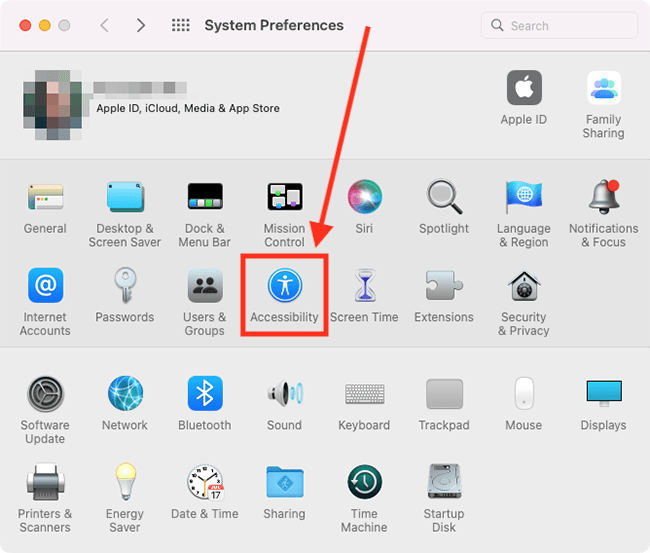
Open the Accessibility settings
2. In the System Preferences window, click Accessibility.
Find the Switch Control settings
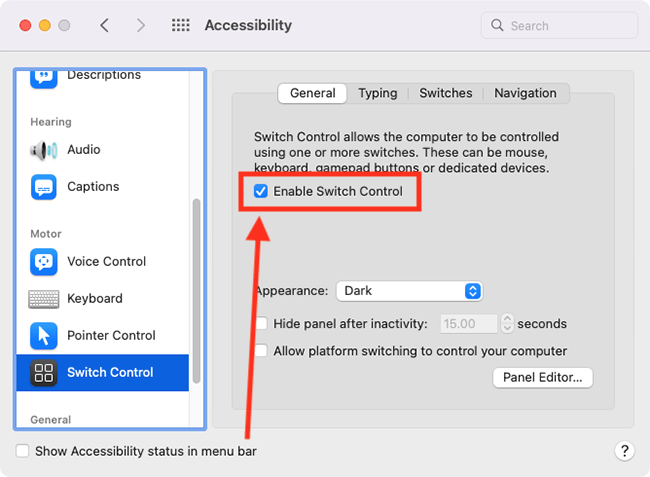
3. In the sidebar, click Switch Control. On the right, if not already selected, select the General tab.
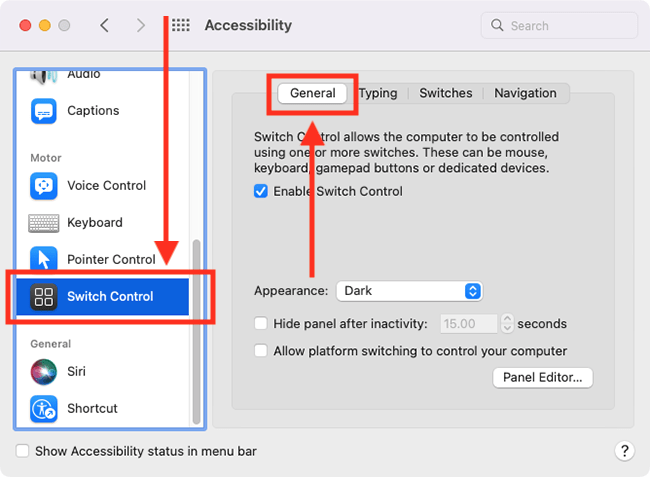
Turn on Switch Control
4. Tick the checkbox for Enable Switch Control. Note: You may be asked to enter your password and/or confirm you want to enable Switch Control.
How to use Switch Control
5. When you enable Switch Control, the Switch Control “Home Panel” will appear on the screen and the Space bar on your keyboard becomes the default “Select Item” switch – the switch you press to select the item currently highlighted on-screen. You can change this and add more switches to perform other tasks, but we will cover that later in this guide.

6. Press the Select Item switch to start auto-scanning. Auto-scanning highlights the items in the Home Panel one after the other. To select a highlighted item, press the Select Item switch again.
The items on the Home Panel
|
Keyboard |
|
|
Pointer |
|
|
Dock |
|
|
Menu Bar |
|
|
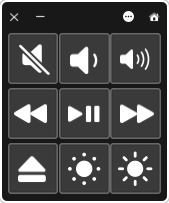
System |
|
|
Custom |
|
|
Location |
|
|
Devices |
|
|
Close button |
|
|
Home button (shown on sub-panels)
|
|
| |
Options button (shown on sub-panels)
|

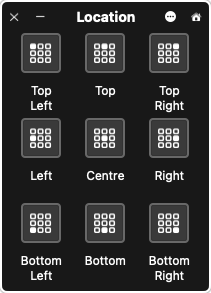
How to move the pointer (and select an item on the screen)
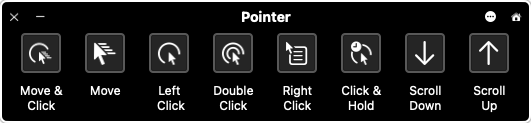
Open the Pointer panel
7. Scan the Home Panel and select Pointer.

Choose the pointer
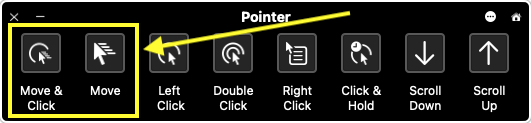
8. On the Pointer panel, select Move or Move and Click.
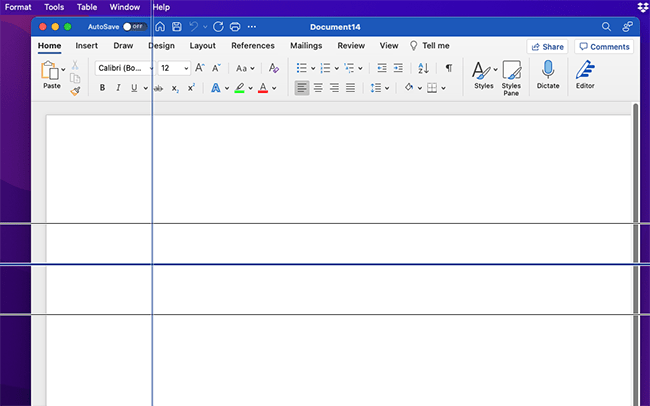
Move the pointer
9. Vertical lines, followed by horizontal lines, will move across the screen so that you can pinpoint where you want the pointer to move to. Press the Select Item switch to stop the lines at the required location. When you stop the horizontal line, the pointer will move to the intersection of the two lines. If you selected Move and Click, the pointer will move to and select the item located at the intersection.
How to add a new switch
Open the Switch Control System Preferences window
10. Open the Switch Control settings window as before – select Apple menu > System Preferences, click Accessibility, then click Switch Control in the sidebar.

Open the Switch options
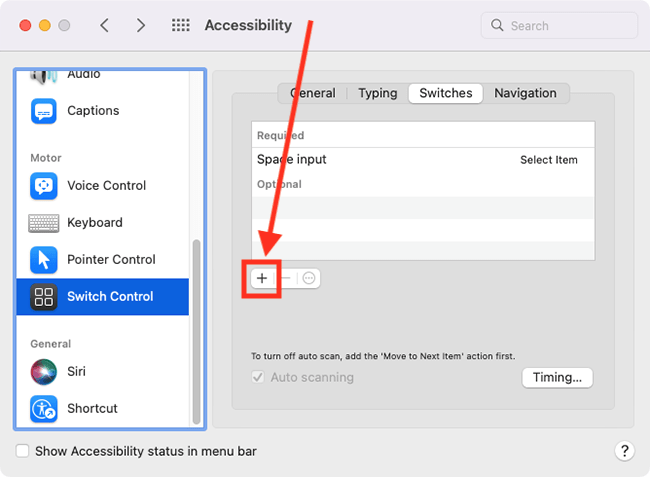
11. Select the Switches tab.
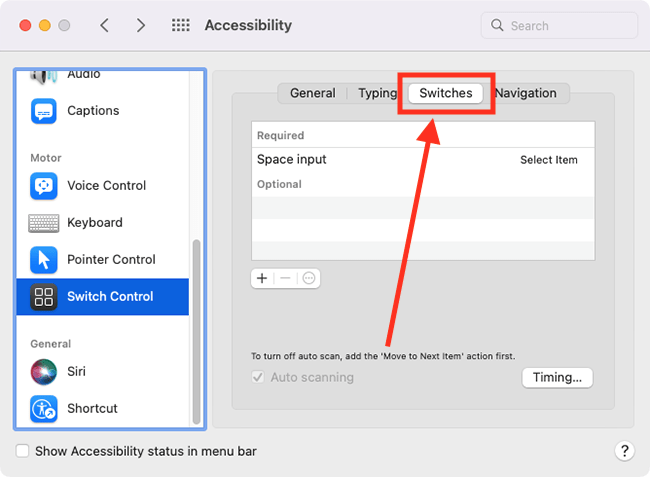
Add a switch
12. Click the + (plus) button, then press the switch you wish to add when prompted.
Name the switch
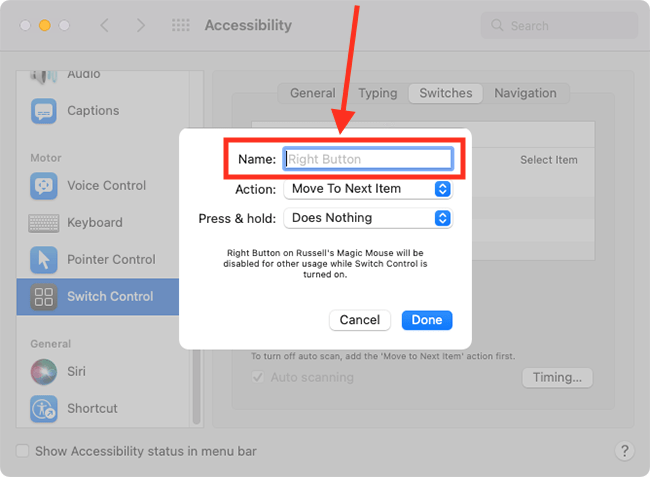
13. The computer will detect the name of the switch but you can type your own name for it if you prefer.
Choose the action you want the switch to perform
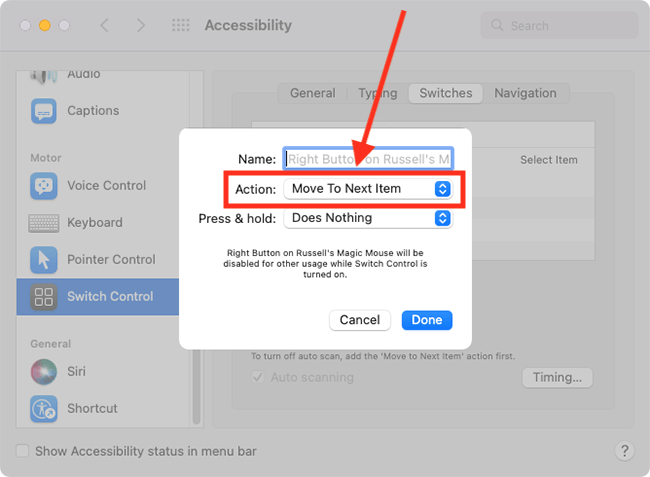
14. On the next screen, choose the action you want to perform when the switch is pressed. Select the Action drop-down menu and choose from:
- Restart from the top
- Select Item
- Move to next item
- Stop scanning
Choose what happens if you press and hold the switch
14. Select the Press and Hold drop-down menu and choose Does nothing or Repeats Current Action.

Save the new switch
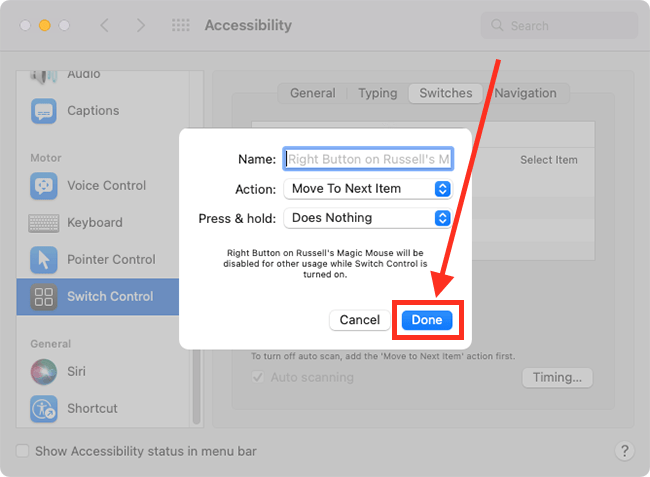
15. To save the switch, click the Done button.
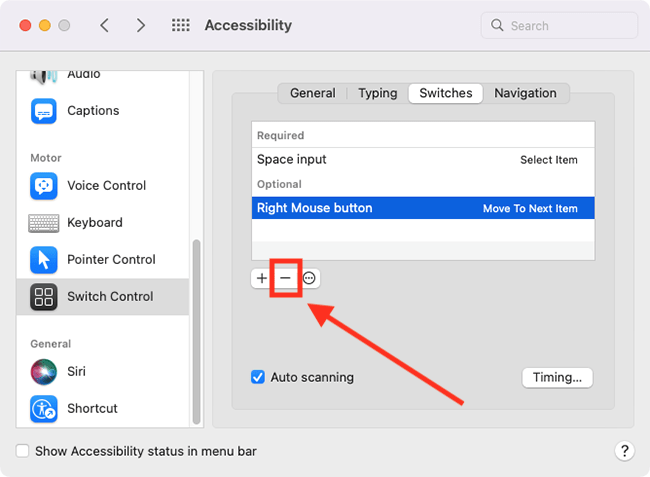
Remove a switch
16. To remove a switch, select the switch in the list, then click the – (minus) button.
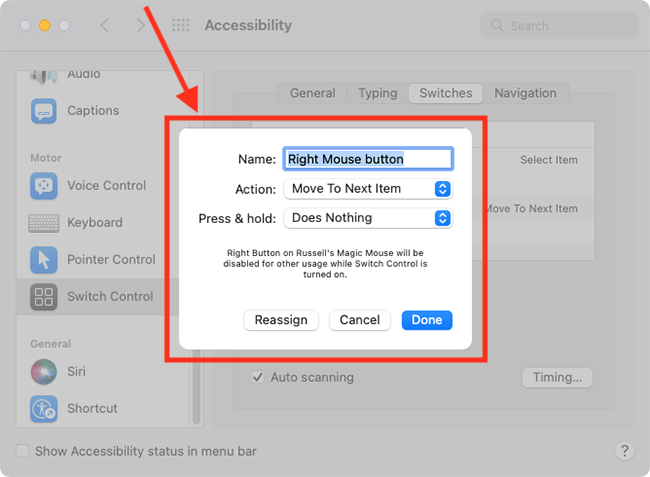
Change a switch
17. To change a switch, select a switch in the list, then click the Edit button.

18. On the pop-up menu, change the name or action. To use a different switch for the action, click Reassign and press your switch when prompted. Click Done to save your changes.
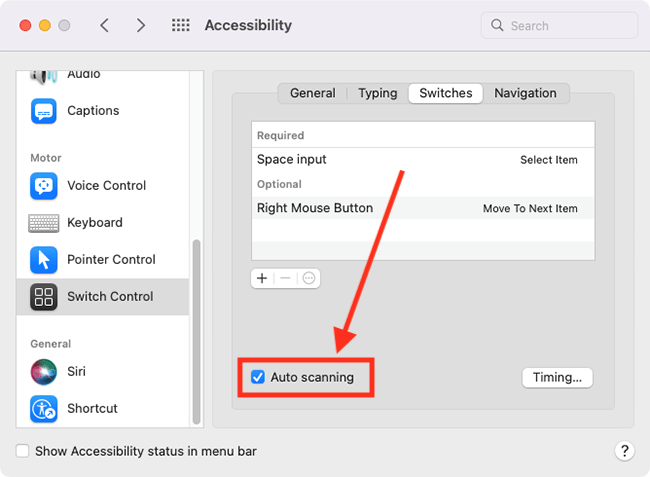
Turn off auto-scanning
19. If you have set up a switch to perform Move To Next Item, you can turn off auto-scanning and use that switch to move between items. If you would like to do this, untick the checkbox for Auto-scanning.
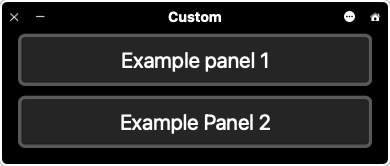
Create your own custom panels
20. Panels are customisable collections of buttons that perform various tasks on your computer, such as entering pre-written text, opening apps, running shortcuts, or performing advanced mouse actions.
For more information on creating your panels, see our guide How to create panels for using with Switch Control and the Accessibility Keyboard in macOS 12 Monterey.
Switch Control Settings
Open the Switch Control System Preferences window
21. Open the Switch Control System Preferences window as before - select Apple menu > System Preferences, click Accessibility, then click Switch Control in the sidebar.

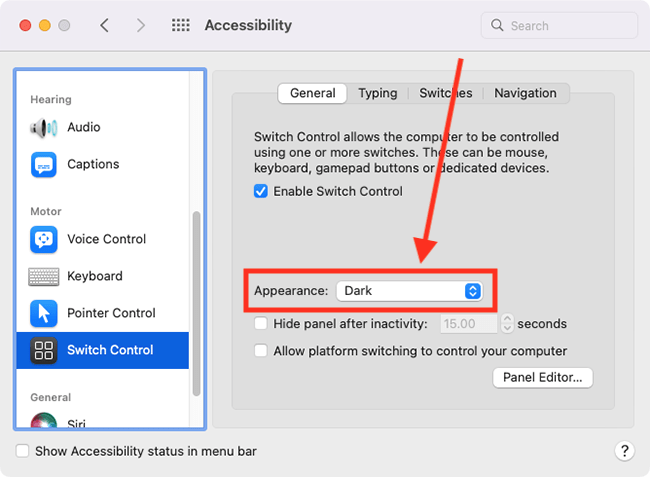
Appearance
(Under General)
22. By default, the Switch Control Panel is black, with white icons. To have black icons on a grey background, select the drop-down menu for Appearance and choose Light.
Hide the Panel after a period of inactivity
(Under General)
23. To automatically hide the Switch Control Panel when it is not in use, tick the checkbox for Hide panel after inactivity. Note: The panel will re-appear when you press a switch.

Control your computer using switches on another device
(Under General)
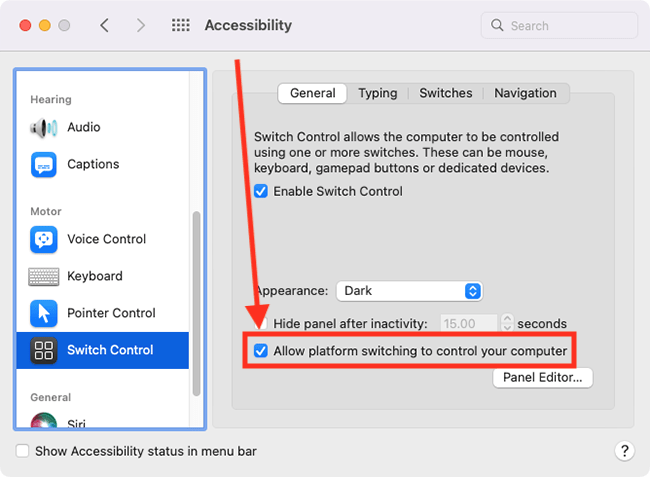
24. You can use another Apple device, such as an iPhone or iPad, that is already set up to use switches, to control your computer. To enable this, tick the checkbox for Allow platform switching to control your computer. You will be asked to enter your password to confirm this. Note: Your computer and the device you wish to control must be connected to the same Wi-Fi network and must be signed into the same iCloud account.
Typing settings
(under Typing)
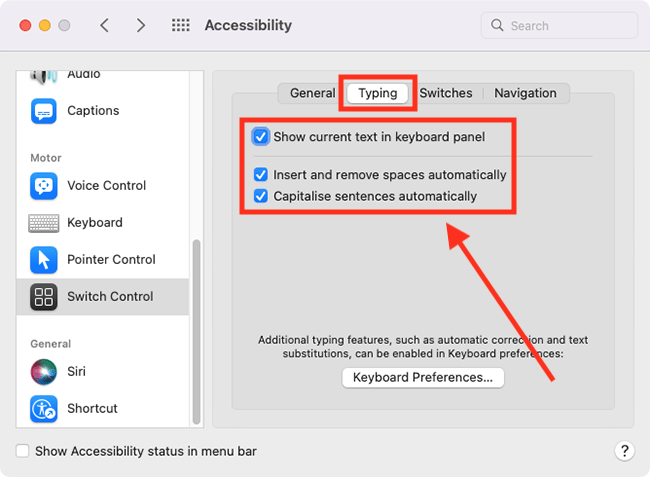
25. Some settings have been enabled to make it easier to use the on-screen keyboard. To change these settings, select the Tying tab and untick any of those you don’t wish to use:
- Show current text in keyboard panel – show the text you are typing at the top of the on-screen keyboard.
- Insert or remove spaces automatically – Switch Control will correct spacing after a full stop or between sentences.
- Capitalise sentences automatically – Switch Control will capitalise words based on context, for instance, capitalising the next word after a Full stop.
Customise Switch Control navigation settings
26. Select the Navigation tab. You can edit the following settings:
- While navigating – choose what feedback you receive when an item is highlighted during a scan. Choose from: Do nothing, Speak selection, Play Sounds, Speak & play sounds.
- Restart position – choose where to start from when you rescan an item. Choose from: After Cursor, From Start Of Group, From The Top.
- Auto scanning after select – by default, scanning pauses when an item is selected. You will need to press the Select Item switch again to resume scanning. If you set Auto scanning after select to Resume, scanning will resume as soon as the selected option loads.
- When pointer reaches edge – choose what should happen when the pointer meets the edge of the screen. Choose from Do nothing and Bounce Back.
- Switch Control cursor size – by default, a thin rectangular border is shown around the currently selectable item. To make the border easier to see, select the drop-down menu and choose Medium or Large.
- Pointer precision – select High to slow down the moving blue lines used to position the pointer when you use Move or Move and Click. This makes it easier to accurately position the lines.
- Loops – by default, Switch Control scans a panel, group, or window twice before stopping if an item isn’t selected. You can choose up to 10 loops.

Open timing settings
27. To change the timing settings, select the Timing button.

Change timing settings
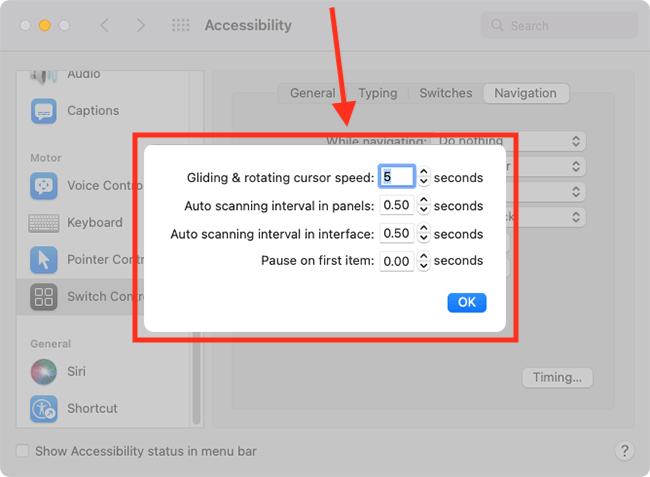
28. You can change the settings for:
- Gliding & rotating cursor speed – The speed that the blocks and blue lines move across the screen when positioning the pointer.
- Auto scanning interval in panels – The number of seconds it takes to move from one item to another in a panel when using auto-scan.
- Auto scanning interval in interface – The number of seconds it takes to move from one item to another in the user interface when using auto-scan.
- Pause on first item – the number of seconds auto-scanning stays on the first item in a panel, group, or user interface before scanning begins.
Close System Preferences
29. When you are happy with your settings, close System Preferences by clicking the Close button (red circle) in the top-left corner of the window or using the Cmd + W keyboard shortcut.
Note: If this does not work it could be because your computer settings are managed by someone else (an IT department or administrator for example). If so, you will need to contact them to access these settings or for help.
Need some more help?
Call our helpline 0300 180 0028 or email enquiries@abilitynet.org.uk
Need free IT Support at Home?
If you are older or disabled and need IT support at home, you can book a free home visit.