Short guide
- Open the Accessibility settings by pressing the Windows key + U.
- Click on the toggle switch for Colour filters to turn it on.
- To switch to a different filter, click on the radio button to the left of it.
- Click the toggle switch for Keyboard shortcut for colour filters to turn it on.
Before and after
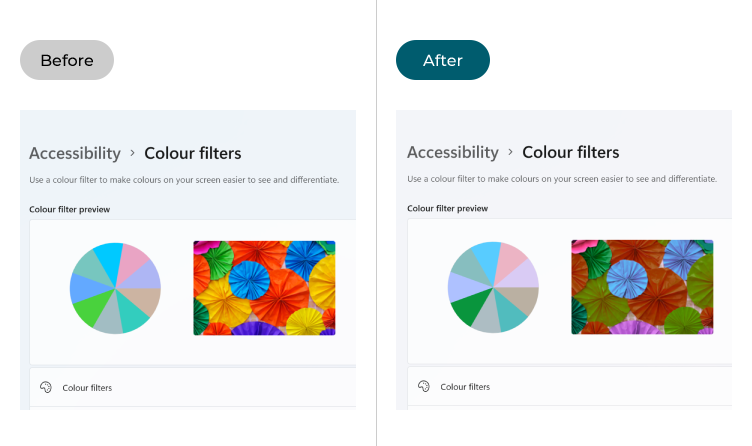
This section explains how to select and enable colour filters in Windows 11. This is a step-by-step guide with pictures of the screens to help.
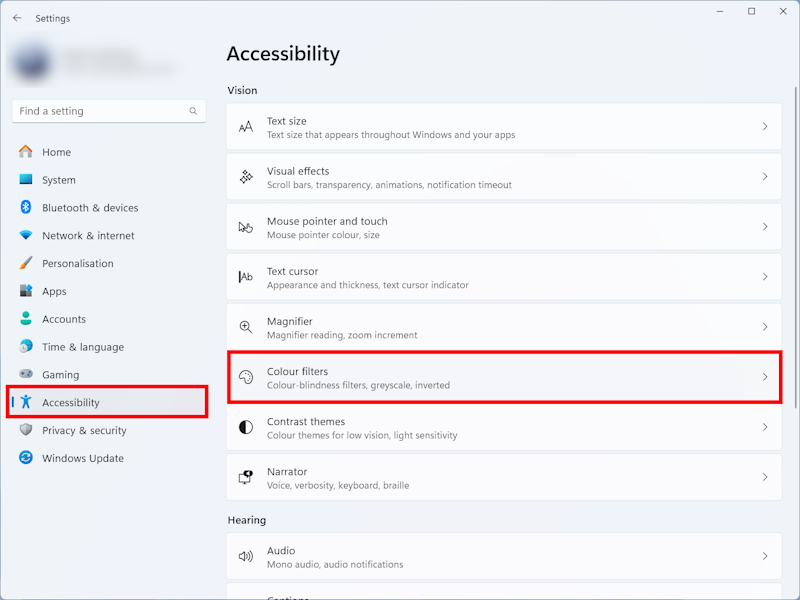
Open the Accessibility settings
1. Open the Accessibility settings by pressing the Windows key + U or clicking Start > Settings > Accessibility. Click on Colour filters in the Vision section on the right.
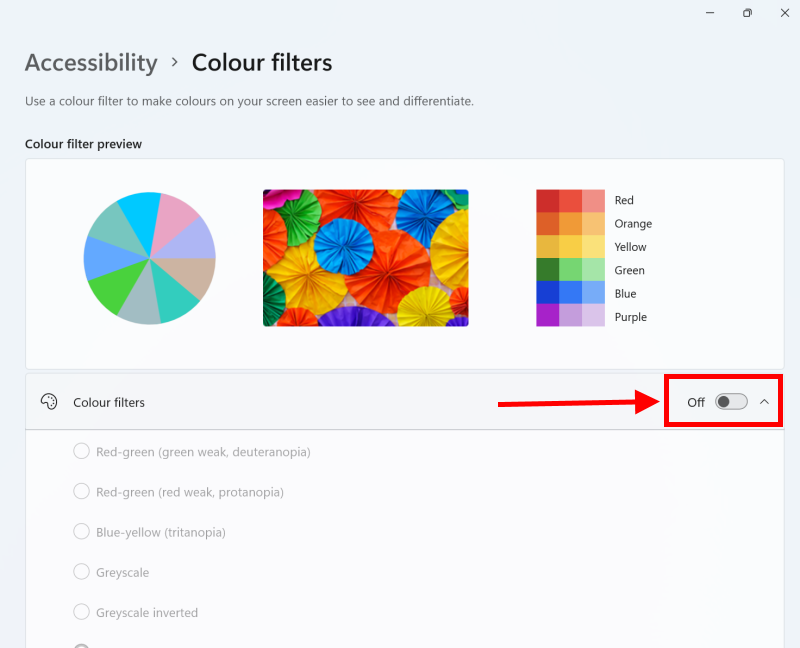
Enable colour filters
2. In the Colour filters window, click on the toggle switch for Colour filters to turn it on.
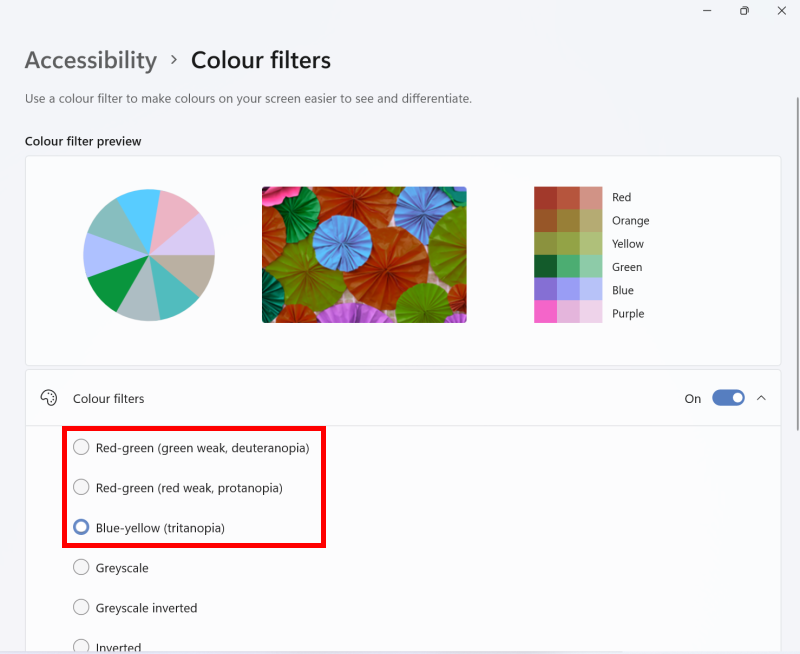
Switching between filters
3. By default, Windows turns on the red/green filter for deuteranopia. To switch to a different filter, click on the circular radio button to the left of it. The preview at the top of the window will change to reflect the effects of the new filter.
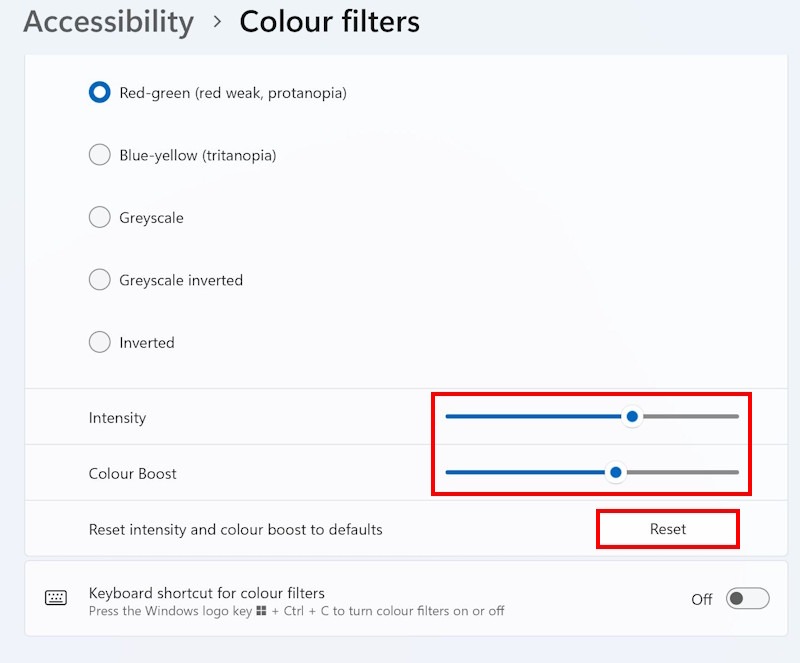
Adjust the intensity and boost
4. If you find the effect of the colour filter too weak or too strong, you can adjust it to suit your vision. Scroll down below the filter types to find the Intensity and Colour Boost sliders. Move the sliders to the left or right until the image on your screen looks right to you. Click Reset if you want to return to the original settings.
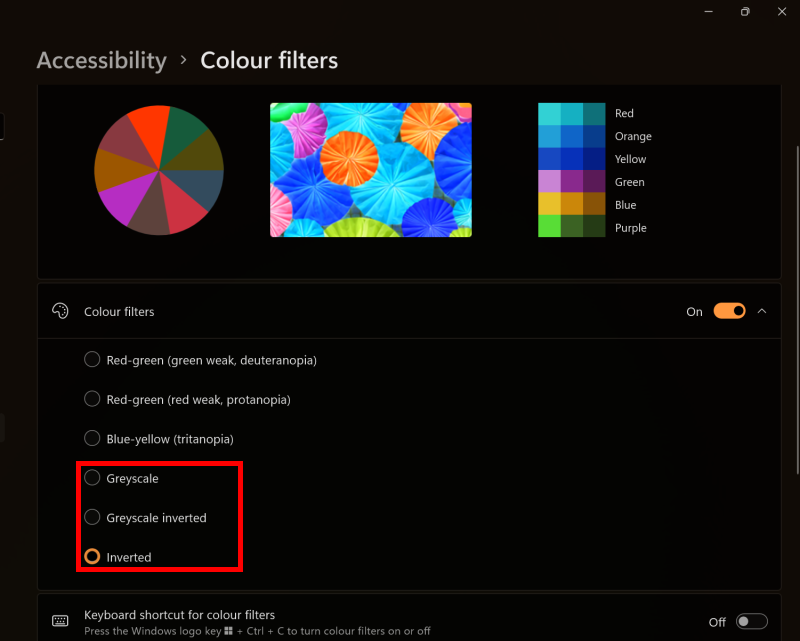
Selecting Greyscale and Inverted filters
5. Below the colour blindness filters, you’ll also find filters that turn the colour image to greyscale and invert the standard colours. These can make the screen easier to read for some users in some applications.
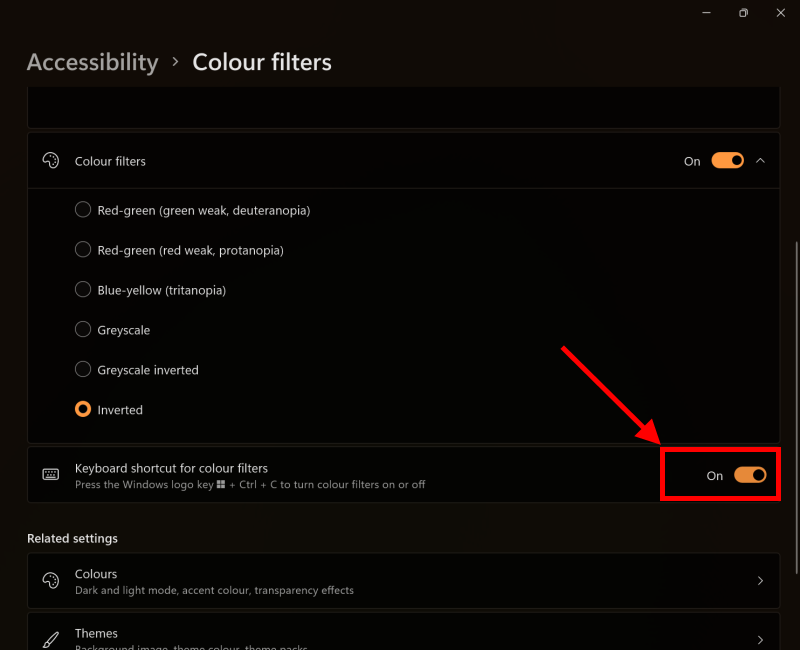
Turn on the keyboard shortcut
6. To enable quick switching between normal colours and filtered colours, click the toggle switch for Keyboard shortcut for colour filters to turn it on. You can now switch your chosen filter on and off by pressing the Windows key + Ctrl + C.
Note: If this does not work it could be because your computer settings are managed by someone else (an IT department or administrator for example) in which case you will need to contact them to access these settings or for further help.
Need some more help?
Call our helpline 0300 180 0028 or email enquiries@abilitynet.org.uk
Need free IT Support at Home?
If you are older or disabled and need IT support at home, you can book a free home visit.