Short guide
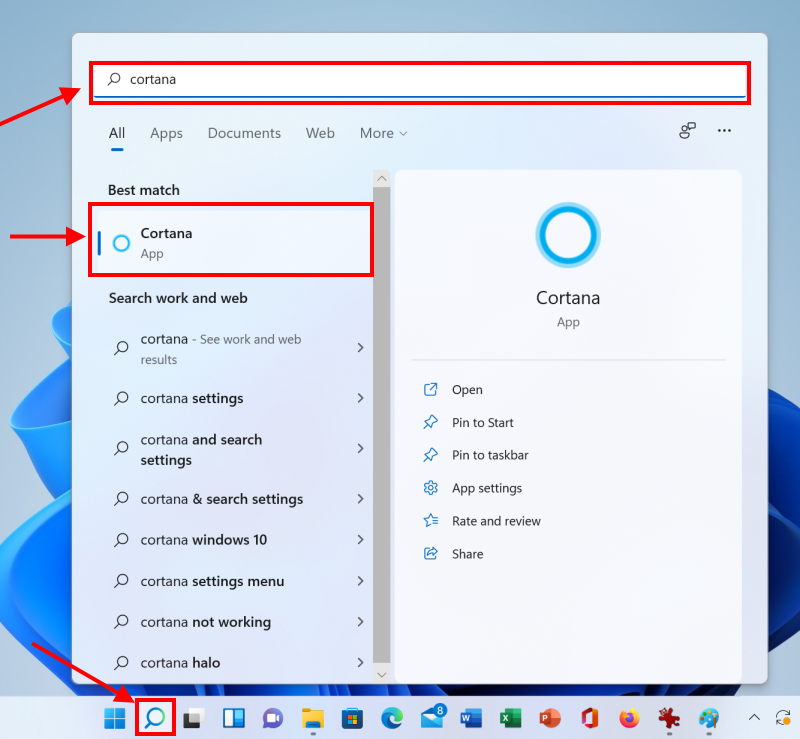
- Click the Search icon on the taskbar and type "cortana" into the search box. Press the Enter key and select the Cortana app.
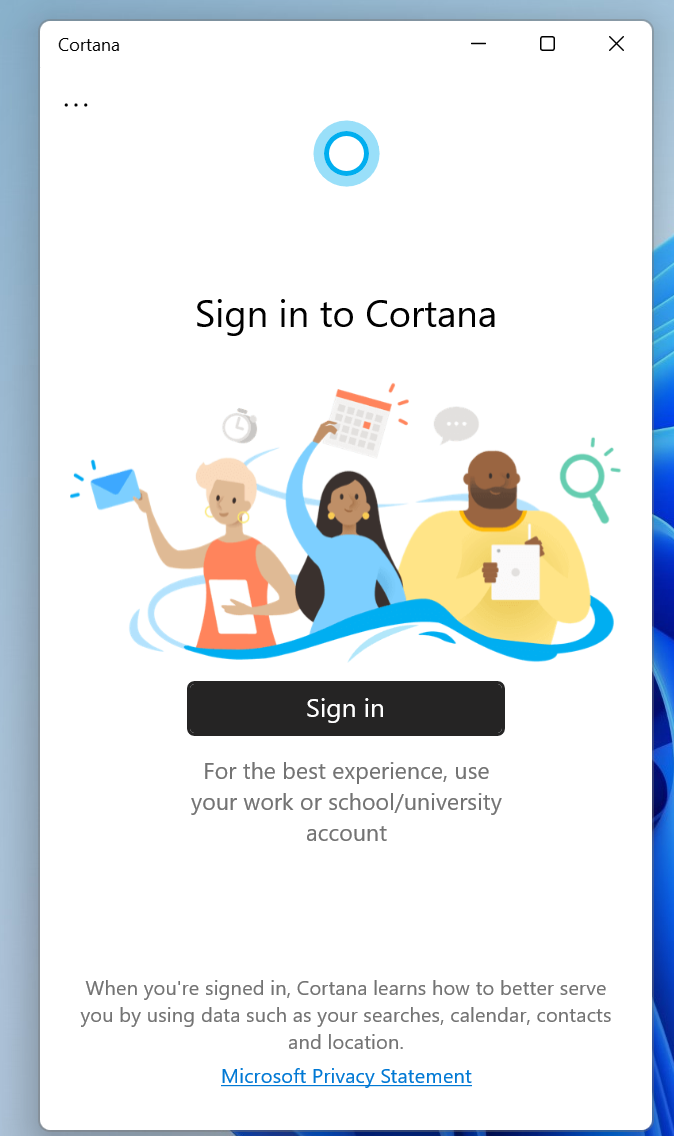
- Click Sign in, select your Microsoft account and click Continue.
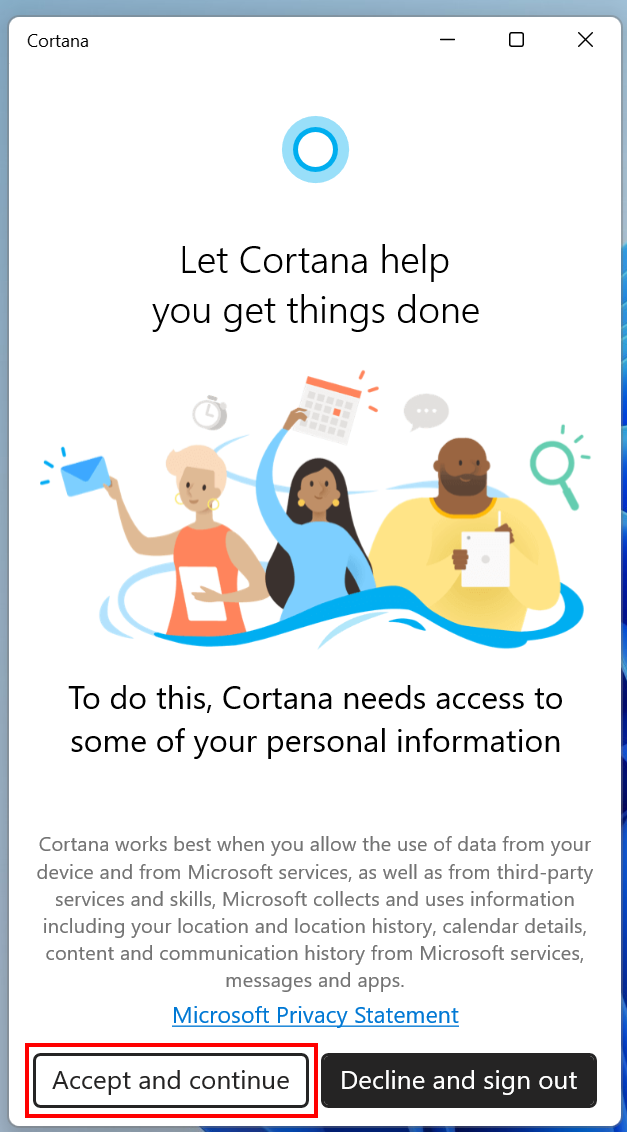
- Click Accept and continue. Cortana should be ready to use. Type enquiries and press Enter, or click the microphone button in the bottom right of the Cortana window to use speech.
- To get Cortana to respond to voice activation, click the Options button in the top left corner of the Cortana window. Click Settings, then Voice activation.
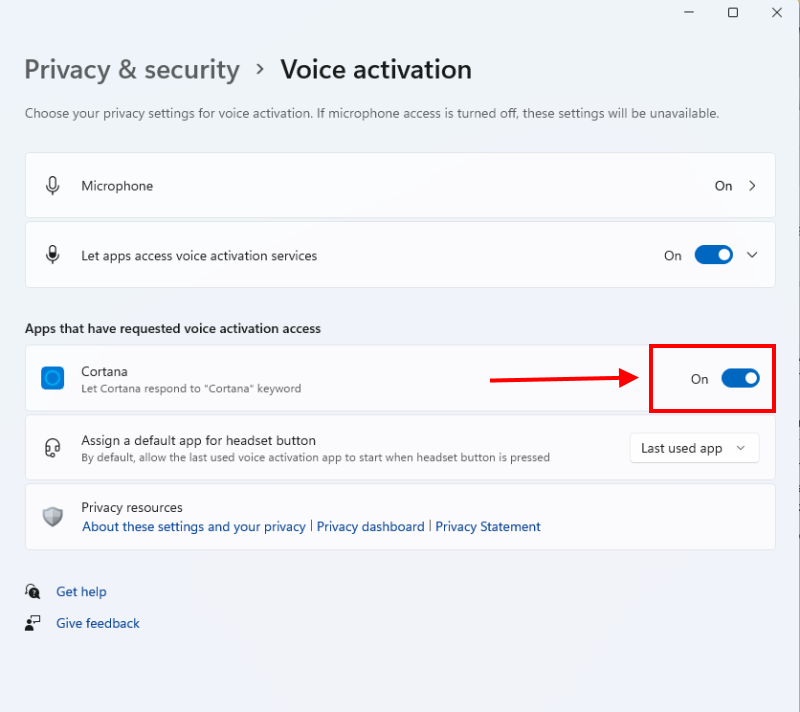
- Click the Voice activation privacy settings link, then click the toggle switch for Cortana to turn it on.
Before and after
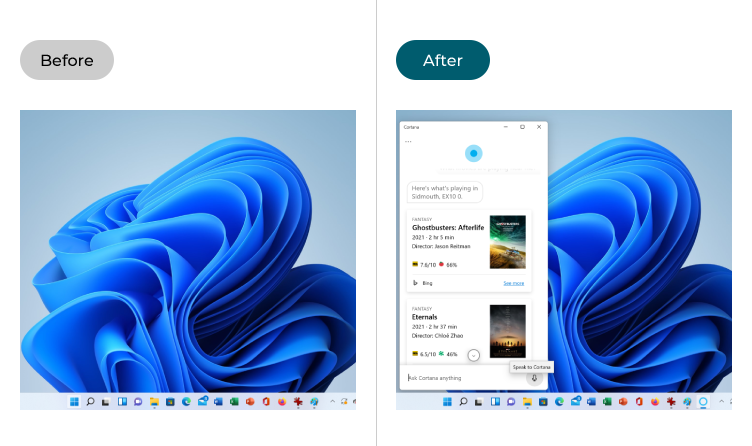
This section explains how to enable and use Cortana in Windows 11. This is a step-by-step guide with pictures of the screens to help.
Find Cortana
1. There’s no Cortana icon on the Windows 11 taskbar, so the easiest way to find Cortana is through search. Click the Search icon on the taskbar and type "Cortana" into the search box. Press the Enter key and select the Cortana app from the search results.
Sign-in to Cortana
2. Before you can use Cortana you need to sign in with a Microsoft account. If you already use one for logging into Windows, click Sign in, select your account and click Continue.
Finish sign-in
3. Cortana may need access to some of your personal information to work. Click Accept and continue if you’re happy with this, or click Decline and sign out.
Asking questions
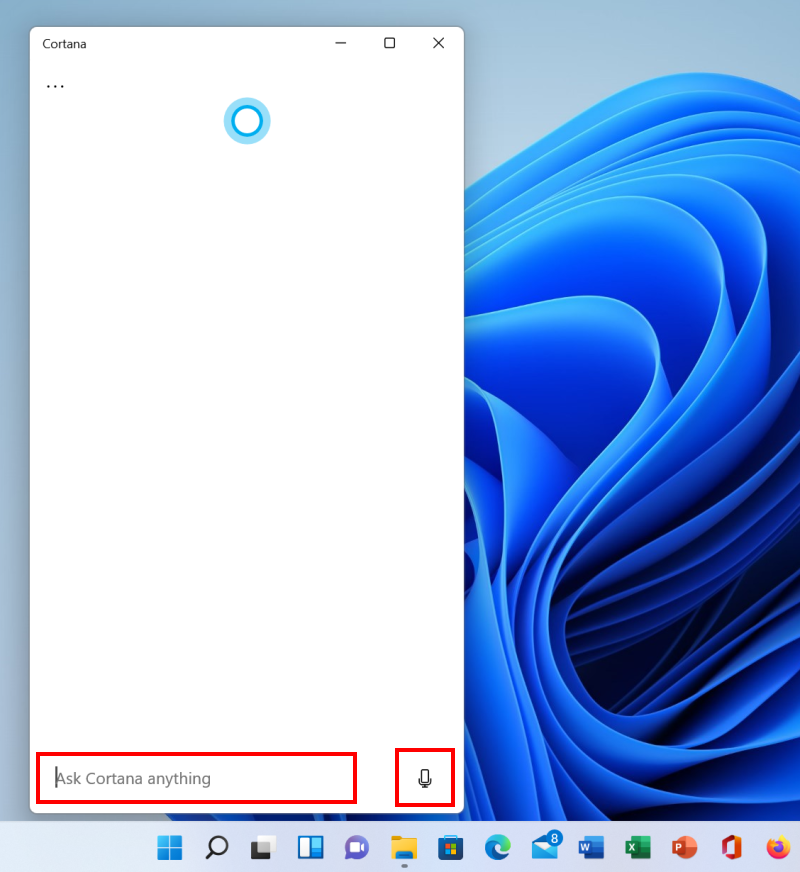
4. Cortana should now be ready to use. You can type enquiries and press the Enter key, or click the Microphone button in the bottom right of the Cortana window and ask Cortana questions using speech.
Getting news and weather
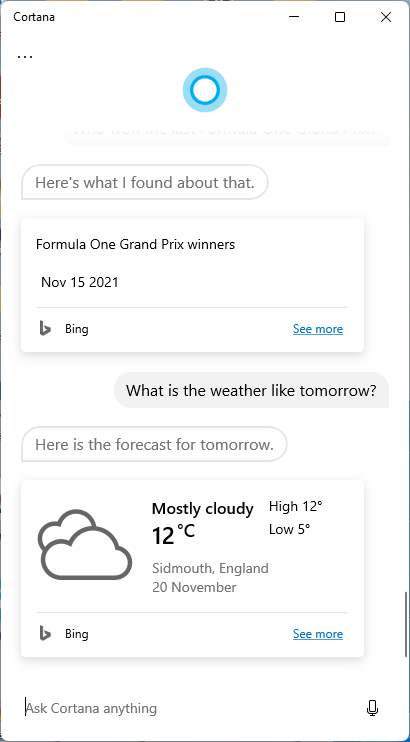
5. Cortana can’t do as much in Windows 11 as it could in Windows 10. You can’t add appointments to your calendar, send emails or ask for reminders. However, you can ask Cortana for news or weather information, or ask a question and get pointed to an answer from the Web.
Ask for local information
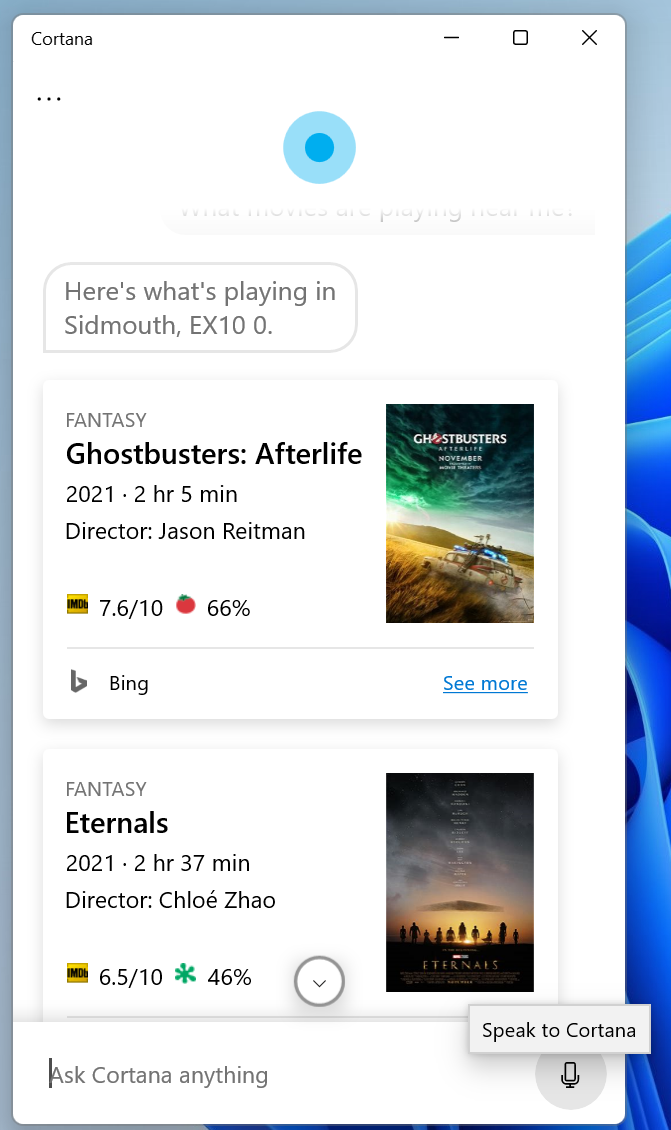
6. You can also get useful local information, including details on nearby restaurants or on films playing at cinemas nearby. Cortana will also respond to silly questions and can even tell a joke.
Enabling voice activation
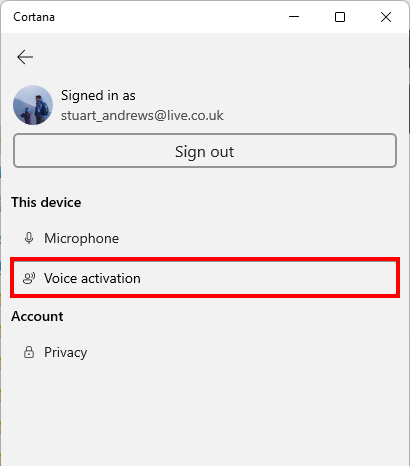
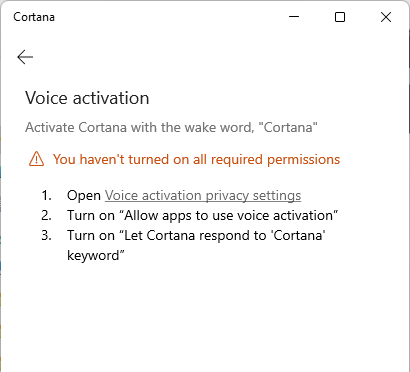
7. To get Cortana to respond to voice activation, click the Options button in the top left corner of the Cortana window. Click Settings, then Voice activation.
Find the privacy settings
8. Cortana will warn you that you haven’t turned on all required permissions. Click the Voice activation privacy settings link.
Turn voice activation on
9. Click the toggle switch for Cortana to turn it on. Cortana will now listen for the "Cortana" keyword and launch Cortana if you say it within range of a connected microphone.
Note: If this does not work it could be because your computer settings are managed by someone else (an IT department or administrator for example) in which case you will need to contact them to access these settings or for further help.