You can also use facial expressions to replace mouse clicks and other actions. To find out how see How to set up pointer actions in macOS
Short guide:
- Click the Apple icon in the top left corner of the screen, then System Preferences.
- Click the Accessibility icon in the System Preferences window.
- Scroll down the list on the left-hand side and select Pointer Control.
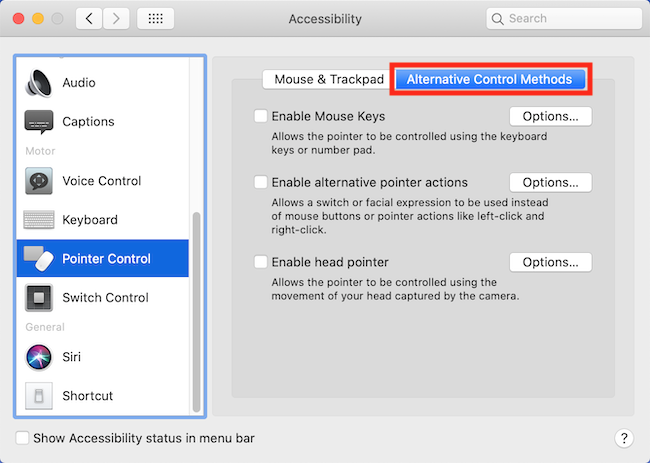
- Click Alternative Control Methods on the right.
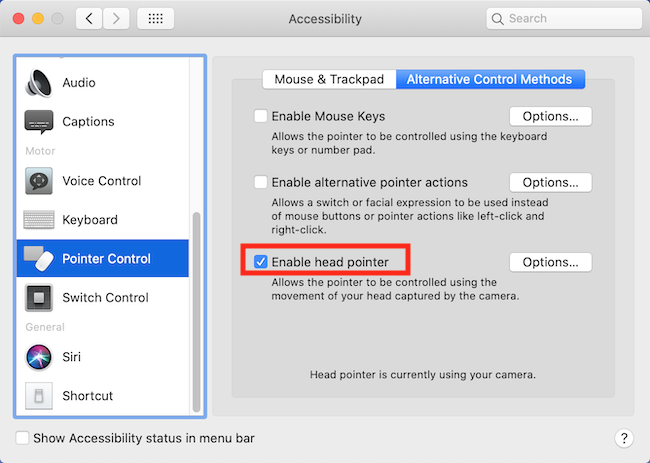
- Move to the right column and tick the checkbox for Enable head pointer.
Before and after
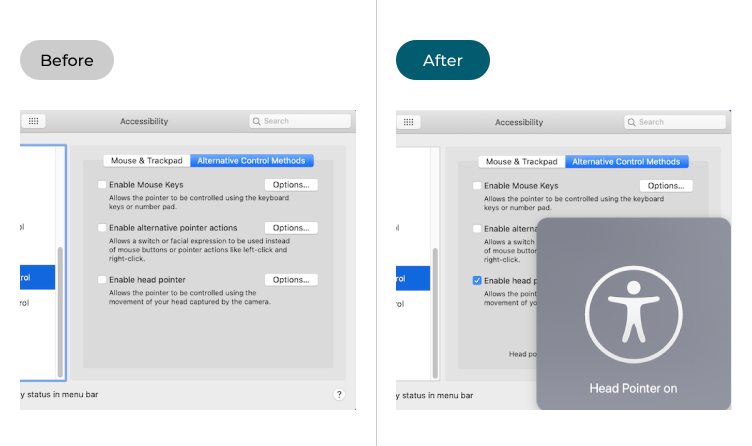
This section takes you through each step in enabling the head pointer in macOS, with pictures of the screens to help you.
Launch system preferences
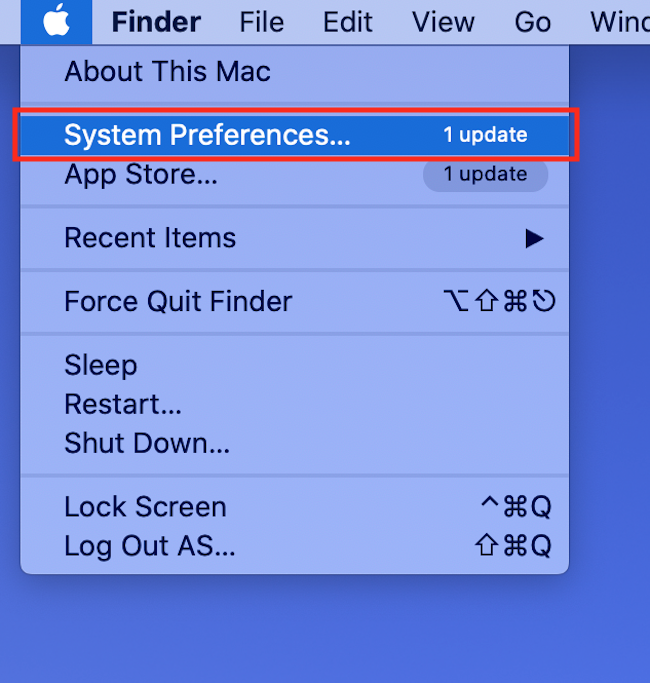
1. Click the Apple icon ![]() in the top left corner of the screen, then select System Preferences.
in the top left corner of the screen, then select System Preferences.
Open the Accessibility preferences
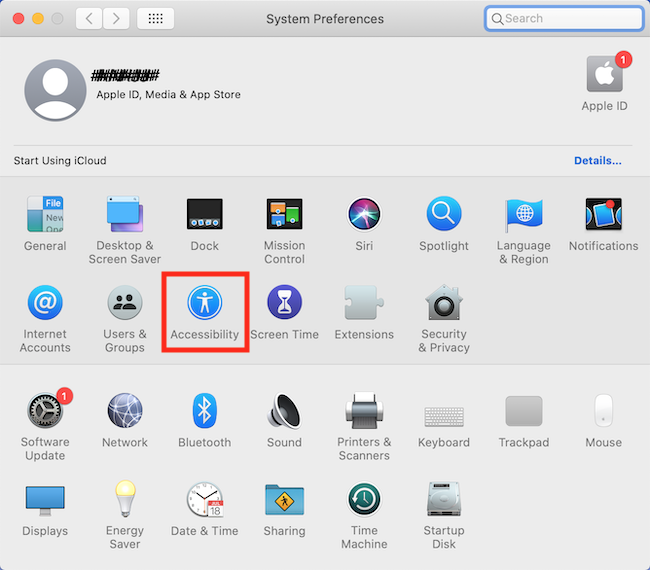
2. Click the Accessibility icon In the System Preferences window.
Select Pointer Control
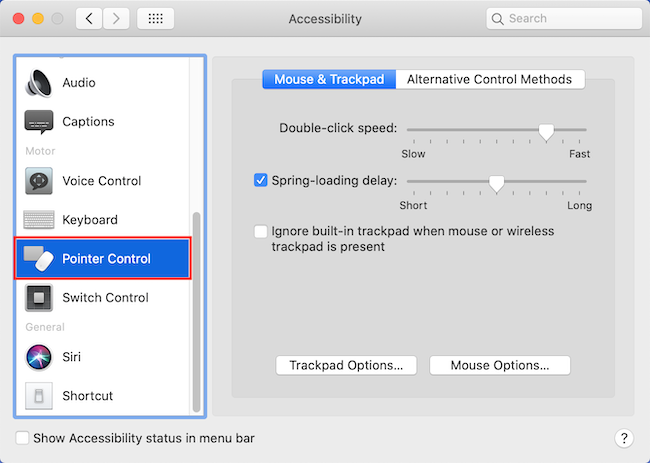
3. In the Accessibility window, scroll down the list on the left-hand side and select Pointer Control.
Click Alternative Control Methods
4. Click the Alternative Control Methods tab on the right.
Enable the head pointer
5. Now look at the three options below and click the checkbox next to Enable head pointer.
Change the head pointer settings
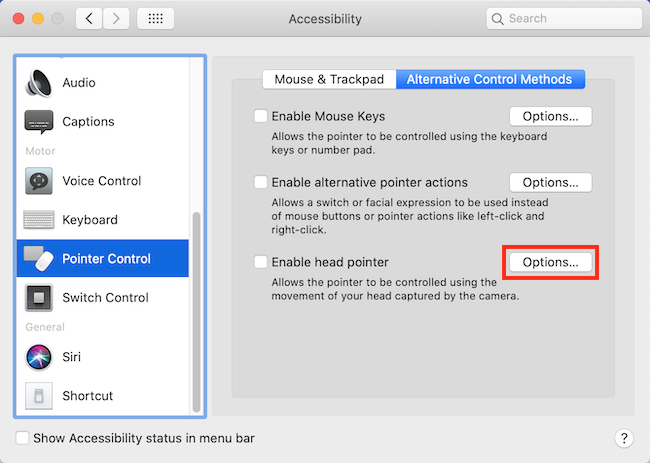
6. The head pointer has some useful settings that adjust how it behaves. To access these, click the Options button opposite Enable head pointer.
Enable the pause switch
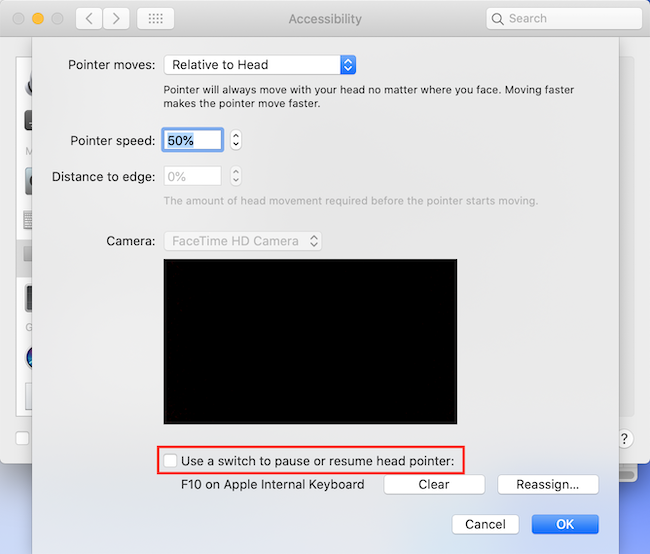
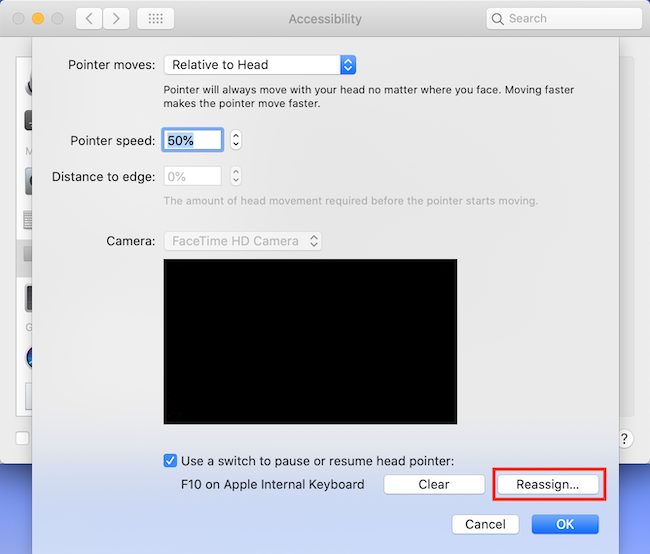
7. You can use a keyboard switch to pause and resume using the head pointer. To enable this, click the checkbox next to Use a switch to pause or resume head pointer.
Change the switch key
8. To change which key pauses and resumes the head pointer, click the Reassign button on the right and tap a new key. This will be the key you use in future to pause and resume using the head pointer feature.
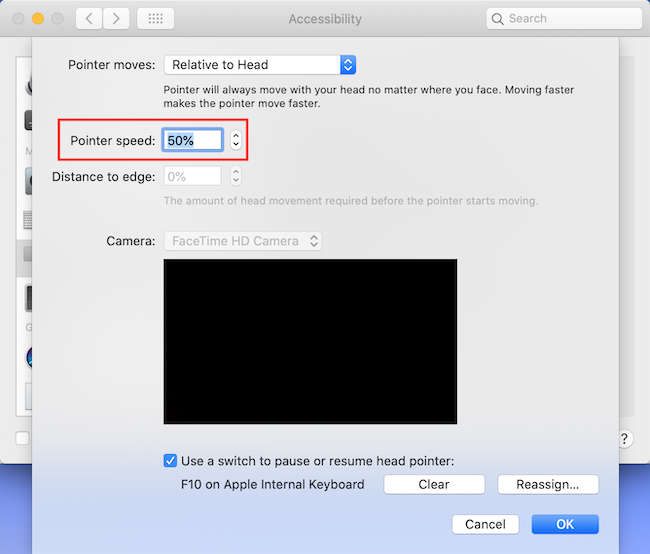
Change the pointer speed
9. To change the pointer speed and make it move faster or slower, increase or decrease the value in the Pointer speed box. Click OK when you're finished.
Note: If this does not work it could be because your computer settings are managed by someone else (an IT department or administrator for example). If this is the case, you will need to contact them to access these settings or for further help.