Short guide:
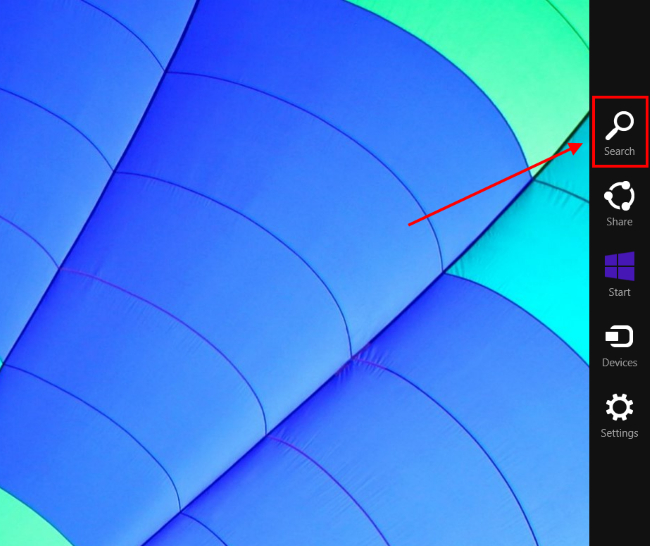
- Open the Ease of Access Center by pressing the Windows key + U. On touchscreen devices, swipe in from the right-hand side of the screen and tap the Search charm. Enter Ease of Access and select the Ease of Access Center from the search results.
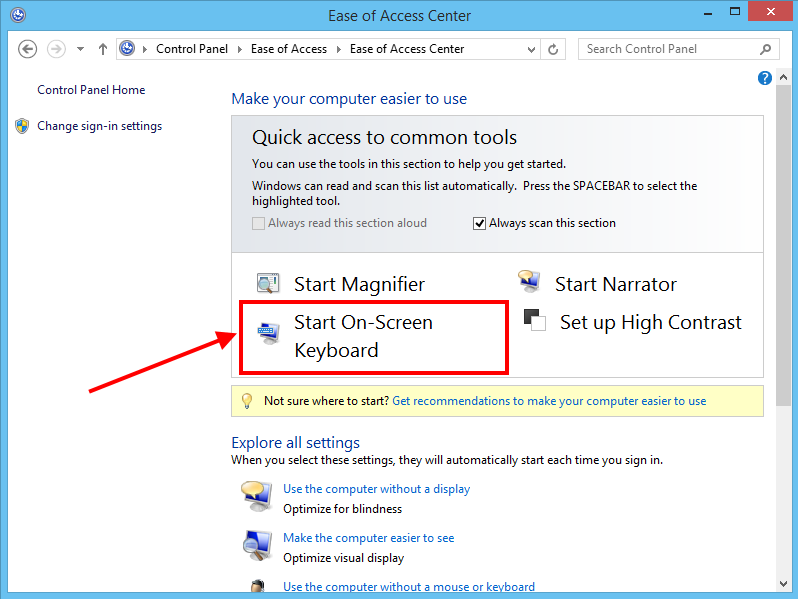
- Click or tap Start On-Screen Keyboard to enable the on-screen keyboard temporarily.
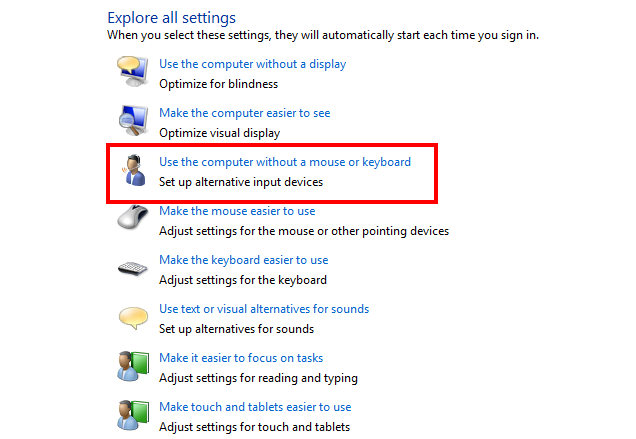
- If you want the on-screen keyboard to open automatically when you start Windows or log-in, scroll down to Explore all settings and click Use the computer without a mouse or keyboard.
- Tick the checkbox next to Use On-Screen Keyboard.
Before and after
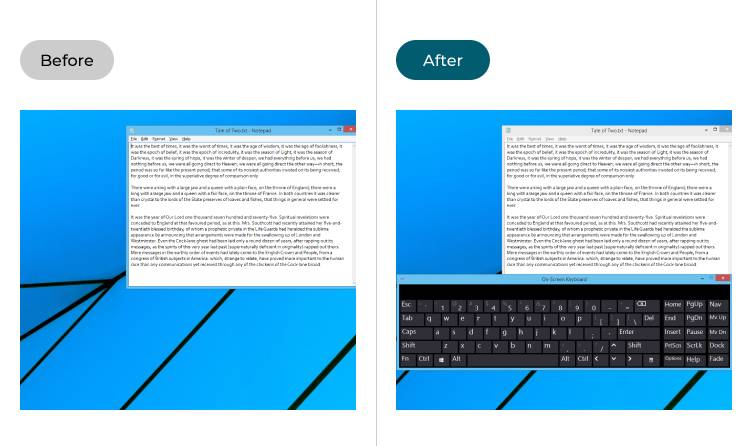
This section takes you through the steps involved in enabling the on-screen keyboard in Windows 8. This is a step-by-step guide with pictures of the screens to help you.
Open the Ease of Access Center
1. Open the Ease of Access Center by pressing the Windows key ![]() + U. On touchscreen devices, swipe in from the right-hand side of the screen and tap the Search charm. Enter Ease of Access and select the Ease of Access Center from the search results.
+ U. On touchscreen devices, swipe in from the right-hand side of the screen and tap the Search charm. Enter Ease of Access and select the Ease of Access Center from the search results.
Start the on-screen keyboard
2. Click or tap Start On-Screen Keyboard to enable it temporarily.
Launch the on-screen keyboard automatically
3. If you want the on-screen keyboard to open automatically when you start Windows or log-in, scroll down to Explore all settings and click or tap Use the computer without a mouse or keyboard.
Enable Use On-Screen Keyboard
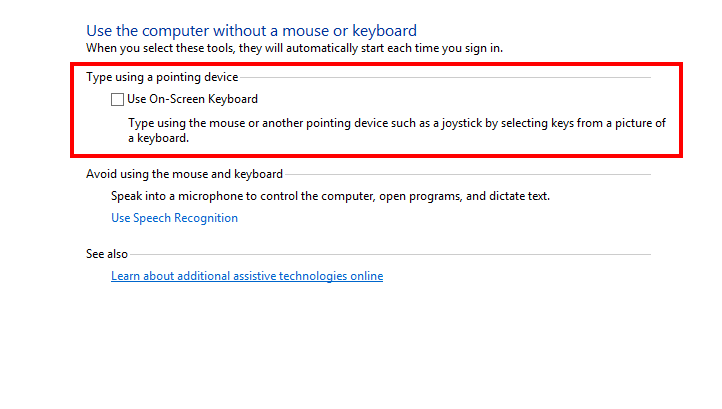
4. Look under Type using a pointing device and tick the checkbox next to Use On-Screen Keyboard.
Change the keyboard's settings
5. Once the on-screen keyboard is active, you can change its settings by clicking or tapping on the Options key in the bottom row of keys, next to the Help key.

Enable Text Prediction
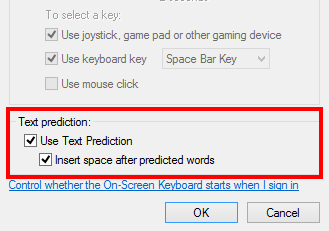
6. To enable text prediction, look under Text prediction and tick the checkbox next to Use text prediction. You can also tick the checkbox next to Insert space after predicted words to get a space added after every word.
Using Hover over keys
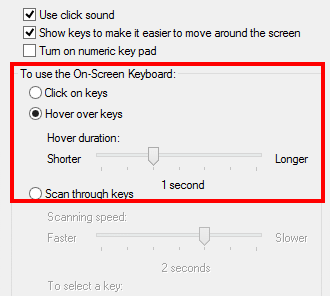
7. By default, you type with the on-screen keyboard by clicking or tapping on a key, but you can also opt to type by hovering over a key with the mouse pointer. To enable this, click the button next to Hover over keys. You can set how long you have to hover before the key is pressed by moving the Hover duration slider.
Using Scan through keys
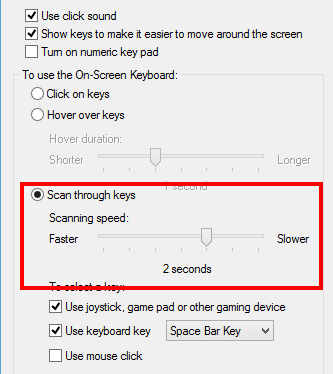
8. Alternatively, you can set Windows to scan through the keys, so that you select a key by pressing a key or button when the key you want is highlighted. Click or tap the button next to Scan through keys to activate this option, and use the slider underneath to adjust the Scanning speed.
Finalise your settings
9. When you've finished changing settings, click OK to go back to using Windows.
Note: If this does not work it could be because someone else manages your computer settings (an IT department or administrator). If this is the case, you will need to contact them to access these settings or for further help.