Short guide
- Click the Time widget in the bottom-right corner to open the Quick Settings menu.
- Click on the Settings icon to open the Settings window.
- Select Accessibility from the left-hand column, then click Display and magnification on the right.
- Click the toggle switch next to either Full-screen magnifier or Docked magnifier to switch your preferred option on.
- To change the level of magnification when the magnifier opens, click the drop-down menu next to Zoom level. Select one of the preset options or choose Custom to set your own level.
- You can quickly increase the magnification level by pressing Ctrl + Alt + Brightness up or decrease it by pressing Ctrl + Alt + Brightness down. To move around the screen in full magnification mode, just move the pointer to the edge of the screen.
Before and after

Video guide
This section will take you step-by-step through the process of enabling the screen magnifier, complete with pictures of the screens to help you.
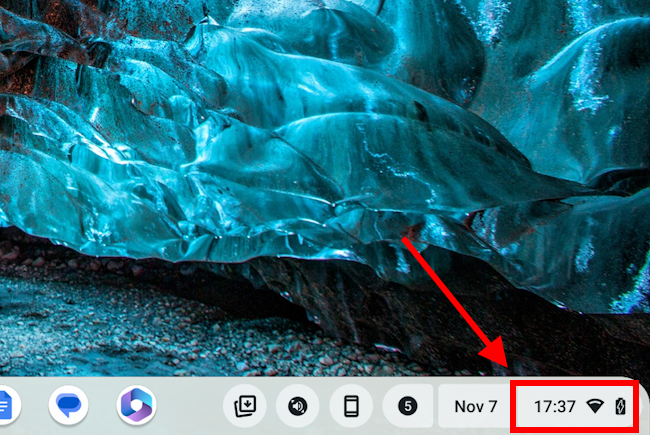
Open the System menu
1. To access the Accessibility features on your Chromebook, click the Time widget in the bottom-right corner to open the Quick Settings menu.
Open Settings
2. Click on the Settings icon ![]() to open the Settings window.
to open the Settings window.

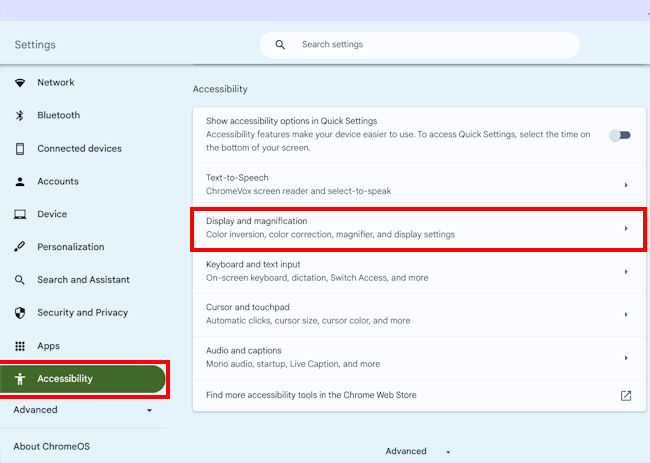
Find the Display and magnification settings
3. Once the Settings window opens, select Accessibility from the left-hand column.Click Display and magnification in the right-hand panel.
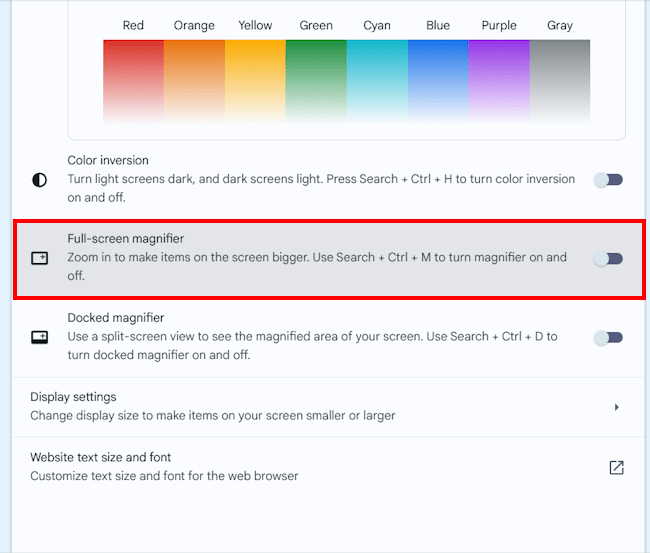
Enable the screen magnifier
4. Click the toggle switch next to either Full-screen magnifier or Docked magnifier to switch your preferred option to On.
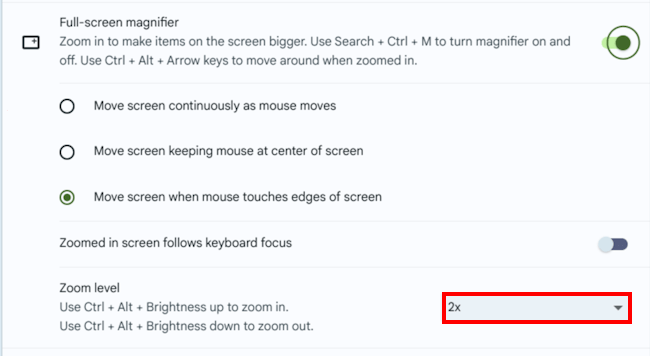
Change the level of magnification
5. To change the level of magnification when the magnifier opens, click the drop-down menu next to Zoom level. Select one of the preset options or choose Custom to set your own level.
Using the magnifier
6. You can quickly increase the magnification level by pressing Ctrl + Alt + Brightness up ![]() or decrease it by pressing Ctrl + Alt + Brightness down
or decrease it by pressing Ctrl + Alt + Brightness down ![]() . To move around the screen in full magnification mode, just move the pointer to the edge of the screen. The Docked magnifier provides a magnified view of the area underneath the cursor, or where the keyboard is currently active.
. To move around the screen in full magnification mode, just move the pointer to the edge of the screen. The Docked magnifier provides a magnified view of the area underneath the cursor, or where the keyboard is currently active.
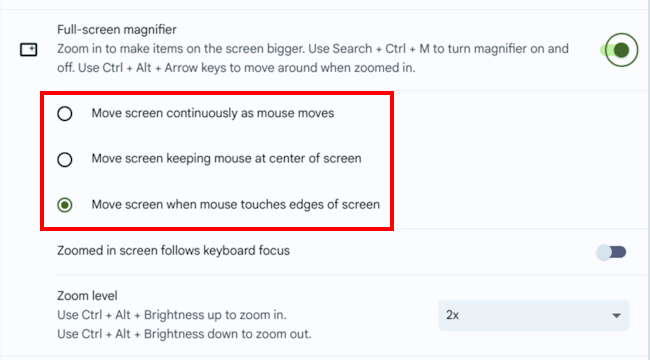
Change how the full-screen magnifier behaves
7. You can adjust how the Full-screen magnifier behaves using the options underneath. By default the view moves when the mouse touches the edge of the screen, but you can also have it move continuously to follow the mouse, or move the view with the pointer always in the centre of the screen.
Need some more help?
Call our helpline 0300 180 0028 or email enquiries@abilitynet.org.uk
Need free IT Support at Home?
If you are older or disabled and need IT support at home, you can book a free home visit.