In this guide we’ll look at how to use Voice Typing. Microsoft has now removed Windows Speech Recogntion from the latest version of Windows 11 so it makes sense to start using Voice typing instead.
Note: You can use Voice Typing using your laptop's built-in microphone, but if you have trouble getting your commands recognised then switching to a USB microphone or headset can help. You will also need a USB microphone or headset if you use a desktop PC.
Short guide
- Click anywhere where you would enter text and press the Windows key + H. If you have the Voice typing launcher open, click the microphone button.
- Voice typing will transcribe everything you say into text until you click the microphone button again or press the Windows key + H.
- Click the Settings button on the launcher. Click the toggle switch for Voice typing launcher to make it appear automatically, or the toggle switch for Auto punctuation.
Before and after
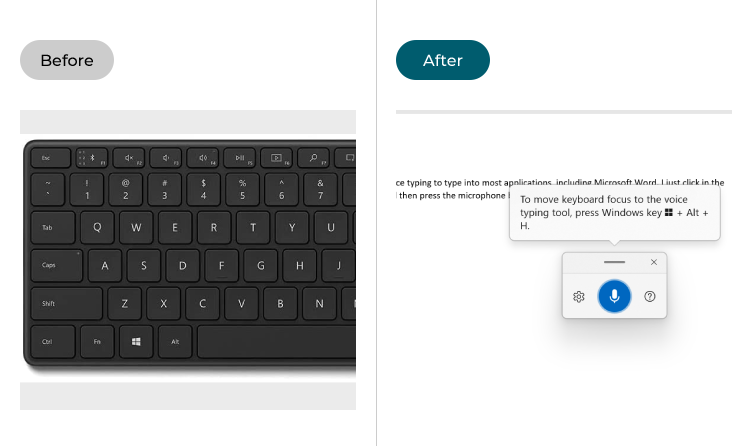
This section explains how to use Voice Typing in Windows 11. This is a step-by-step guide with pictures of the screens to help.
Start Voice Typing
1. To start Voice Typing, click anywhere where you would enter text, including a search box, text field, the Notepad app or a Microsoft Word document. Press the Windows key + H.
Click the Microphone button
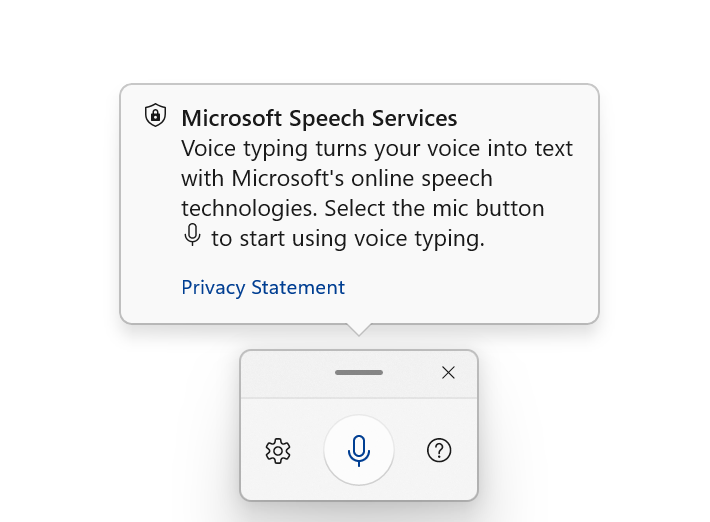
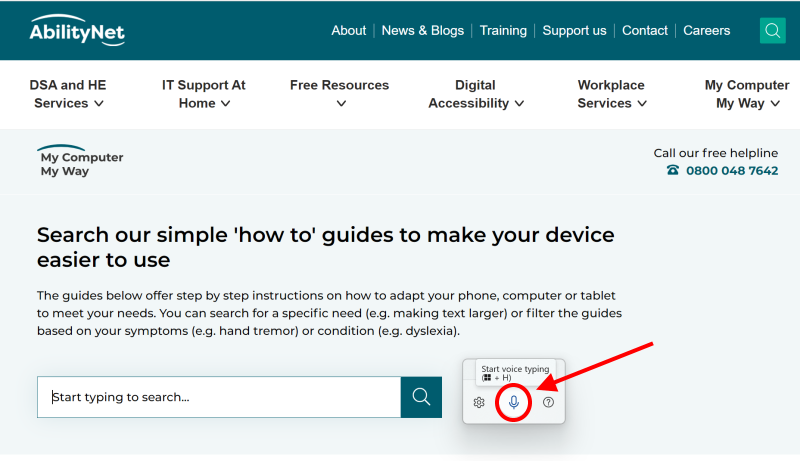
2. You’ll see a message when you first launch the tool, but click the microphone button to start entering text. The button will turn blue to show that Voice typing is active.
Turning speech to text
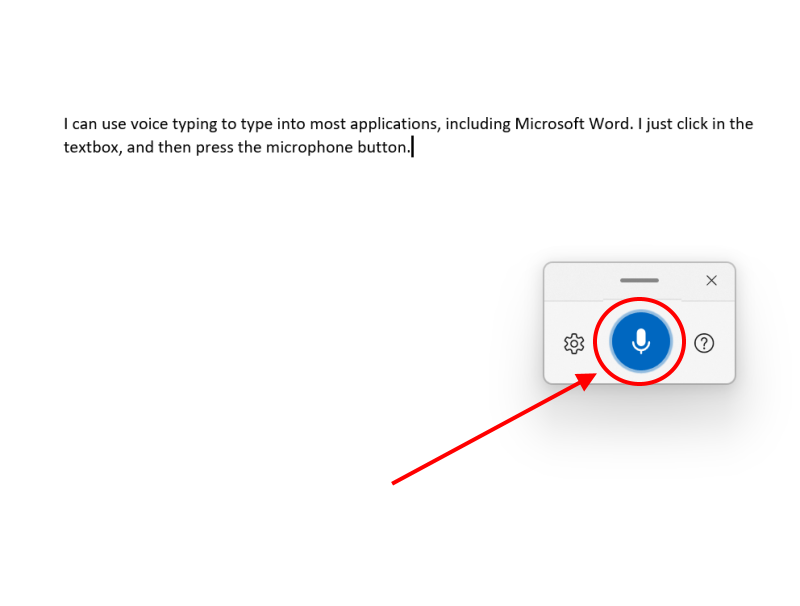
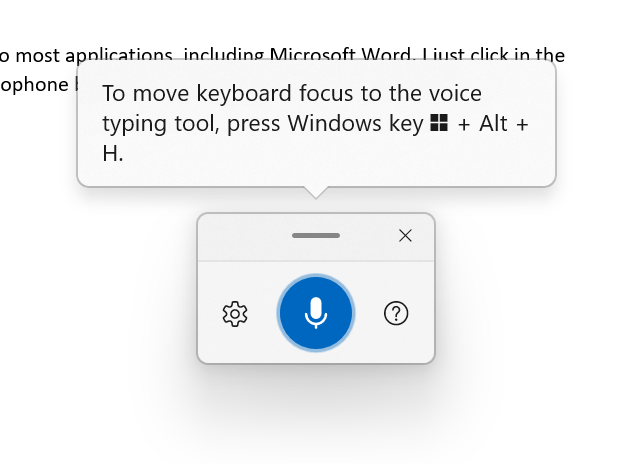
3. Voice typing will transcribe everything you say into text until you click the microphone button again or press the Windows key + H. To focus on the window or area where you’re using Voice typing, press the Windows key + Alt + H.
Where to use Voice Typing
4. You can use Voice typing almost anywhere where you can enter text, including search engines, the browser address bar or search features on websites like this one.
Change the settings
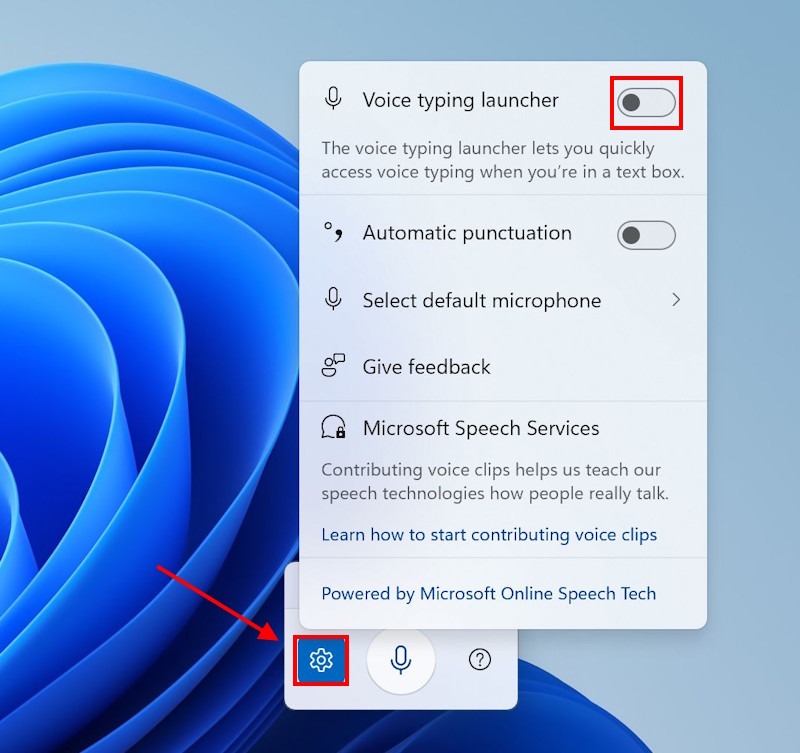
5. To access the tool’s settings, click the Settings button on the launcher. Click the toggle switch for Voice typing launcher if you want it to appear whenever you click in a text box or on a document.
Enable automatic punctuation
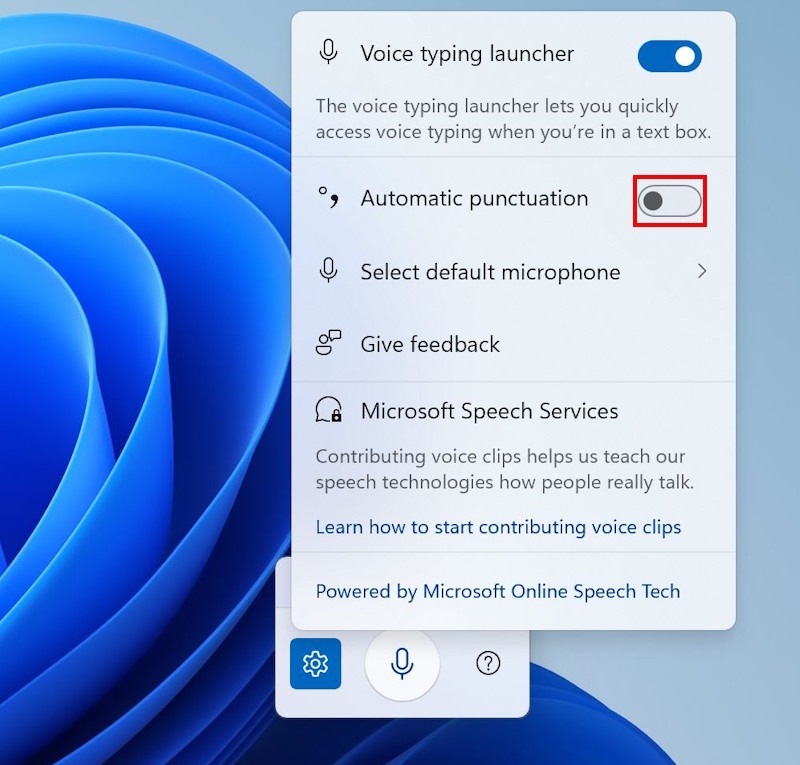
6. Click the toggle switch for Automatic punctuation to have the tool punctuate your text automatically as you speak. It will add commas, full stops and other punctuation marks according to basic grammar rules and the length of any pause in your voice typing.
Note: If this does not work it could be because your computer settings are managed by someone else (an IT department or administrator for example) in which case you will need to contact them to access these settings or for further help.