This article also includes step by step instructions for enabling the ‘Speech’ settings in order to use ‘text-to-speech’. ‘Text-to-speech’ gives you the ability to have any selected text read aloud as well as spoken announcements of alerts.
Terminology:
‘Alt’ refers to the ‘Option’ key ( ⌥ )
If you have enabled ‘Use F1, F2, etc. keys as standard function keys’ under ‘Keyboard’ settings in ‘System Preferences’ then omit the ‘Fn’ key from the keyboard shortcuts shown in this article.
This article is split into two sections:
Enabling ‘VoiceOver’:
- Open the ‘Apple Menu’ by clicking on the Apple icon (
 ) in the Menu Bar, or press ‘Fn’ + ‘Ctrl’ + ‘F2’ to highlight the Apple icon and press ‘Enter’
 - Click to select ‘System Preferences…’ as shown in Fig 1 or press the down arrow key to highlight it and then press ‘Enter’.

Fig 1 - Click on the ‘Accessibility’ icon or press ‘Tab’ repeatedly (you might need to press ‘Fn’ + ‘Ctrl’ + ‘F7’ first) to cycle through the icons until the ‘Accessibility’ icon is highlighted with a blue border as shown in Fig 2 and then press the ‘Spacebar’.

Fig 2 - In the left column, click on the ‘VoiceOver’ item under ‘Vision’ or press ‘Fn’ + ‘Ctrl’ + ‘F7’ (once or twice) to highlight one of the options for example ‘Display’ and then press the up or down arrow keys to select the ‘VoiceOver’ item, see Fig 3.

Fig 3 - Click the checkbox next to ‘Enable VoiceOver’ or press ‘Tab’ to highlight the checkbox and press the ‘Spacebar’, see Fig 4.
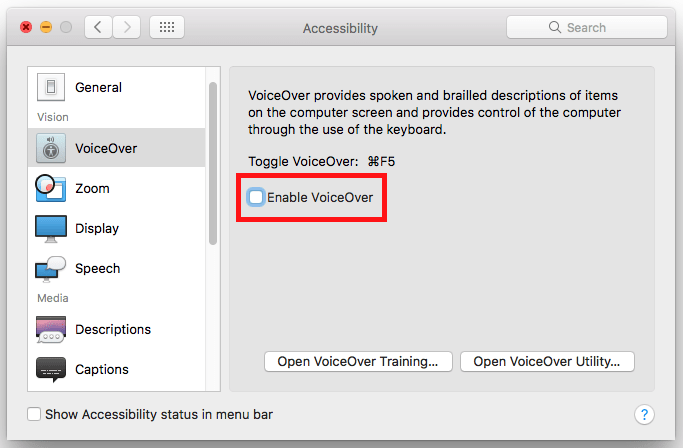
Fig 4
Note: You can turn ‘VoiceOver’ on or off at any time by pressing ‘Cmd’ + ‘F5’. - To adjust ‘VoiceOver’ settings click the ‘Open VoiceOver Utility…’ button or press ‘Tab’ until the button is highlighted and then press ‘Spacebar’, See Fig 5.
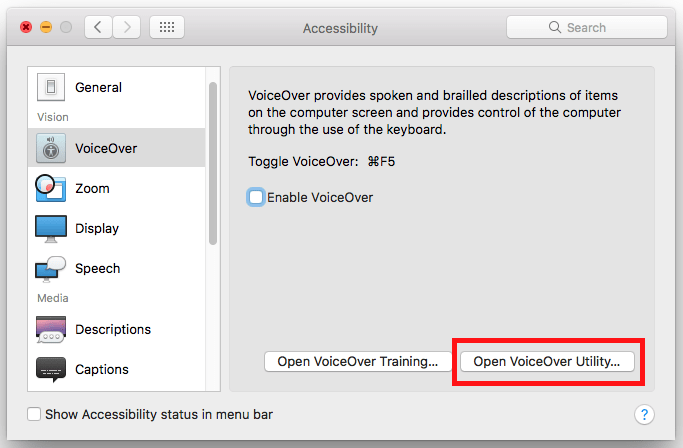
Fig 5
Note: You can use ‘VoiceOver’ in its default configuration, or you can customize it to suit your needs. The ‘VoiceOver Utility’ presents a list of ten categories, from General to Braille, see Fig 6.
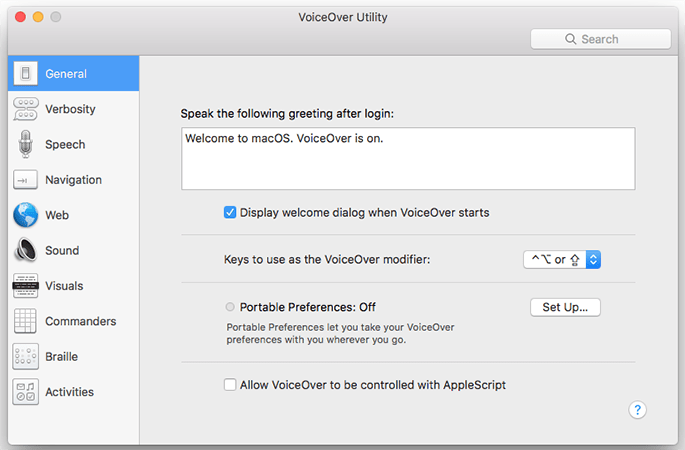
Fig 6 - Click a category in the left-hand column or use the arrow keys to select a category in order to see the available customisation options, see Fig 6, above). You can also navigate among the categories using keyboard shortcuts:
- General: ‘Cmd’ + ‘1’
- Verbosity: ‘Cmd’ + ‘2’
- Speech: ‘Cmd’ + ‘3’
- Navigation: ‘Cmd’ + ‘4’
- Web: ‘Cmd’ + ‘5’
- Sound: ‘Cmd’ + ‘6’
- Visuals: ‘Cmd’ + ‘7’
- Commanders: ‘Cmd’ + ‘8’
- Braille: ‘Cmd’ + ‘9’
- Activities: ‘Cmd’ + ‘0’
For a comprehensive ‘VoiceOver Getting Started Guide’ go to: https://help.apple.com/voiceover/info/guide/10.12/
Note: ‘VoiceOver’ includes ‘Braille’ support. ‘VoiceOver’ automatically recognises the Braille model in use and programs the keys — including “wiz wheels”, scrollers, router keys, and buttons — to best suit each model’s characteristics.
If you don’t have a USB Braille display, you can use the onscreen visual Braille panel that ‘VoiceOver’ provides. The ‘Braille Panel’ behaves like a standard 40-cell display. It displays both the Braille dots being sent to the dedicated Braille display and an English translation so that sighted instructors, parents, or co-workers can read its contents with minimal disturbance to the non-sighted user.
For more information on Braille display that work with ‘VoiceOver’ visit: https://support.apple.com/en-us/HT202524
Speech output options for text-to-speech:
The built-in text-to-speech feature allows you to hear spoken announcements of computer alerts. You can also enable the computer to speak any text that you select and highlight.
- Open the ‘Apple Menu’ by clicking on the Apple icon in the Menu Bar, or press ‘Fn’ + ‘Ctrl’ + ‘F2’ to highlight the Apple icon and press ‘Enter’
- Click to select ‘System Preferences…’ as shown in Fig 7 or press the down arrow key to highlight it and then press ‘Enter’.
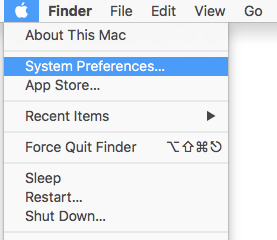
Fig 7 - Click on the ‘Accessibility’ icon or press ‘Tab’ repeatedly (you might need to press ‘Fn’ +’ Ctrl’ + ‘F7’ first) to cycle through the icons until the ‘Accessibility’ icon is highlighted with a blue border as shown in Fig 8 and then press the ‘Spacebar’.
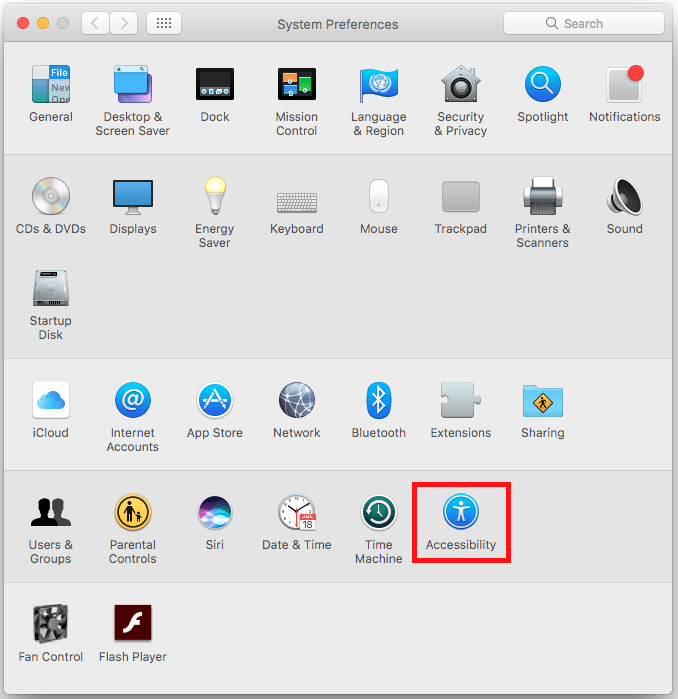
Fig 8 - In the left column, click on the ‘Speech’ item under ‘Vision’ or press ‘Fn’ + ‘Ctrl’ + ‘F7’ (once or twice) to highlight one of the options for example ‘Display’ and then press the up or down arrow key to select the ‘Speech’ item, see Fig 9.
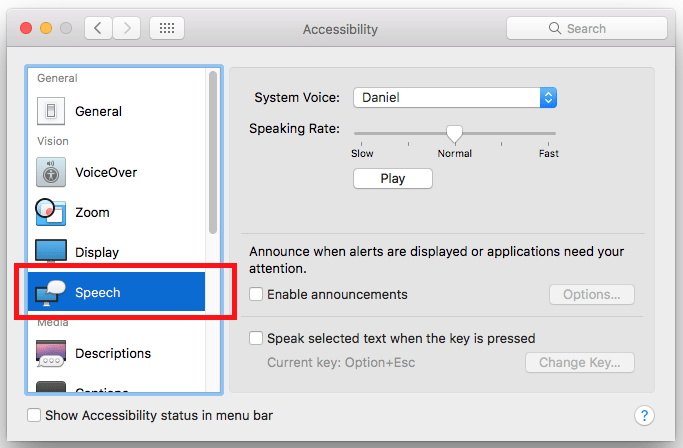
Fig 9
To turn on spoken announcements:
- Click the checkbox next to ‘Enable announcements’ or press ‘Tab’ until it is highlighted and press ‘Spacebar’, see Fig 10.
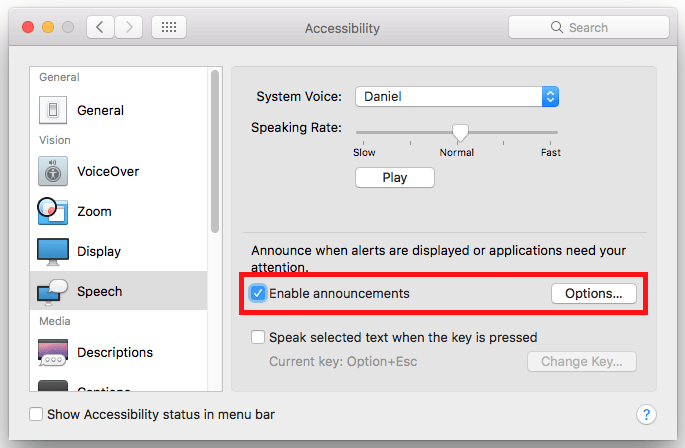
Fig 10 - If you want to make changes to the way announcements are spoken such as the time delay before an announcement is spoken click the ‘Options’ buttons or press ‘Tab’ until it is highlighted and press ‘Spacebar’, see Fig 10 above
- To change the phrase you hear at the beginning of an announcement click the drown-down menu next to ‘Phrase’ or press ‘Tab’ to highlight the drop-down menu and press ‘Spacebar’, see Fig 11.
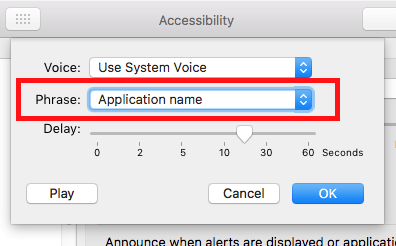
Fig 11 - Click on a phrase or use the arrow keys to select and press ‘Enter’, see Fig 12 below.
Note: You can edit the list of phrases and add your own, to do so choose ‘Edit phrase list’ from the ‘Phrase’ drop-down menu.
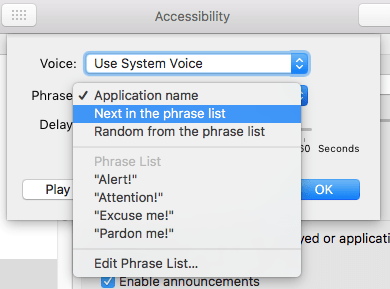
Fig 12 - To change the time delay before an announcement is spoken click on the slider next to ‘Delay’ or press ‘Tab’ to select the ‘Delay’ slider and use the arrow keys to select your speed. To have the computer speak the announcement as soon as an alert appears select a value of ‘0’, for a five second delay select ‘5’ etc. See Fig 13.
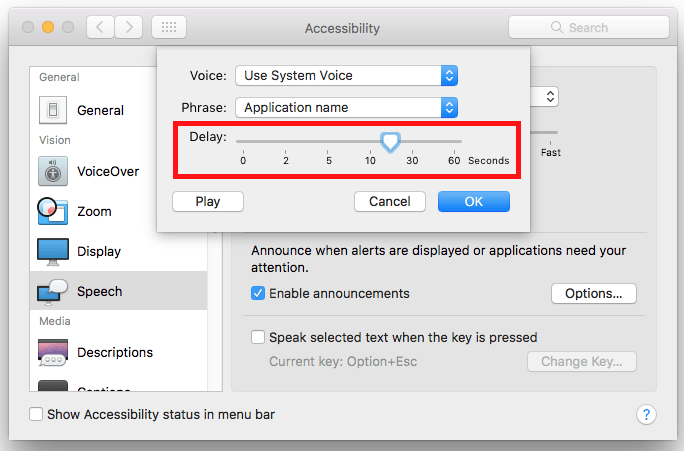
Fig 13 - If you wish to hear an example of the changes you have made click the ‘Play’ button or press ‘Tab’ until the button is highlighted and press Spacebar’.
- When you are happy with your settings click ‘OK’ or press ‘Tab’ until the ‘OK’ button is highlighted and press ‘Enter’.
To enable the computer to speak any text that you have highlighted with the cursor:
- Click the checkbox next to ‘Speak selected text when the key is pressed’ or press ‘Tab’ until it is highlighted and press ‘Spacebar’, see Fig 14.

Fig 14
Now, whenever you wish to use ‘text-to-speech’ highlight the text you would like spoken aloud (for example, text in a web page or a Word document) and press ‘Option (the ‘Alt’ key)’ + ‘Esc’. - If you want to change the keyboard shortcut that activates ‘text-to-speech’ click the ‘Change Key’ button or press ‘Tab’ until the button is highlighted and press ‘Enter’, see Fig 14 above.
- Type the new keyboard shortcut you wish to use to activate ‘text-to-speech’, see Fig 15.
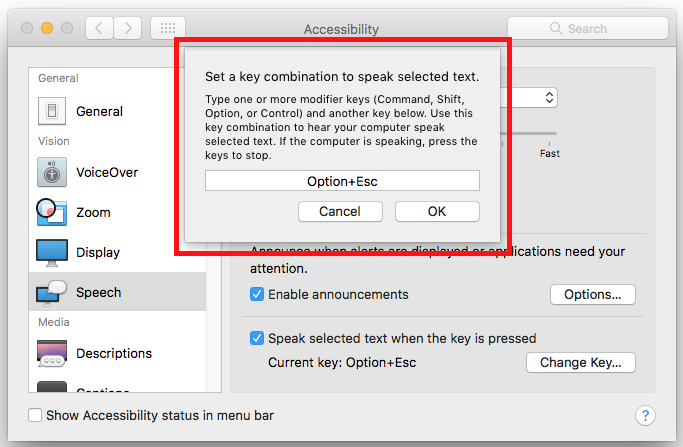
Fig 15 - When you are happy with your new shortcut click ‘OK’ or press ‘Tab’ until ‘OK’ is highlighted and press ‘Enter’.
To change the voice that is used for announcements and ‘text-to-speech’
- Click on the drop-down menu next to ‘System Voice’ or press ‘Tab’ until the drop-down menu is highlighted and press ‘Spacebar’ to activate it, see Fig 16.
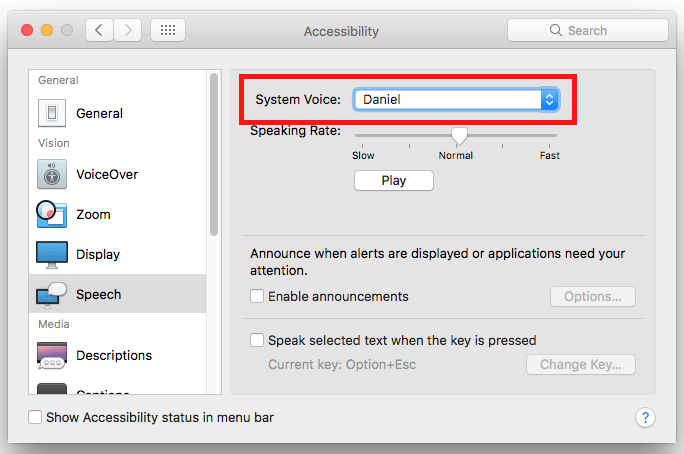
Fig 16 - Click ‘Customise…’ or use the arrow keys to select it and press ‘Enter’, see Fig 17.
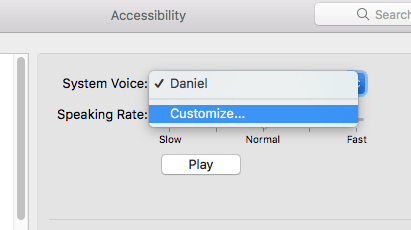
Fig 17 - Click the checkbox next to any voice you would like to add or press ‘Tab’ until ‘Daniel’ is highlighted, use the arrow keys to select a voice, for instance ‘Kate’, and press ‘Spacebar’, see Fig 18.
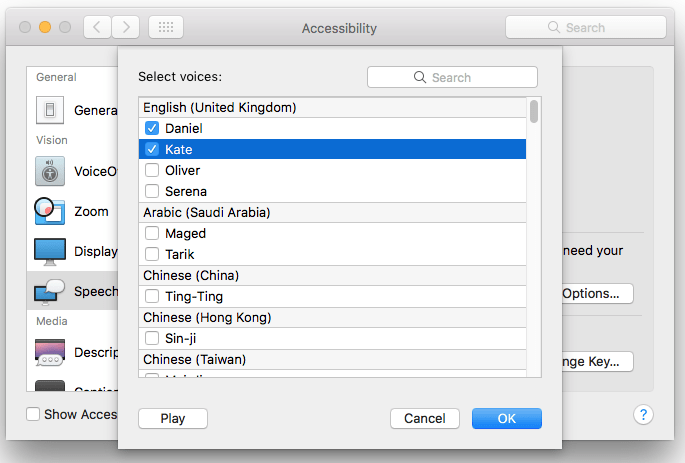
Fig 18 - If you wish to hear how a particular voice sounds like, first highlight the voice and then press the ‘Play’ button or press ‘Tab’ until the ‘Play’ button is highlighted and press ‘Spacebar’.
- When you are happy with the voices you have selected click ‘OK’ or press ‘Tab’ until ‘OK’ is highlighted and press ‘Enter’.
Note: Your computer will now download the complete voice pack from Apple so it will need to be connected to the internet.
When the voice pack has finished downloading you can select it to use from the ‘System Voice’ drop-down menu, see Fig 16 above. - To change the speed at which text is spoken click on the slider next to ‘Speaking Rate’ or press ‘Tab’ until the slider is highlighted and use the arrow keys to adjust the speed, see Fig 19.
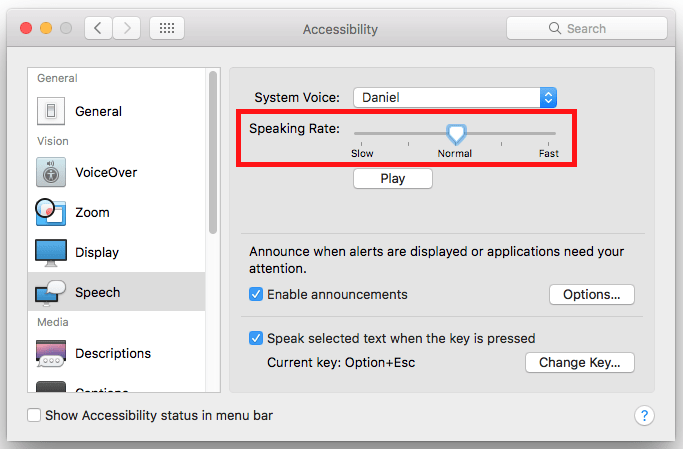
Fig 19 - To hear what the new voice and/or speed settings sounds like click the ‘Play’ button or press ‘Tab’ until the button is highlighted and press ‘Spacebar’.
- Finally, when you happy with your settings click the close icon in the top left of the speech options box or press ‘Apple’ + ‘W’ on the keyboard to close the window.
Note: If this does not work it could be because your computer settings are managed by someone else (an IT department or administrator for example). If this is the case you will need to contact them to access these settings or for further help.
More information:
Apple’s comprehensive ‘VoiceOver Getting Started Guide’: https://help.apple.com/voiceover/info/guide/10.12/
For more information on Braille display that works with ‘VoiceOver’ visit: https://support.apple.com/en-gb/HT202524
Need some more help?
Call our helpline 0300 180 0028 or email enquiries@abilitynet.org.uk
Need free IT Support at Home?
If you are older or disabled and need IT support at home, you can book a free home visit.