Call our helpline
0300 180 0028The process for creating new panels is the same for both Switch Control and Dwell Control but the panels will only be applicable to the accessibility feature under which they were created.
This article is split into the following sections:
Opening the Panel Editor in Switch Control and Dwell Control
Opening the Panel Editor in Switch Control and Dwell Control
Open ‘Accessibility Preferences’: Apple Menu > System Preferences > Accessibility. (See the article Open Accessibility Preferences on this website for more information.)
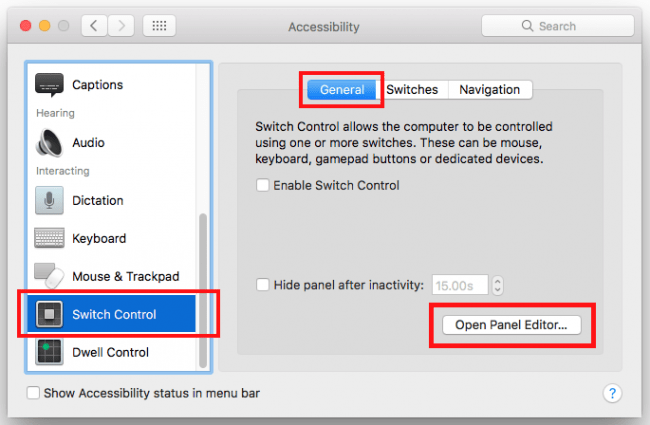
- To access the panel editor for Switch Control:
- Click on ‘Switch Control’ in the left-hand column.
- Click the ‘General’ tab.
- Click the ‘Open Panel Editor’ button.
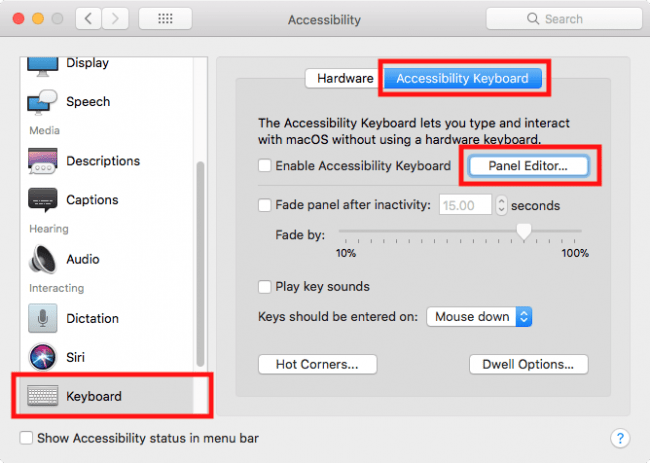
- To access the panel editor for Dwell Control:
- Click on ‘Keyboard’ in the left-hand column.
- Click the ‘Accessibility Keyboard’ tab.
- Click the ‘Panel Editor’ button.
Creating a panel
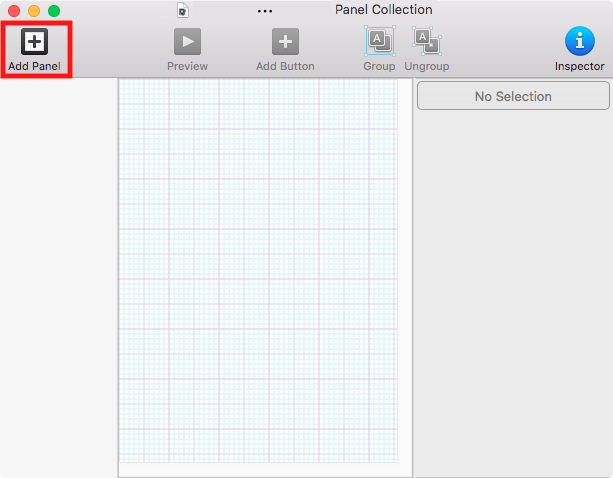
- To create a new panel, click ‘Add Panel’.
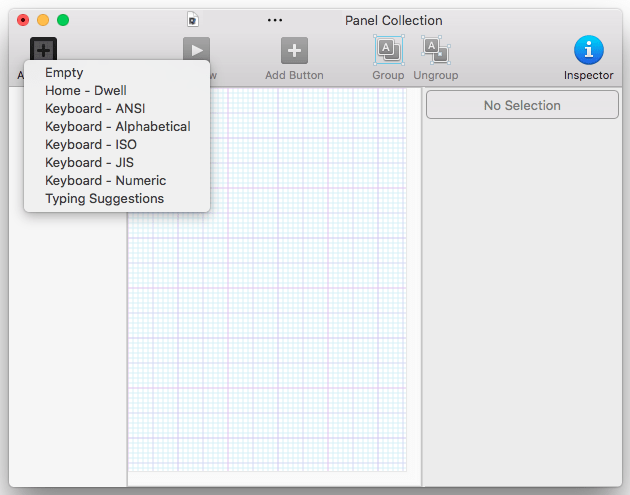
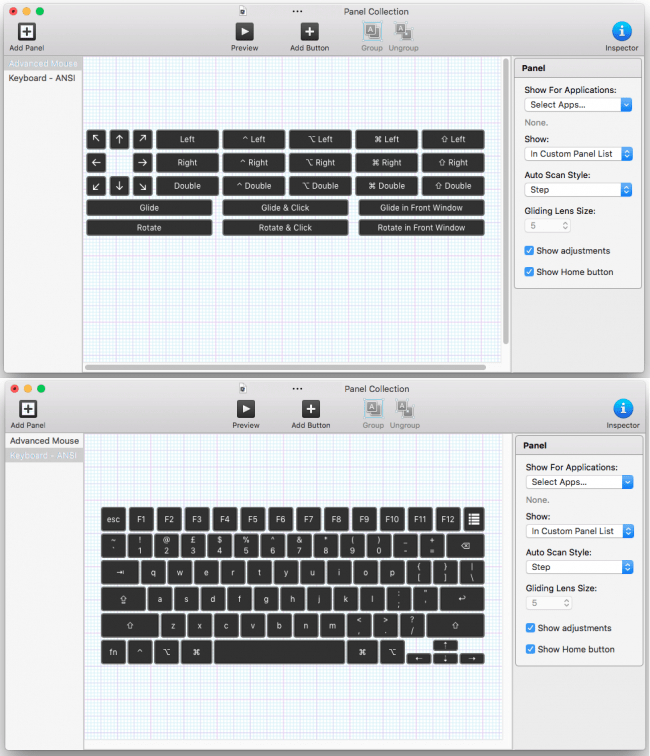
- You will see that there are already some pre-configured panel options you can choose from such as Dwell Controls, Typing Suggestions and several keyboard layouts.
- See below for examples of the pre-configured mouse and keyboard panels. You can click on any of the buttons and resize and reposition them.
- To create a new, blank panel to which you can add your own buttons, click ‘Add Panel’ and select ‘Empty’.
- To rename the panel, click on the current name then press the enter key to edit. Press ‘Enter’ again to confirm the new name.

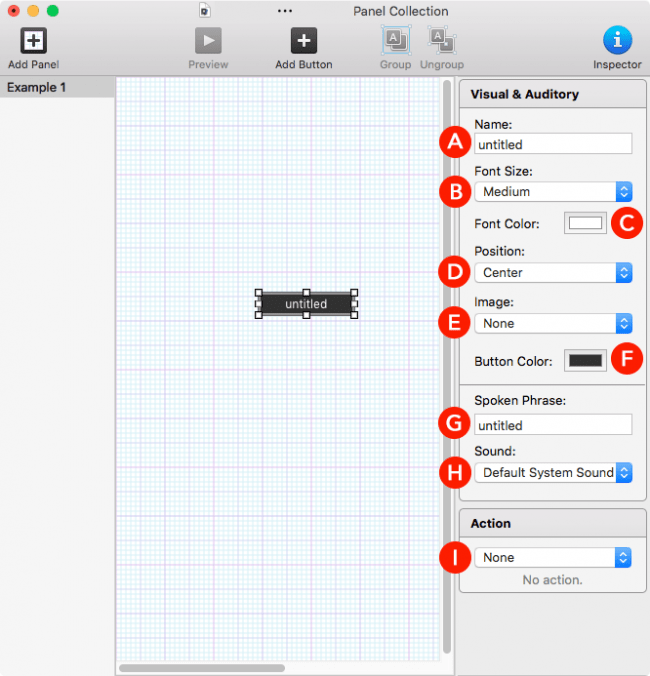
Panel Inspector options:
With the panel name is selected, you can change the following settings in the panel inspector in the right-hand column.
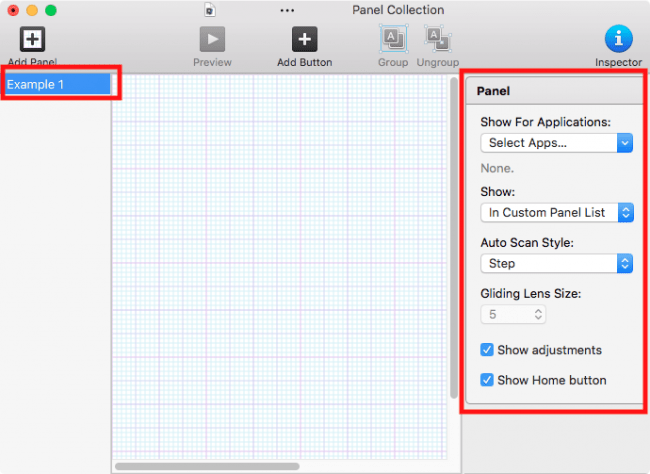
Show For Application:
Any application you choose from the dropdown menu will use this panel as its primary panel, saving you having to navigate through other menu items first in order to find it. This means you can create app specific panels, containing common actions, that are immediately available when you use those apps.
Show:
Click the drop-down menu and choose where this panel should appear within the panel menus structure. Select from:- In Custom Pane list
- As Home Panel (this panel will become the ‘Home’ menu)
- Default Keyboard
- Default Pointer
- Not Shown (this panel will only appear when you use an application defined in ‘Show in Application’ above).
- If you want to delete a panel, click on the panel name in the left-hand column and press the ‘Backspace’ key.
Adding buttons to a panel
- To add your first button to a panel, click ‘Add Button’.
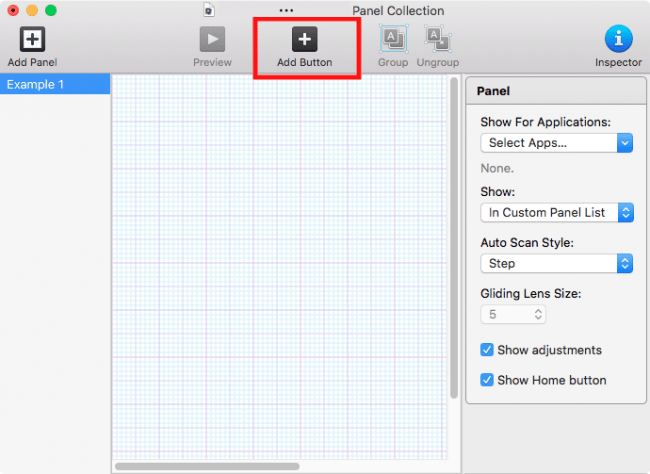
- A button will appear on the canvas. You can reposition the button by clicking on it and dragging it to a new location. You can resize the button by dragging the square, white handles.
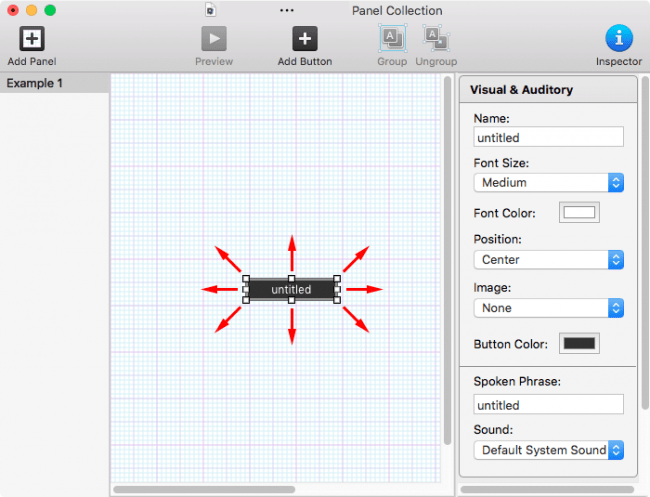
- When a button is selected on the canvas, you can edit the button’s properties, and what action it will perform, in the ‘inspector’ in the right-hand column.
- In the inspector you can:
- Give your button a name
- Choose the font size (from Small, Medium, Large, Extra Large)
- Change the font colour (the default is white)
- Change the position of the text label (Top, Centre, Bottom)
- Add an image to the button (this will hide the button text)
- Change the button colour (the default is dark grey)
- Change the spoken phrase used to describe the button when the VoiceOver cursor is on it (the default is to use the name of the button) - this option is only editable for Switch Control panels.
- Change the sound that is played when the button is clicked.
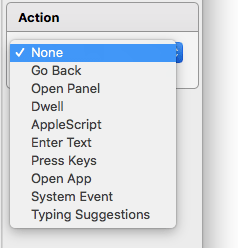
- Choose the action you want to assign to the button
A button can perform one of the following actions:
- Go Back (return to the last panel)
- Open Panel (choose another panel that the button should open)
- Dwell (use Dwell to perform a mouse action)
- Apple Script (choose an AppleScript to perform)
- Enter Text (text that will be inserted when the button is clicked)
- Press Keys (define which keys should be ‘pressed’ when the button is selected, this is useful for performing keyboard shortcuts)
- Open App (choose which App to open)
- System Event (choose a system event such as volume, brightness etc)
- Typing Suggestions (display typing suggestion based on the current content)
Follow steps 1 – 3 to add additional buttons to the canvas. If you want to delete a button, click the button to select it, then press the backspace key.
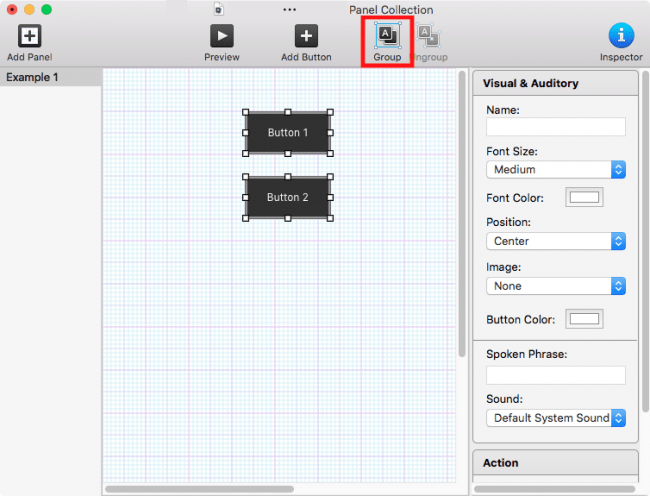
Grouping buttons
It’s a good idea to group buttons that perform similar task together to make navigating through them easier.
To create a group:
- Hold down the ‘ctrl’ button and click to select each button in turn (or drag the cursor around them to select them all), then click the ‘Group’ button in the toolbar.
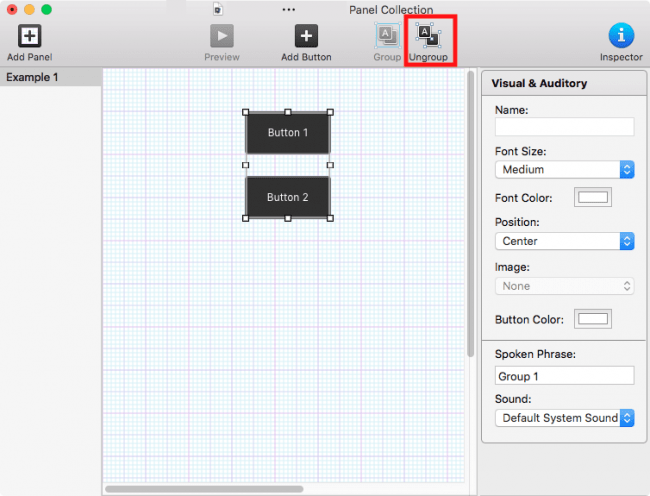
When a group is selected on the canvas, you can edit its properties in the ‘inspector’ in the right-hand column. - To ungroup buttons, click on the group to select it then click the ‘Ungroup’ button in the toolbar.
When happy with your panels, click the close (red) button at the top of the panel editor or press ‘Cmd’ + ‘W’ to close the window, you will be asked to save your changes. Click ‘Save’ to apply the changes.
Need some more help?
Call our helpline 0300 180 0028 or email enquiries@abilitynet.org.uk
Need free IT Support at Home?
If you are older or disabled and need IT support at home, you can book a free home visit.