This article contains the following sections:
- Open Switch Control settings
- How to add a new switch
- How to turn Switch Control on
- Switch Control menus
- Switch Control panels
Open Switch Control settings
- Open ‘Accessibility Preferences’: Apple Menu > System Preferences > Accessibility. (See the article Open Accessibility Preferences on this website for more information.)
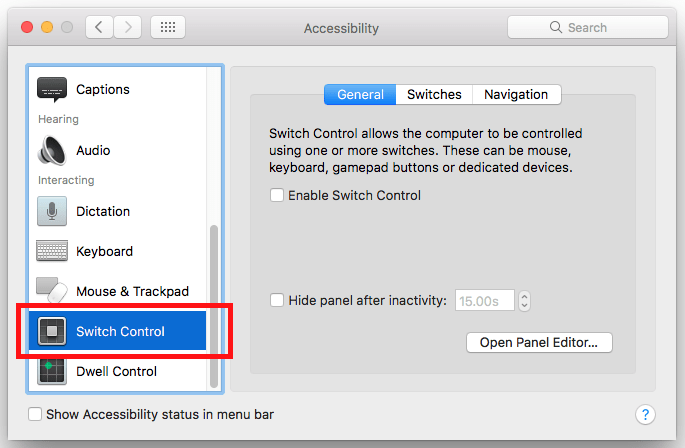
- In the left hand column, under the ‘Interacting’ section, select ‘Switch Control’ or press ‘Tab’ to highlight one of the items of the left-hand list and then press the up and down arrow keys to select the ‘Switch Control’ option.

- To see what switches area available, click the ‘Switches’ tab or press ‘Tab’ to highlight the ‘General’ tab and use the arrow keys to select ‘Switches’.
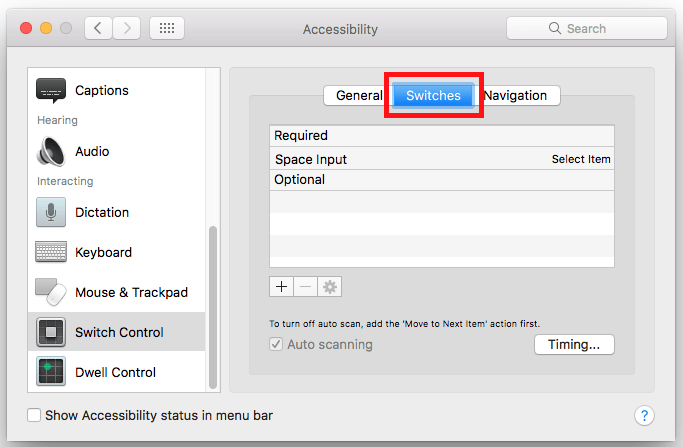
- You’ll see there is a default switch already set up - ‘Space Input’ , which is used to select an item and is activated by pressing the ‘Spacebar’.
You can change a switch’s name or its key by double-clicking on it in the list or using the ‘Tab’ key to highlight the switch and then pressing the cog icon to open its settings.

How to add a new switch
It is possible to control the whole computer with just one switch, but it is more convenient to have two or more. To add more switches:
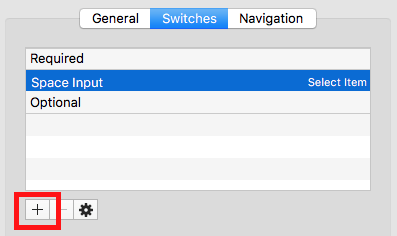
- Select the ‘Switches’ tab.
- Click the ‘+’(plus) button or press ‘Tab’ until the ‘+’ (plus) button is highlighted and press ‘Spacebar’.
- The system will ask you to “Press your switch now…”, your new switch can be a button on the mouse, a key on the keyboard, or a key or button on any other device that connects to your computer. In this example we will use the right arrow key of the keyboard.
- Give the new switch a name – for example, ‘Next’.
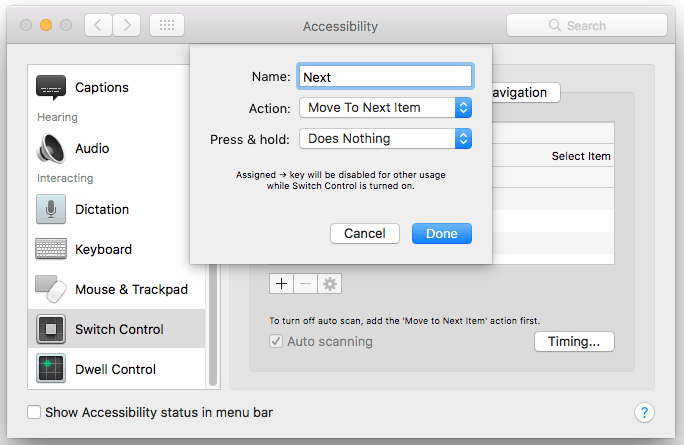
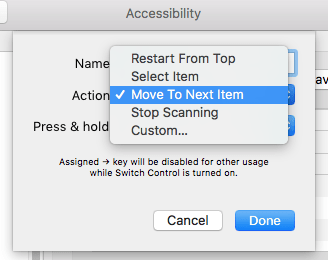
- In the ‘Action’ drop-down menu, select the action that the new switch will perform when it is triggered – for example, ‘Move to the next item’.
- You can also choose what happens if you press and hold the new switch. In the ‘Press & hold’ drop-down menu you can choose ‘Does nothing’ or ‘Repeats current action’.

- When happy with your settings click ‘Done’ or press ‘Tab’ until the ‘Done’ button is highlighted and press ‘Enter’ to return to the main ‘Switch control’ window.
How to turn Switch Control on
- Click the ‘General’ tab.
- Click the checkbox next to ‘Enable Switch Control’ or press ‘Tab’ until the checkbox is highlighted and press ‘Spacebar’.
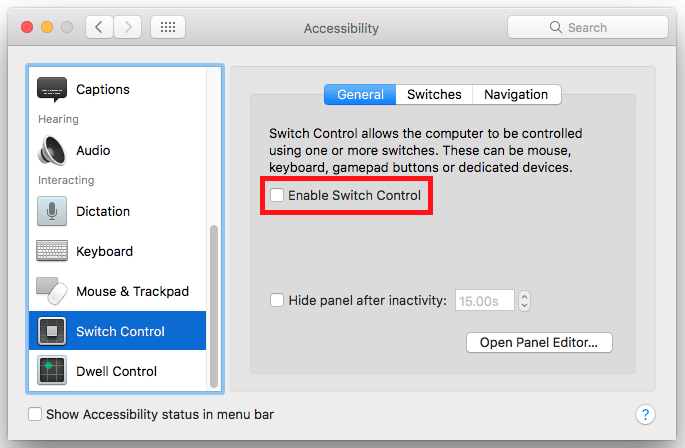
- The first time you enable ‘Switch Control’ you may be asked to enter your computer user password at this point to give the computer permission to enable ‘Switch Control’.
After entering your password, the ‘Home – Switch’ on-screen menu will appear. You can control this menu with the switch keys you defined before in Steps 6 – 13. In our example above we set-up ‘Spacebar’ to select, and the ‘Right Arrow’ key to go to the next item.
Switch Control menu options (the ‘Home - Switch’)
| Menu icon | Menu description |
|---|---|
| Keyboard– control an on-screen keyboard This will present an onscreen keyboard that will scan through groups of letters reducing the group size until you are able to select the desired letter. | |
| Pointer – change the location of the pointer. This will present a vertical line that will scan across the screen, press the switch and the line will stop and a horizontal line will scan down until the switch is pressed again at which point the cursor will move to where the two lines intersect. You can then perform actions such as a click, double-click and right-click using the switch options. | |
| App – controls the application in use. This scans through individual items or groups in the active window | |
| Dock – scans across the applications in the dock. | |
| Menu bar– scans through the menus (File, Edit, View, etc.) of the application in use. | |
| System – scans through options such as adjusting the volume, the playback of media, the brightness of the screen, etc. | |
| Custom – allows the control of custom panels you can create using Panel Editor. | |
| Location – allows moving the Switch Control menu to different locations of the screen. | |
| Devices – allows you to control devices such as an iPhone, iPad and Apple TVusing ‘Switch Control’ on your computer. Your computer and the device you wish to control must be connected to the same Wi-Fi network and must be signed in to the same iCloud account. |
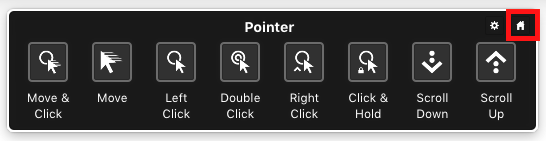
You can return to the ‘Home – Switch’ menu by selecting the ‘Home’ button, represented with a house icon.
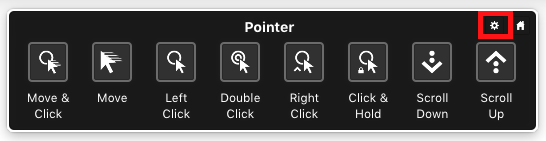
You can adjust the size of each panel, and increase or decrease its transparency by selecting the ‘Settings’ button, represented with a cog icon and navigating through the settings options.
Adjusting the navigation behaviour of the ‘Switch Control’ menus
Note: We recommend spending some time using the switches before modifying their default behaviour.
- Open ‘Accessibility Preferences’: Apple Menu > System Preferences > Accessibility. (See the article Open Accessibility Preferences on this website for more information.)
- In the left hand column, under the ‘Interacting’ section, select ‘Switch Control’ or press ‘Tab’ to highlight one of the items of the left-hand list and then press the up and down arrow keys to select the ‘Switch Control’.
- Click on the ‘Navigation’ tab and choose your settings from the drop-down menus.
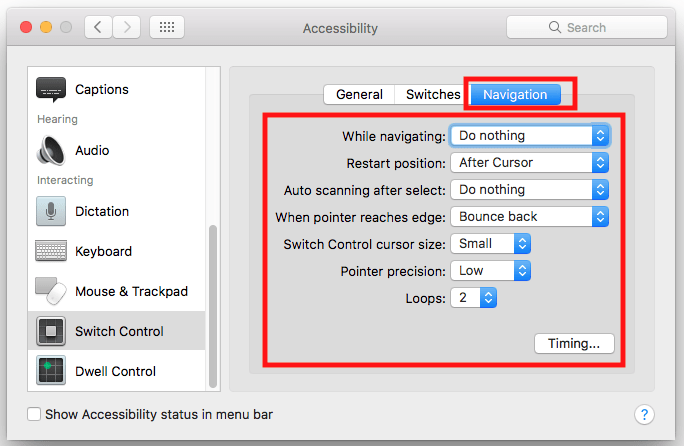
- While navigating
Have the switch names announced or play a sound while you navigate through the switches. Choose from:- Do nothing
- Speak selection
- Play sounds
- Speak and play sounds
- Restart Position
- After cursor
- From start of group
- From the top
- Auto scanning after start
By default, once you select a Switch Control option, scanning will stop. With auto scanning set to ‘Resume’, scanning will resume as soon as the selected option loads – for instance, if you have selected another panel such as ‘Keyboard’, switch control will immediately start looping through the keys. Choose from:- Do nothing
- Resume
- When pointer reaches the edge
- Do nothing
- Bounce back
To adjust the timing of navigating the ‘Switch Control’ menu click the ‘Timing…’ button or press ‘Tab’ until it is highlighted and press ‘Spacebar’.
- You can adjust the navigation timings in the pop-up window. When happy with your settings click ‘OK’ or press ‘Tab’ until the ‘OK’ button is highlighted and press ‘Enter’.

- Finally click the ‘Close’(red) button at the top of the ‘Accessibility’window or press ‘Cmd’+ ‘W’ to close the window.
Note: If this does not work it could be because your computer settings are managed by someone else (an IT department or administrator for example). If this is the case you will need to contact them to access these settings or for further help.
Switch Control panels
‘Panels’ are collections of configurable buttons that allow you to carry out various tasks on your computer with a single click, such as: entering text, opening an application, or performing mouse actions.
For more information on creating your own panels see the article: macOS 10.13 High Sierra – Panels for Switch Control and Dwell Control on this website.
Related information
Apple’s ‘Switch Control’ support page: https://support.apple.com/kb/PH25778?locale=en_GB&viewlocale=en_GB
Apple’s ‘Panel Editor’ support page:https://support.apple.com/kb/PH25777?locale=en_US&viewlocale=en_US
Need some more help?
Call our helpline 0300 180 0028 or email enquiries@abilitynet.org.uk
Need free IT Support at Home?
If you are older or disabled and need IT support at home, you can book a free home visit.