To enable ‘Speak Selection’
- Open the ‘Accessibility Settings’: Settings > General > Accessibility. (See the article Open Accessibility Preferences on this website for more information.)
- Under the ‘Vision’ section, tap on ‘Speech’.
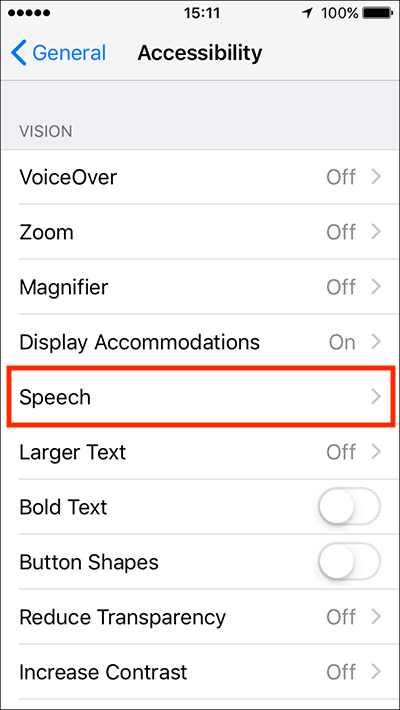
- Tap the toggle switch next to ‘Speak Selection’.
- When ‘Speak Selection’ is turned on you will see an option for ‘Highlight Content’. Here you can choose the amount of text to highlight as it is being read aloud.
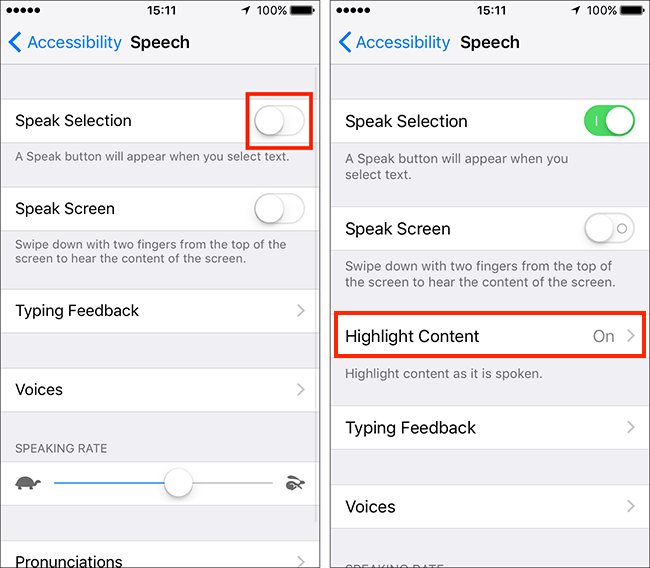
- Tap ‘Highlight Content’.
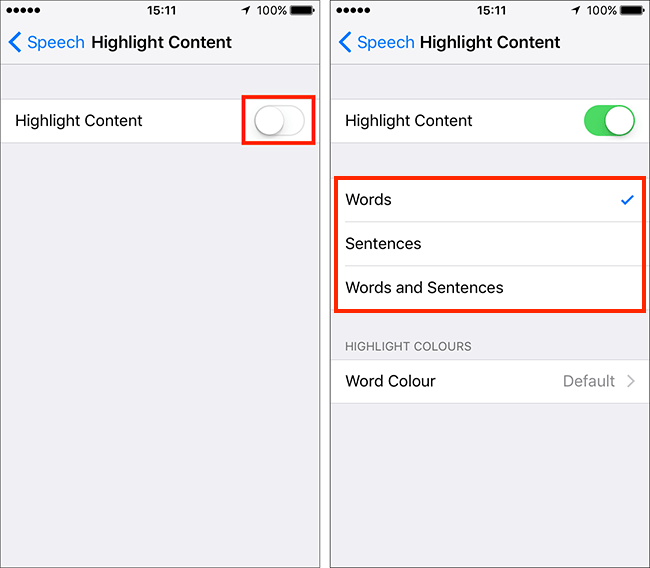
- Tap the toggle switch next to ‘Highlight Content’.
- The following options will be displayed
- Words
- Sentences
- Words and Sentences
- Tap to select which items you would like to be highlighted as content is spoken.
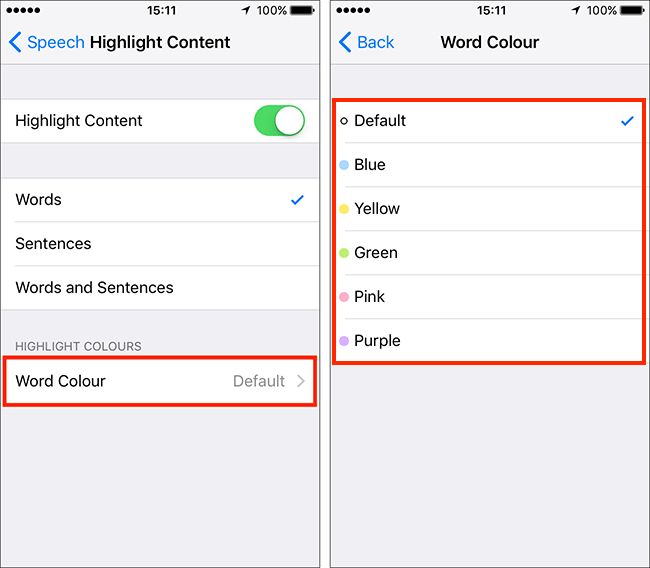
- To choose the colour used for highlighting content, tap ‘Word Colour’.
- Tap the colour you wish to use to highlight content.
When happy with your ‘Speech’ settings, either tap the back button in the top left of the screen to return to the main ‘Accessibility’ settings screen or press your device’s ‘Home’ button to return to the home screen.
Note: You can customise the voice used for ‘Speech’ and the speed at which text is read aloud. See the article: Speech Settings - iPhone/iPad/iPod Touch on this website for more information.
Using ‘Speak Selection’
You can use ‘Speak Selection’ anywhere you can select text, such as in emails, websites and documents.
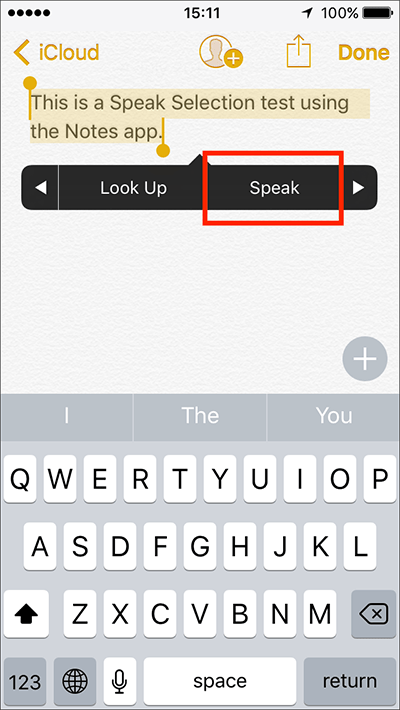
- Select the text you want to have to read aloud. In our example we have highlighted text in the Notes app.
- To hear the highlighted text read aloud, tap the ‘Speak’ button in the menu that appears. Note: In some apps you may need to press the right arrow button on the menu to scroll right and reveal the ‘Speak’ option.
More information:
To change the voice used for ‘Speech’ and the speed at which text is read aloud, see the article: Speech Settings - iPhone/iPad/iPod Touch on this website.
If you would like to have the entire screen read out without having to highlight any text, see the article: Speak Screen – iPhone/iPad/iPod Touch on this website.