Short guide
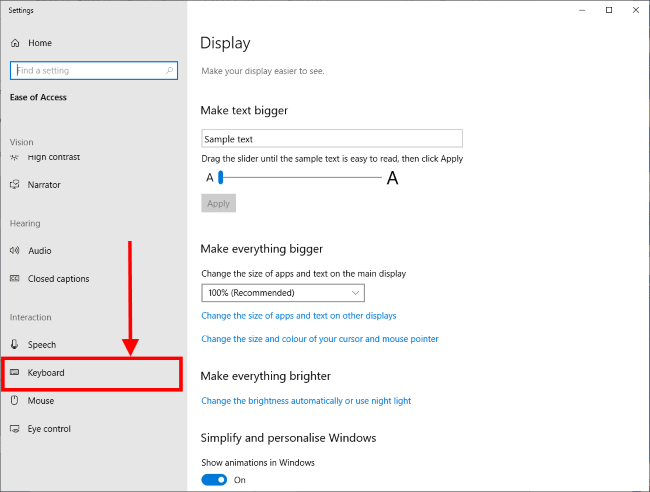
- Open the Ease of Access settings by pressing the Windows key + U on the keyboard. Scroll down and select Keyboard in the left-hand column.
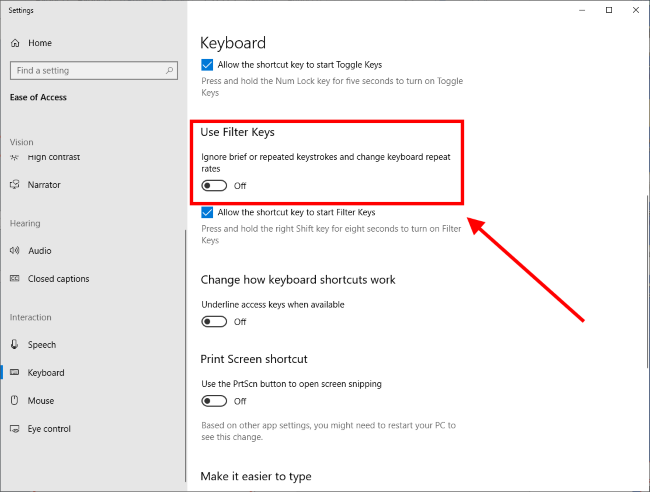
- In the right-hand panel, scroll down to Use Filter Keys and click the toggle switch to turn it to On.
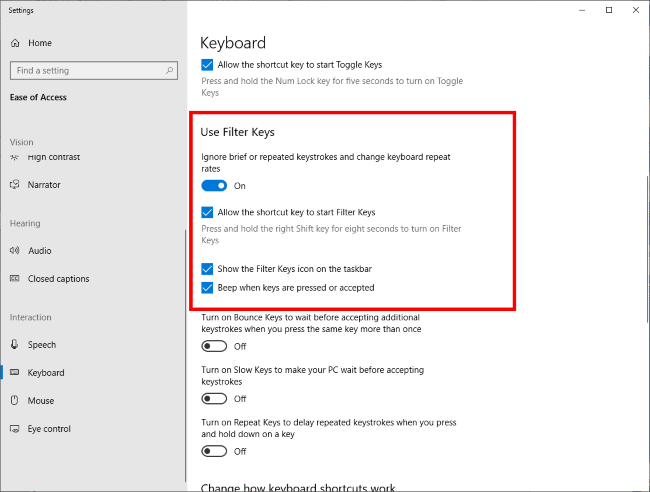
- Once Filter Keys is enabled you will also see options to allow keyboard shortcuts and add a taskbar icon, or turn on the Bounce Keys, Slow Keys and Repeat Keys options. Turning these on or off may improve your typing experience.
Before and after
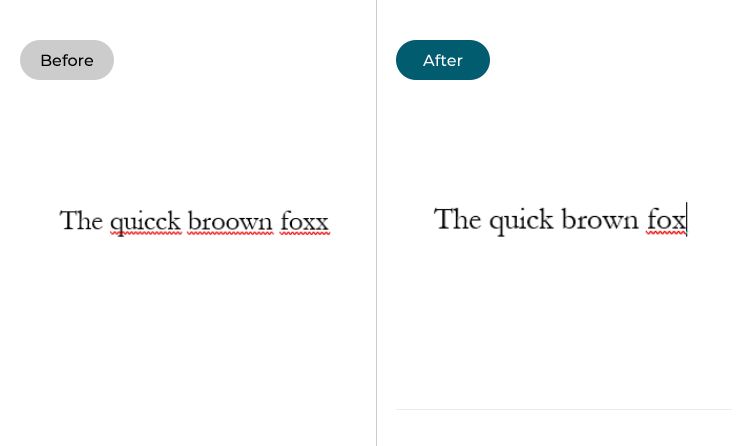
This section will show you how to enable Filter Keys in Window 10. This is a step-by-step guide with pictures of the screens to help you.
Open the Ease of Access settings
1. Open the Ease of Access settings by pressing the Windows key ![]() + U on the keyboard. Scroll down and select Keyboard in the left-hand column.
+ U on the keyboard. Scroll down and select Keyboard in the left-hand column.
Enable Filter Keys
2. In the right-hand panel, scroll down to Use Filter Keys and click the toggle switch to turn the feature On.
Change the Filter Keys options
3. Once Filter Keys is enabled you will see other options appear. Turning these on or off might improve your typing experience. You can allow the Shift key to work as a shortcut key to start Filter Keys, or add a Filter Keys icon to the taskbar for easy access. You can also set your laptop or PC to beep every time a key is pressed.
Using Bounce Keys
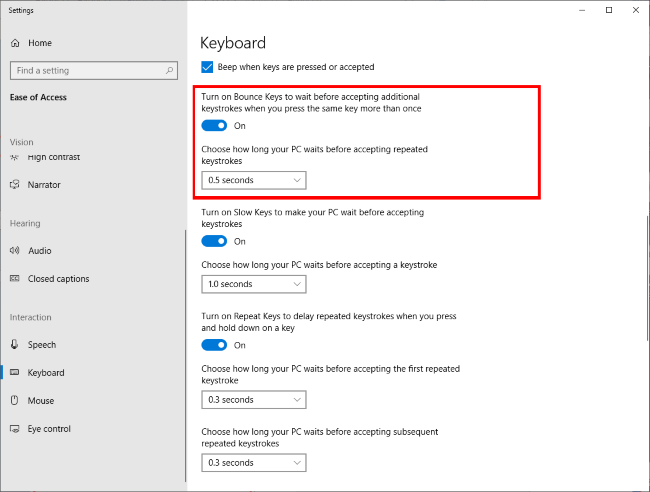
4. The Bounce Keys option tells your computer to ignore a keystroke when you press the same key more than once within a specified time limit. You can enable it by clicking on the toggle switch, then use the drop-down menu to set the time limit.
Using Slow Keys
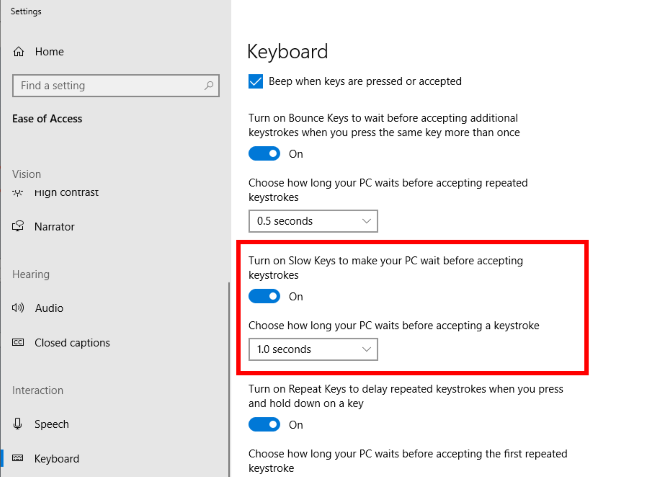
5. Enable Slow Keys to make your PC wait for a specified time before accepting any other keystroke. This works on any two key presses, not just repeated presses of the same key. You can change the delay using the drop-down menu below the switch.
Using Repeat Keys
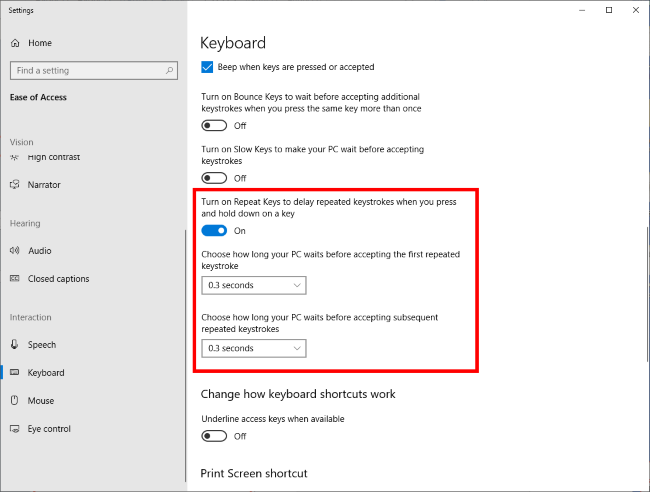
6. Enable Repeat Keys to set how long your computer waits before accepting a repeated keystroke. You can set different times for the first repeated keystroke and repeated keystrokes after that through the drop-down menus below each option.
Note: If these options don't work it could be because your computer settings are managed by someone else (an IT department or administrator for example). If this is the case, you will need to contact them to access these settings or for further help.