In this article
How to use the Magnifier
The three Magnifier views
Magnifier settings
Reading the screen aloud while using the Magnifier
Keyboard shortcuts to control the Magnifier
How to use the Magnifier
- To enable the Magnifier, press the Windows logo key and + (plus). On touch-enabled devices type “magnifier” in the search box and press enter. Select Magnifier from the results to turn it on.
- The magnifier controls will appear onscreen.

- Use the following controls to change the level of magnification:
- To zoom in: Press the Windows logo key and + (plus). Or select the + (plus) button on the Magnifier controls.
- To zoom out: Press the Windows logo key and - (minus). Or select the - (minus) button on the Magnifier controls.

- You can also change the level of magnification using the scroll wheel on a mouse or trackpad gestures while holding down the Ctrl + Alt keys.
- To exit the Magnifier, press the Windows logo key + Esc. Or select the X (close) button in the top-right corner of the Magnifier controls.
Note: When you launch the Magnifier again, it will use the zoom level from when it was last open.
The three Magnifier views
There are three Magnifier views to choose from: Full screen, Lens, and Docked (full descriptions below). By default, Magnifier uses the Full screen view. To change the view, press Ctrl + Alt + M to cycle through views. You can also change the view in the Magnifier settings.
Full screen view
In Full screen view the entire screen is magnified. Move the pointer to the edge of the screen to scroll in that direction.
Tip: When using the Full screen view you can get a sneak peek of the whole screen by pressing Ctrl + Alt + Spacebar.
Lens view
In Lens view only a small part of the screen, surrounding the mouse pointer, is magnified.
How to resize the Lens view
You can resize the Lens using the following keyboard shortcuts:
- To decrease the width of the lens, press Shift + Alt + Left arrow key.
- To increase the width of the lens: press Shift + Alt + Right arrow key.
- To decrease the height of the lens, press Shift + Alt + Down arrow key.
- To increase the height of the lens, press Shift + Alt + Up arrow key.
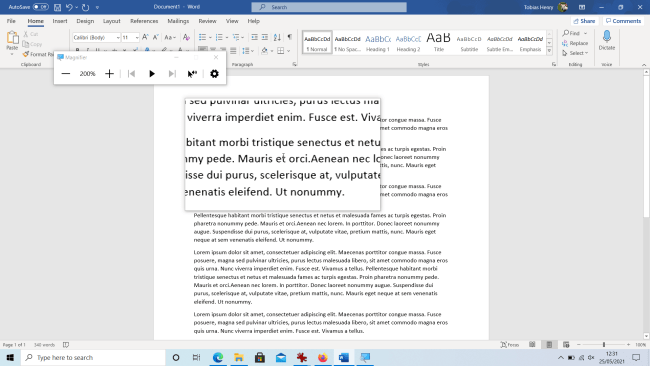
Docked view
In Docked view, the top third of the screen becomes a magnified view of the lower part of the screen. As you move the pointer around the lower part of the screen, the area surrounding the pointer is shown magnified in the top third of the screen.
How to resize the Docked view
You can resize the docked viewer by clicking and dragging the bottom edge, or by using the following shortcuts:
- To decrease the height of the docked view, press Shift + Alt + Down arrow key.
- To increase the height of the docked view, press Shift + Alt + Up arrow key.
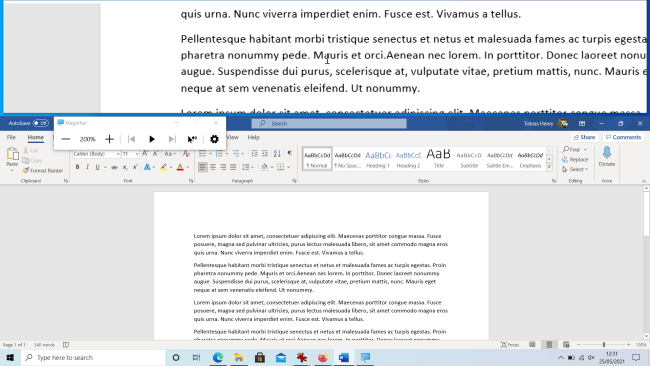
How to undock the docked magnifier to create a floating window
If you wish, you can undock the Magnifier window from the top edge of the screen and position it elsewhere. To undock the window, click and hold on the magnified area then drag downwards. The docked window will become a small floating window. To reposition floating window, click and hold on the window’s title bar then drag it to a new location.
How to resize the floating window
You can resize the floating window using the following shortcuts:
- To decrease the width of the floating window, press Shift + Alt + Left arrow key.
- To increase the width of the floating window: press Shift + Alt + Right arrow key.
- To decrease the height of the floating window, press Shift + Alt + Down arrow key.
- To increase the height of the floating window, press Shift + Alt + Up arrow key.
Magnifier settings
The view can also be changed in Magnifier settings. To open Magnifier settings:
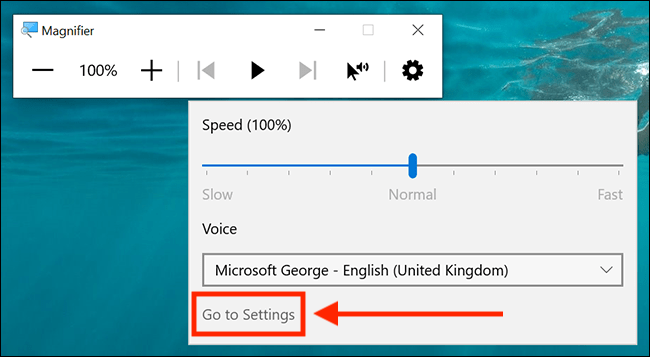
- Select the settings icon on the Magnifier controls.

- Select the Go to settings link.
On the Magnifier settings page, you can customise the following settings:
Magnifier options

- Change the zoom level - Set the default level of magnification.
- Change the zoom increments - Set how much the magnification level should increase/decrease by when you zoom in/out. By default, the magnification level changes in 100% increments. To change this, click on the dropdown menu and select the desired level. You can choose from 25% up to 400%.
- Start Magnifier after sign in – Tick the checkbox to start Magnifier whenever you sign in to Windows.
- Start Magnifier automatically before sign-in for everyone - Tick the checkbox to enable the Magnifier on the login screen.
- Smooth edges of images and text - Text and images can become blocky and jagged when magnified. Smoothing attempts to make sure that they remain smooth and easier to read. This option is enabled by default, click the checkbox to disabled it.
- Invert colours – Invert the colours shown in the magnified area. Tick the checkbox to enable.
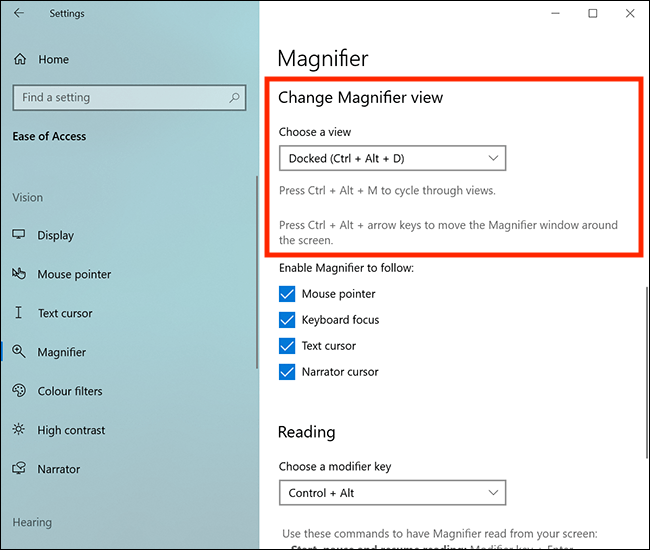
Magnifier view
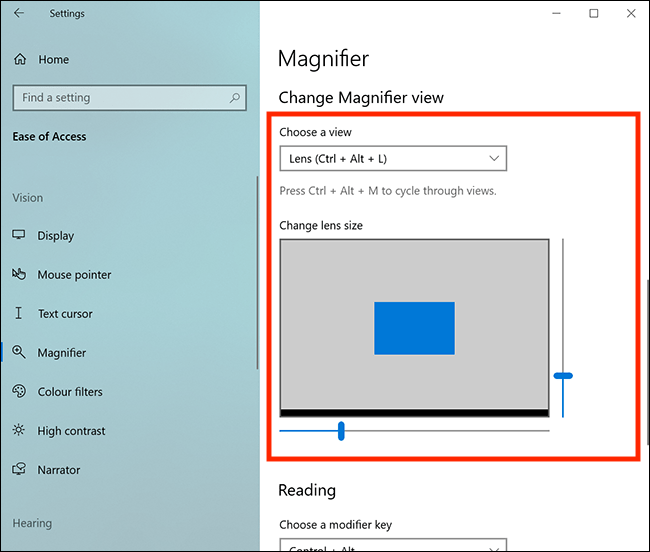
To change the Magnifier view, select the drop-down menu labelled “choose a view” and choose from:
- Full screen
- Lens
- Docked
The settings for each magnifier view
If you choose Full screen view or Docked view you can enable the Magnifier to follow:
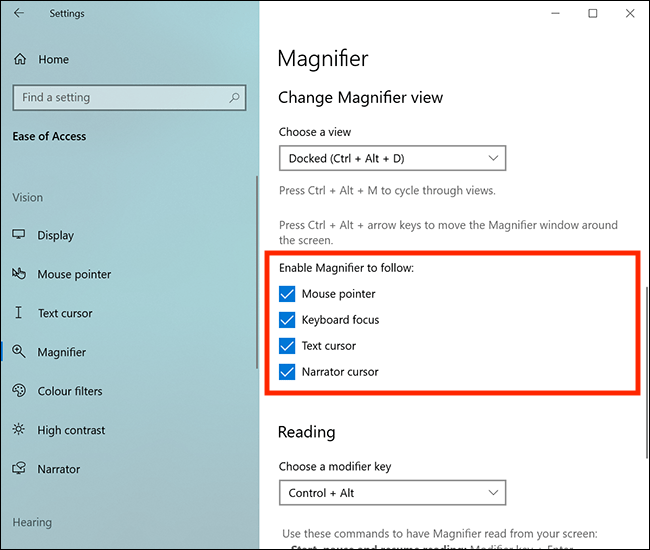
- Mouse pointer - In Full screen view, the magnified screen gets repositioned when the pointer nears the edge of the screen. This brings content hidden off screen into view. In Docked view the magnified window shows the area around the pointer as it moves around the screen.
- Keyboard focus - With this option selected, you can navigate the magnified screen using keyboard controls; the arrow keys will scroll the page up and down and left and right, the tab key ‘hops’ from section to section.
- Text cursor - The Magnifier will magnify the area around the cursor when you are typing.
- Narrator cursor - If you use Narrator, the built-in screen reader software, the magnifier will follow the Narrator cursor by default.
If you choose Lens view can set the default lens size. The blue shape, in the image below, is the size of the lens in relation to the whole screen. Adjust the vertical and horizontal sliders to resize it.
Reading the screen aloud while using the Magnifier
While using the Magnifier you can have text read aloud by using keyboard shortcuts or the controls embedded on the Magnifier itself.
Keyboard shortcuts for reading the screen aloud
- To have Magnifier read from where the cursor is positioned or from the beginning of content that is highlighted: Press Ctrl + Alt + Enter
- To stop Magnifier reading: Press any key
- To have Magnifier read from where the mouse pointer is positioned: Press Ctrl + Alt + Left Mouse Click
- To read the previous sentence: Press Ctrl + Alt + H
- To read the next sentence: Press Ctrl + Alt + K
Using the reading controls on the Magnifier

- To have Magnifier read from where the cursor is positioned or from the beginning of content that is highlighted: Select the Play button
- To stop Magnifier reading: Select the Pause button
- To read the previous sentence: Press the Forward button
- To read the next sentence: Press the Back button
- To read from where the mouse pointer is clicked: Press the Pointer button, then click on the text where you want to start reading from.

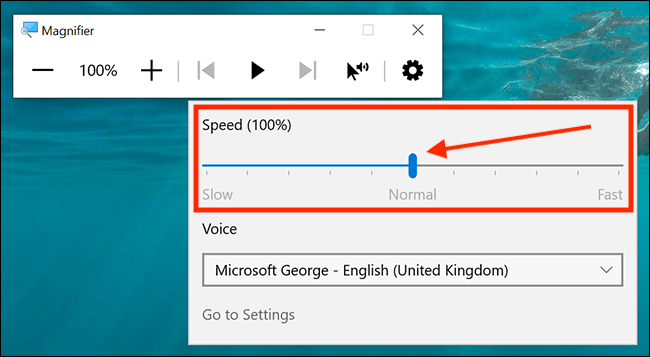
How to change the reading speed
- Select the Settings icon on the Magnifier controls.

- Adjust the slider for Speed.
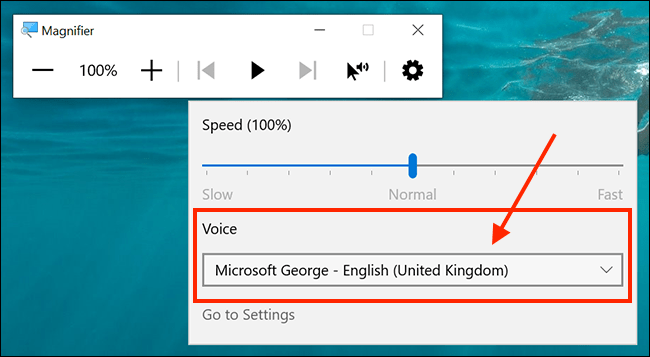
How to change the voice used for reading
- Select the Settings icon on the Magnifier controls.

- Select the drop-down menu for Voice and choose from the available options.
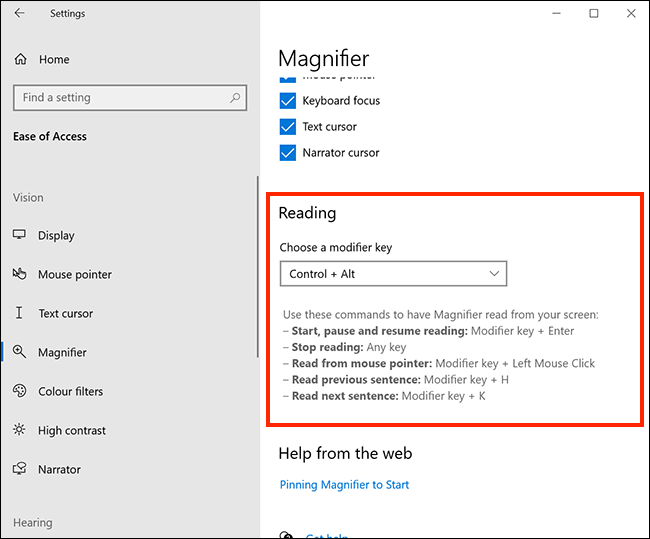
How to change the modifier key used for reading shortcuts
The default modifier keys used for reading shortcuts are Ctrl + Alt. To change these:
- Select the Settings icon on the Magnifier controls.

- Select the Go to settings link.

- On the Magnifier settings page, scroll down to the Reading section.
- Select the drop-down menu labelled “Choose a modifier key” and choose from the options.
Keyboard shortcuts to control the Magnifier
|
Keyboard Shortcut |
Action |
|
Turn Magnifier on |
Windows logo key and + (plus) |
|
Turn Magnifier off |
Windows logo key + Esc |
|
Open magnifier settings |
Windows logo key + Ctrl + M |
|
Zoom in |
Windows logo key and + (plus) |
|
Zoom out |
Windows logo key and - (minus) |
|
Zoom with mouse scroll wheel |
Ctrl + Alt + Mouse scroll wheel |
|
Zoom with trackpad gesture |
Ctrl + Alt + Trackpad scroll gesture |
|
Pan left |
Ctrl + Alt + Left arrow key |
|
Pan right |
Ctrl + Alt + Right arrow key |
|
Pan up |
Ctrl + Alt + Up arrow key |
|
Pan down |
Ctrl + Alt + Down arrow key |
|
Invert colours |
Ctrl + Alt + I |
|
Full screen view |
Ctrl + Alt + F |
|
Lens view |
Ctrl + Alt + L |
|
Docked view |
Ctrl + Alt + D |
|
Change view |
Ctrl + Alt + M |
|
Use the mouse to resize the lens |
Ctrl + Alt + R |
|
Decrease lens / docked width |
Shift + Alt + Left arrow key |
|
Increase lens / docked width |
Shift + Alt + Right arrow key |
|
Increase lens / docked height |
Shift + Alt + Up arrow key |
|
Decrease lens / docked height |
Shift + Alt + Down arrow key |
|
Preview the desktop when in Full screen mode |
Ctrl + Alt + Spacebar |
|
|
|
|
Reading |
|
|
Read from where the cursor is positioned or from the beginning of content that is highlighted |
Ctrl + Alt + Enter
|
|
Stop reading |
Press any key |
|
Read from where the mouse pointer is positioned
|
Ctrl + Alt + Left Mouse Click |
|
Read the previous sentence |
Ctrl + Alt + H |
|
Read the next sentence |
Ctrl + Alt + K |
Note: If this does not work it could be because someone else manages your computer settings (an IT department or administrator). If this is the case, you will need to contact them to access these settings or for further help.
Need some more help?
Call our helpline 0300 180 0028 or email enquiries@abilitynet.org.uk
Need free IT Support at Home?
If you are older or disabled and need IT support at home, you can book a free home visit.