- Ease of Access Center has replaced Accessibility Options in the ‘Control Panel’.
- Open ‘Ease of Access Center’ press ‘Windows’ logo key + ‘U’ or click Start button ‘Control Panel’ + ‘Ease of Access’ + ‘Ease of Access Center’.
Step 1
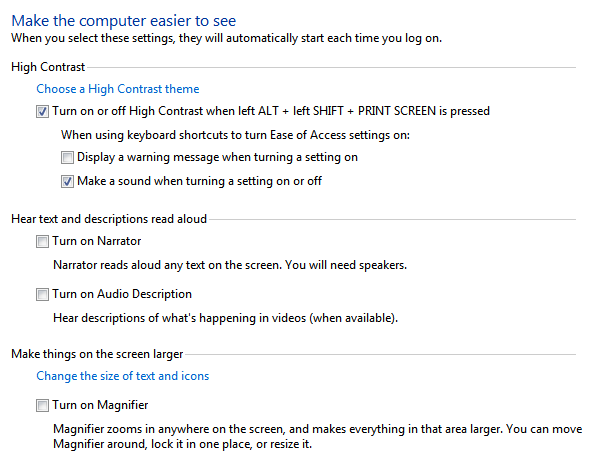
- Under ‘Explore all settings’, ‘Tab’ to and ‘Enter’ or click to select ‘Make the computer easier to see’, see Fig 1.
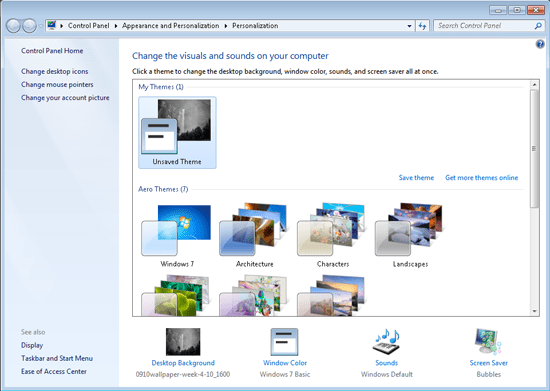
- The 'Make the computer easier to see' window will appear. Click to select or press ‘Alt’ + ‘C’ to select and open the 'Personalization' window, Fig 2 and 3.

Fig 2

Fig 3
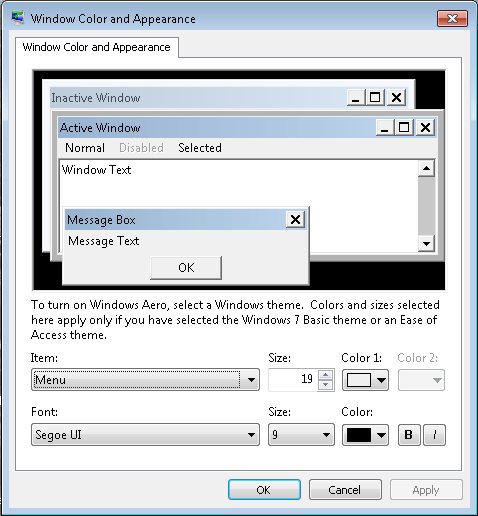
- 'Tab' to 'Window Color' and press 'Enter' or click to select. The 'Window color and Appearence' window will appear.
- If necessary, select 'advanced appearance setting' to open the dialog box.

Fig 4
- Press ‘Alt’ + ‘I’ or click to select ‘Item’ and use the arrow keys to scroll through the list of items. For this example we will change the font for Menu.
- Scroll through until Menu is selected, Fig 4.
- Press ‘Alt’ + ‘F’ or click to select ‘Font’.
- Use your mouse or arrow keys to scroll through the list of fonts available.
- To change the Font size press ‘Alt’ + ‘E’ or click to select and use your mouse or arrow keys to increase or decrease the font size, Fig 5.

Fig 5
- Press ‘Enter’ or click ‘OK’ to save your settings.
You can change the font settings on the following Items:
- Active titlebar
- Icon
- Inactive titlebar
- Menu
- Message box
- Palette title
- Selected items
- Tooltip
Note: If this does not work it could be because your computer settings cannot be changed due to local IT policies - contact your local IT support for further help.
Need some more help?
Call our helpline 0300 180 0028 or email enquiries@abilitynet.org.uk
Need free IT Support at Home?
If you are older or disabled and need IT support at home, you can book a free home visit.