Call our helpline
0300 180 0028AutoCorrect
Although AutoCorrect is primarily used to correct spelling mistakes it can also be used to reduce the amount you need to use the keyboard. As an example, we’ll add the acronym ‘imho’ to AutoCorrect and set it to be corrected to ‘in my humble opinion’ every time we type it.
- Start Microsoft ‘Word’ and create a new document.
- Click ‘File’ or press ‘Alt’ + ‘F’, see Fig 1.
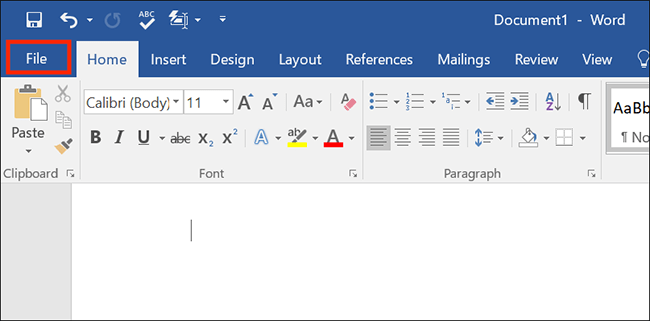
Fig 1 - Click ‘Options’ in the left column or press ‘Alt’ + ‘T’, see Fig 2.
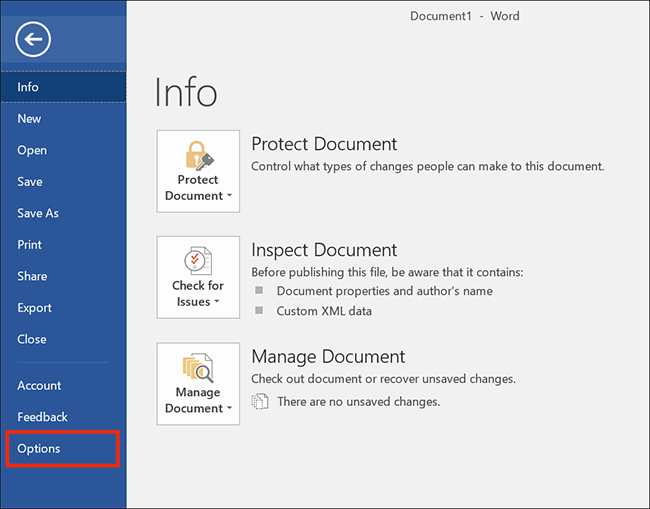
Fig 2 - Click, or use the arrow keys, to select ‘Proofing’, see Fig 3.
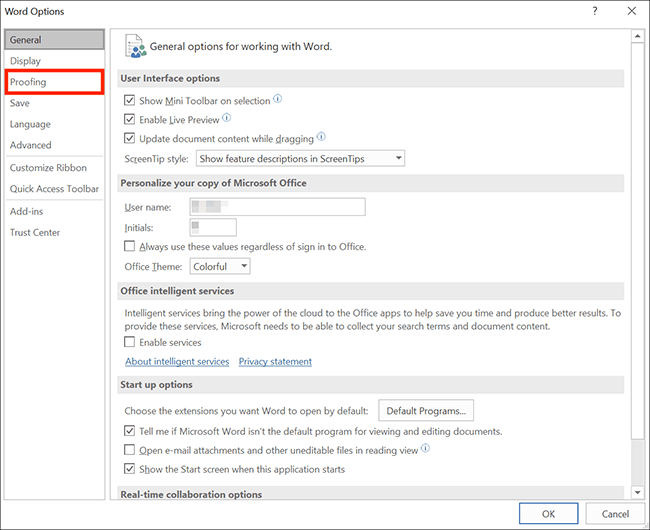
Fig 3 - Click the ‘Autocorrect Options’ button, or press ‘A’, to open the AutoCorrect dialog box, see Fig 4.
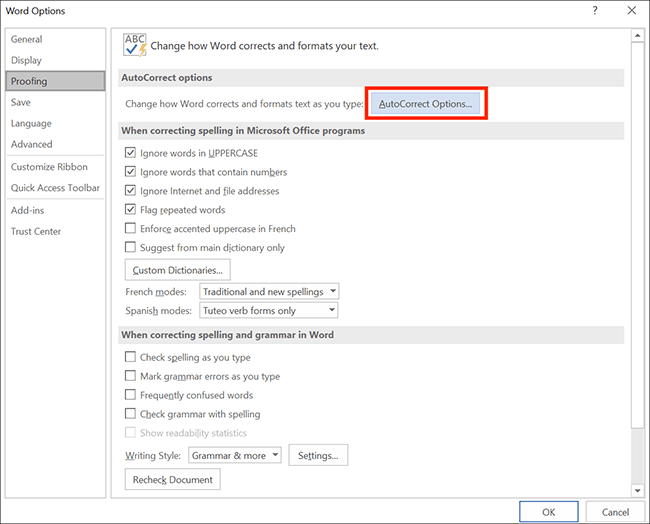
Fig 4 - Click in the box under ‘Replace’ or press ‘Alt’ + ‘R’, see Fig 5. For this example, we will enter ‘imho’.
Note: It is advised that text entered into ’Replace’ should be in lower case.
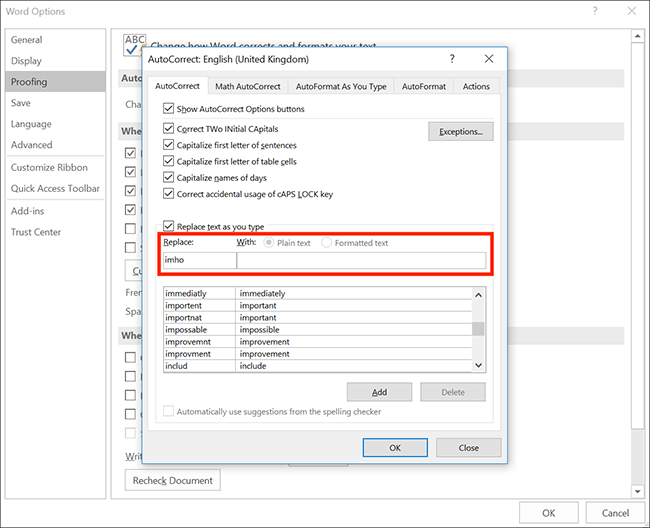
Fig 5 - Click in the box under ‘With’ or press ‘Alt’ + ‘W’, see Fig 5. Type ‘in my humble opinion’.
- Click the ‘Add’ button, or press ‘Alt’ + ‘A’, to add the phrase to AutoCorrect, see Fig 6.
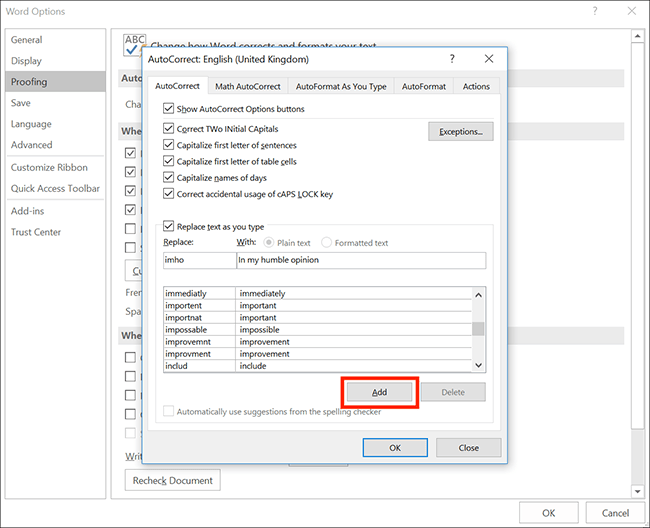
Fig 6 - Click ‘OK’ or press ‘Enter’ to close the dialogue window.
In a Word document, if you now type ‘imho’ followed by either ‘Spacebar’, ‘Tab’ or ‘Enter’ you will see that the acronym is corrected to read ‘in my humble opinion’.
AutoText
With ‘AutoText’ you can create blocks of text, such as addresses or frequently typed phrases, that you can insert into your documents without having to type them.
In our example, we are going to add the following address to AutoText:
Joe Bloggs
123 Any Street
Townsville
- Open a new document and type a phrase you would like to add, for this example type in the address above.
- Highlight the address by either clicking and dragging over it or by pressing ‘Shift’+ ‘Ctrl’ + ‘Home’ repeatedly to select it.
- Click ‘Insert’ on the ‘ribbon’ or press ‘Alt’ + ‘N’, see Fig 7.
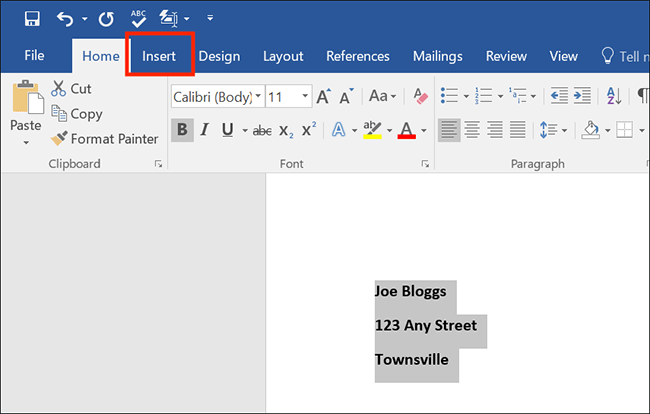
Fig 7 - In the text group, click ‘Quick Parts’ or press ‘Q’, see Fig 8.

Fig 8 - Click ‘AutoText’ or press ‘A’, see Fig 9.
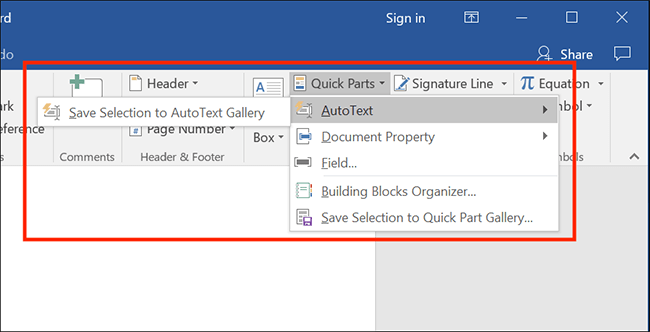
Fig 9 - Click ‘Save Selection to AutoText Gallery’ or press ‘S, see Fig 9.
- When the dialogue box appears, click ‘OK’ or press ‘Enter’ to save the new phrase to AutoText, see Fig 10.
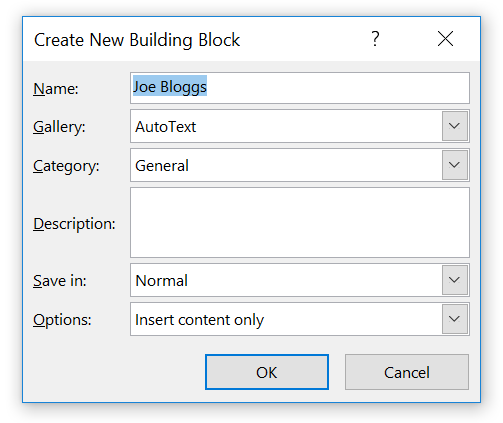
Fig 10
Note: AutoText will remember any formatting you have applied.
Using AutoText
To insert an AutoText entry into your document:
- Click ‘Insert’ on the ribbon or press ‘Alt’ + ‘N’, see Fig 7, above.
- In the text group, click ‘Quick Parts’ or press ‘Q’, see Fig 8, above.
- Click ‘AutoText’ or press ‘A’, see Fig 9, above.
- In the list that appears, click on the entry you want to add to your document or use the arrow keys to highlight an entry then press ‘Enter’, see Fig 11.
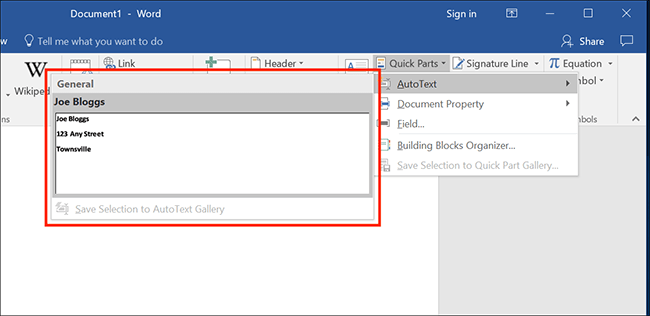
Fig 11
Note: If this does not work it could be because your computer settings are managed by someone else (an IT department or administrator for example). If this is the case you will need to contact them to access these settings or for further help.
More information
https://www.howtogeek.com/241581/how-to-add-shortcut-keys-to-autotext-entries-in-word/