In this guide we’ll look at how to enable and configure the Guided Access feature. To find out more about how to use it, see How to use Guided Access in iOS 15 for iPhone, iPad and iPod Touch.
Short guide:
- Open the Settings app. Scroll down and select Accessibility, then scroll to the bottom and select Guided Access. Tap Guided Access to switch the toggle switch on.
- You can set a passcode to stop the user from switching off Guided Access before the set time-limit is up. Tap Passcode Settings.
- Select Set Guided Access Passcode. Enter a six-digit code. If your device has Touch ID you can also use that to end Guided Access. Select Touch ID to set the toggle switch to on.
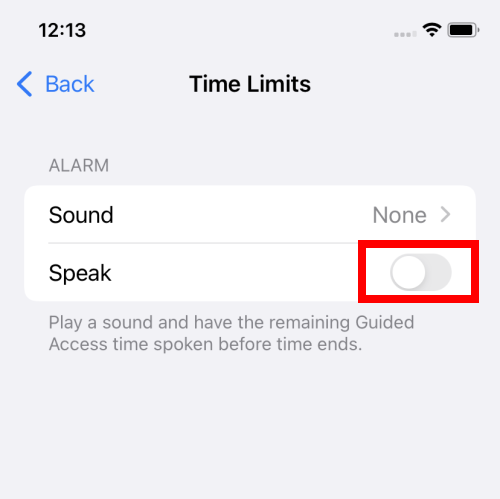
- Tap Time Limit to select a sound to play when a Guided Access session is coming to an end. Tap Sound and choose a sound from the list. To have the remaining time announced to the user, tap Speak to turn the toggle switch on.
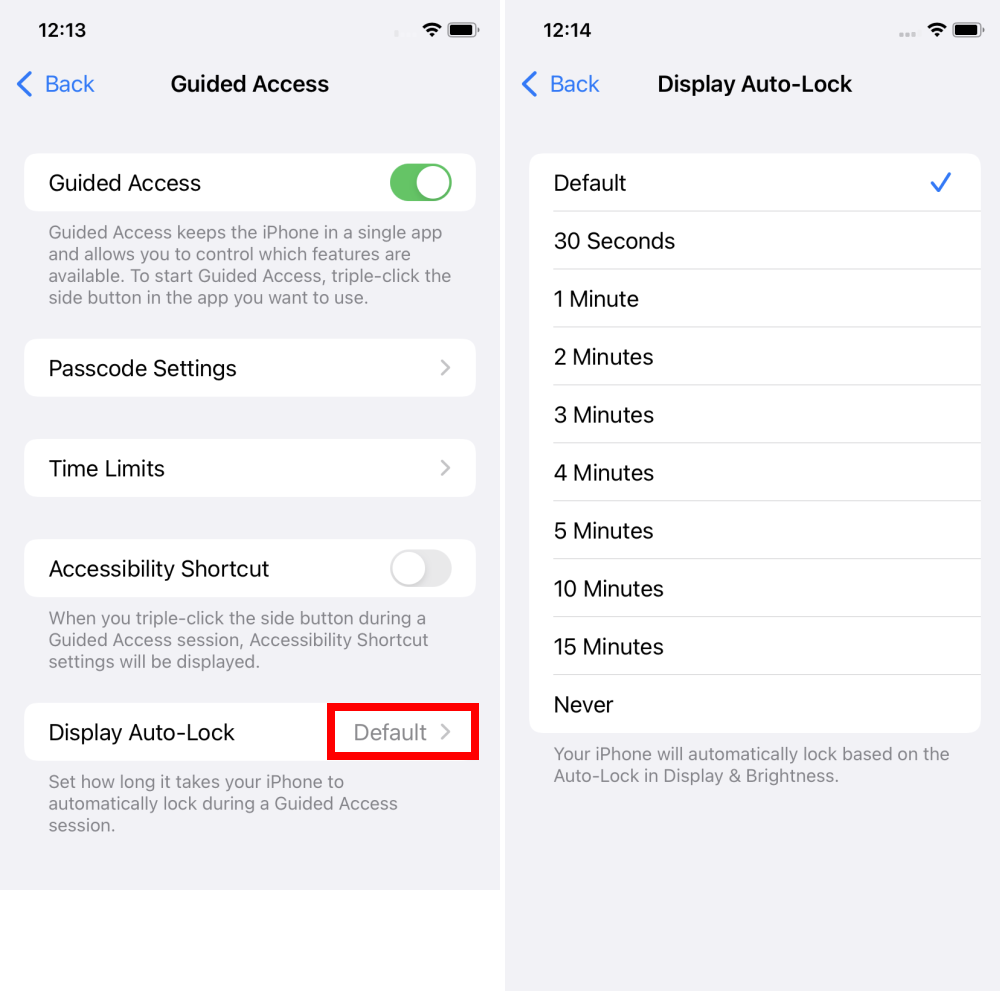
- By default, the device will lock when the display turns off after a period of inactivity. To override this for Guided Access sessions, tap Display Auto-Lock and choose a new time-out.
Before and after
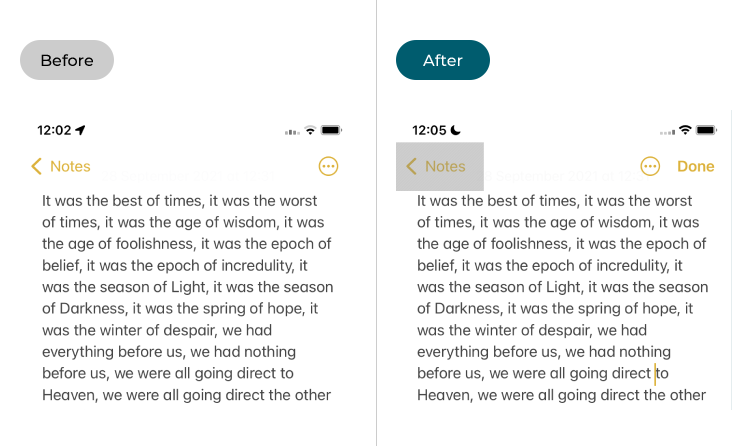
This section gives you step by step instructions on how to enable and configure Guided Access in Apple iOS 15, with pictures of the screens to help.
Open the Accessibility settings
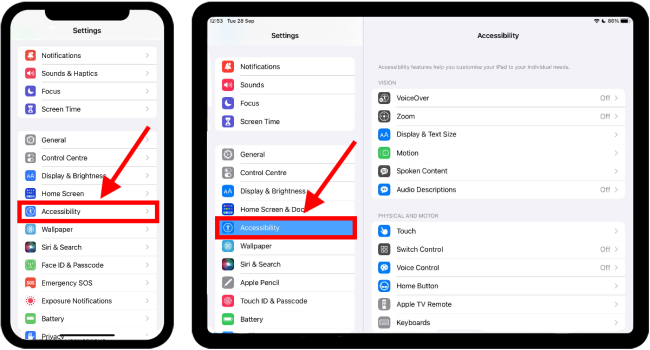
1. Tap the Settings icon to launch the Settings app. Scroll down and select Accessibility from the list.
Find Guided Access
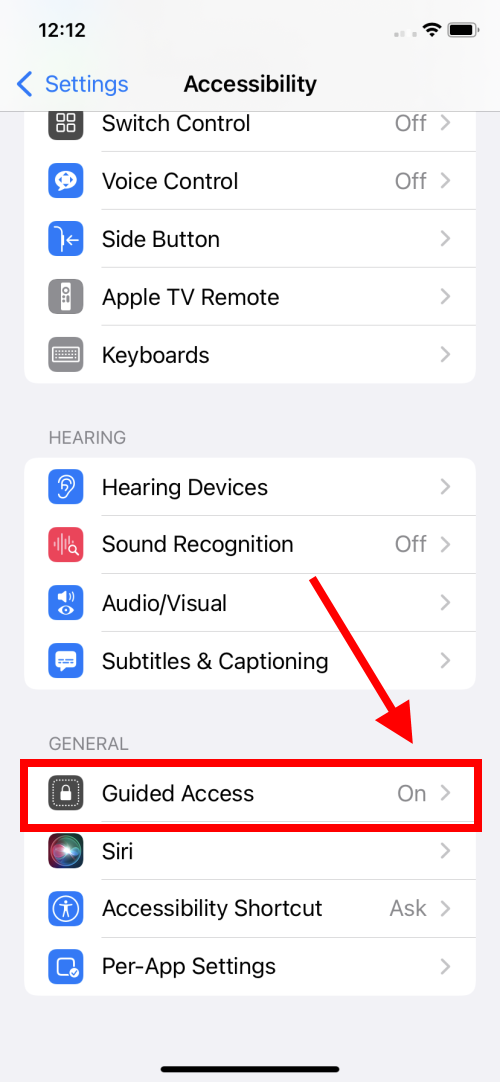
2. On the Accessibility screen, scroll to the General section at the bottom and tap Guided Access.
Enable Guided Access
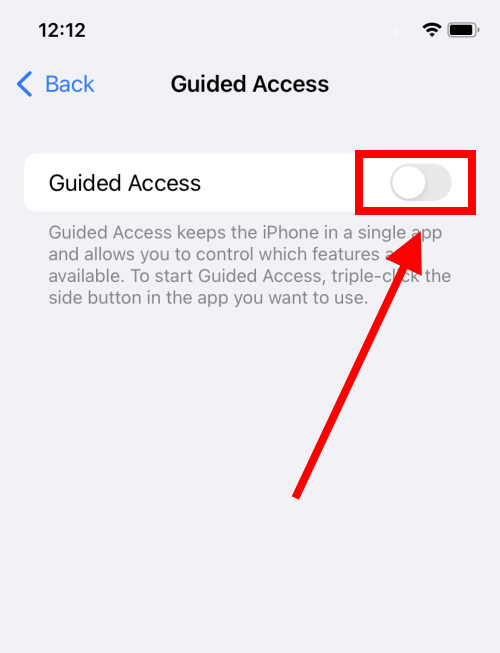
3. Tap Guided Access to turn the toggle switch on.
Set a passcode
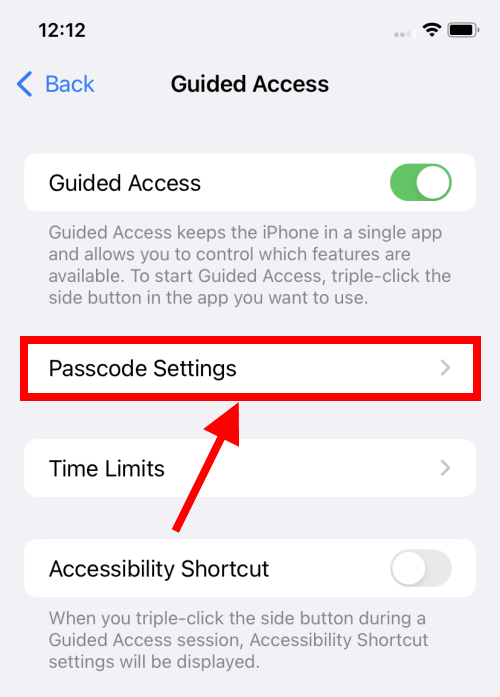
4. You can set a passcode to stop the user from switching off Guided Access before the set time-limit is up. Tap Passcode Settings.
Enter your passcode
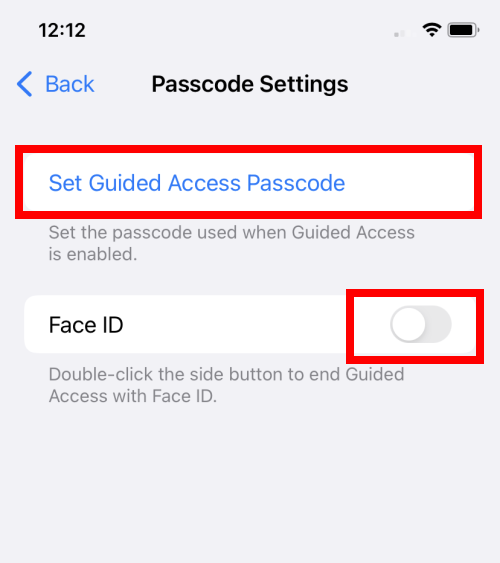
5. On the Passcode Settings screen, tap Set Guided Access Passcode. Enter a six-digit code. If your device has Touch ID or Face ID you can also use that to end Guided Access. Tap Face ID or Touch ID to set the toggle switch to On.
Set the Time Limit warning
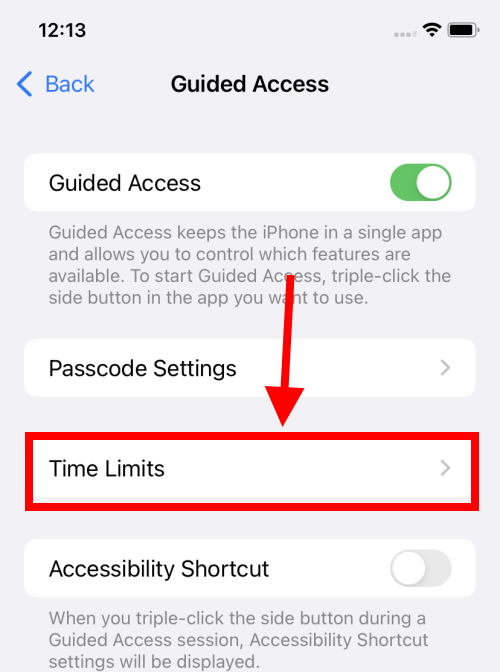
6. The Time Limit setting allows you to choose a sound to play when a Guided Access session is coming to an end. You can also choose whether the remaining time is announced or not. Tap Time Limit.
Pick a sound
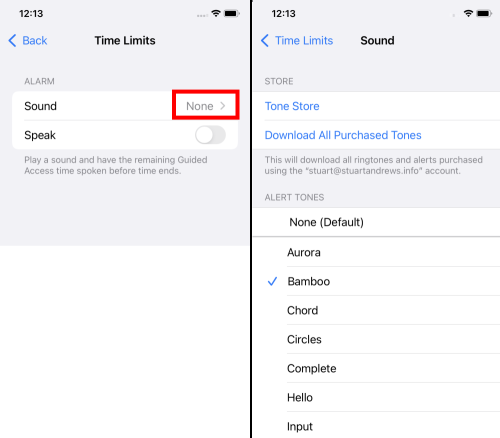
7. To enable a sound, tap Sound and choose one from the list.
Enable a spoken announcement
8. If you’d like to have the remaining time announced to the user, select Speak to set the toggle switch to on.
Enable the Accessibility shortcut
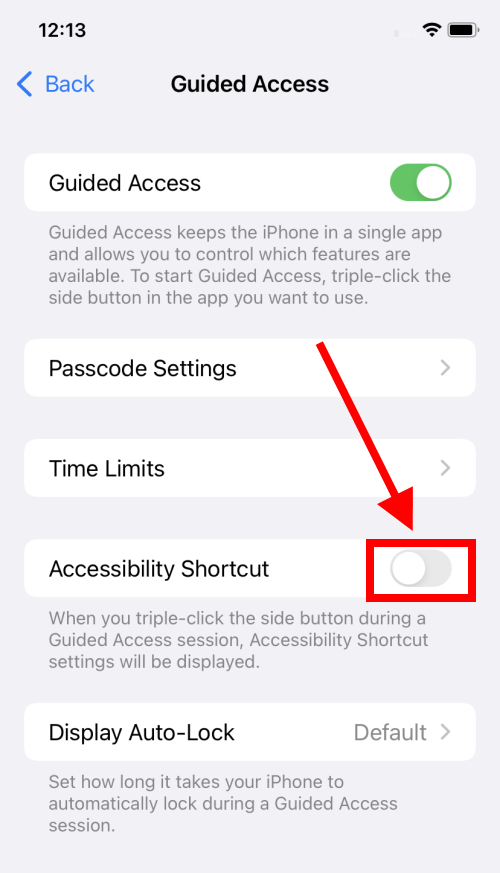
9. To allow the Accessibility Shortcut to be useable during a Guided Access session, tap Accessibility Shortcut to set the toggle switch to on.
Adjust the display auto-lock
10. By default, the device will lock when the display turns off after a period of inactivity. To override this for Guided Access sessions, tap Display Auto-Lock and choose a new time-out period.
Return to the Home screen
11. Guided Access is now ready to use. When you've finished adjusting your settings, return to the Home screen by swiping up from the bottom of the screen or pressing the Home button, if your device has one.