The Accessibility keyboard also incorporates a feature called ‘Dwell’. Dwell lets you control the mouse using eye or head-tracking hardware. Dwell also works with a mouse or joystick. For more information about Dwell, see our guide How to use Dwell in macOS 26 Tahoe.
Short guide:
- Click the Apple icon
 in the top left corner of the screen and select System Settings.
 - Click Accessibility in the sidebar.
- Select Keyboard from the list of Accessibility options.
- Turn on the toggle switch for Accessibility Keyboard.
- The Dwell panel will appear. Click the Keyboard button on the panel to open the Accessibility Keyboard.
Before and after
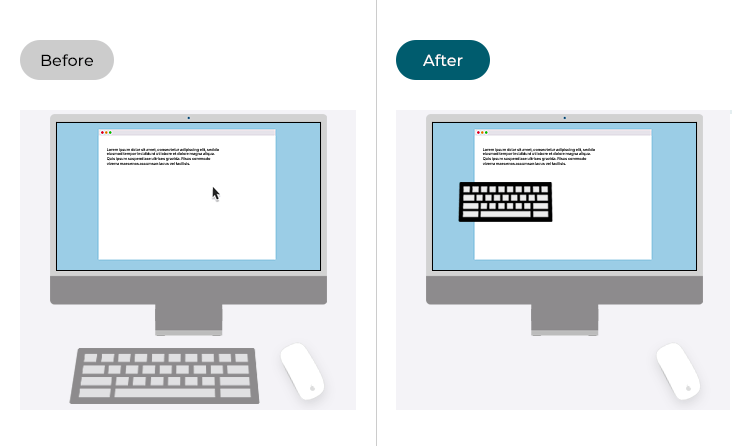
This section explains how to enable the Accessibility Keyboard in macOS 26 Tahoe. This is a step-by-step guide with pictures of the screens to help.
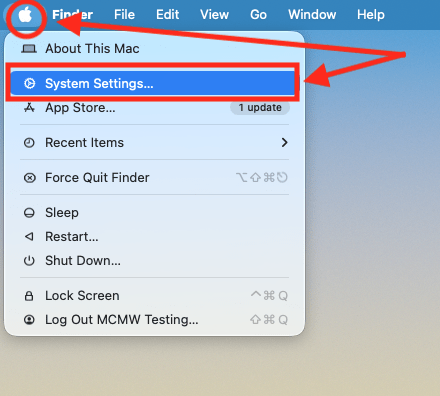
Open System Settings
1. Click the Apple icon in the top left corner of the screen and choose System Settings from the menu.
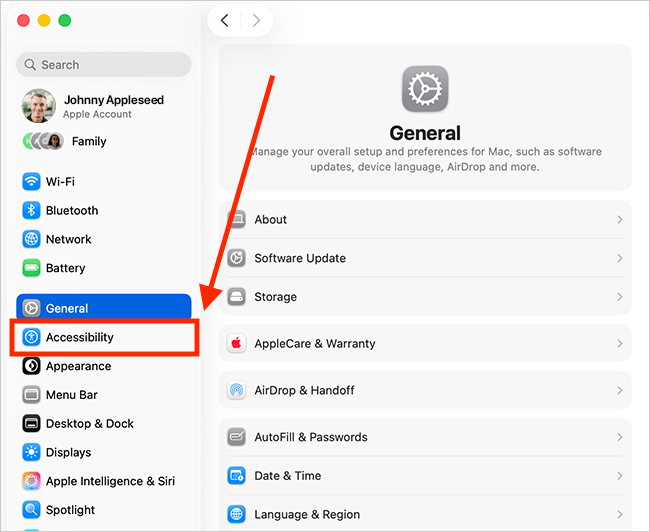
Open the Accessibility settings
2. In the System Settings window, click Accessibility in the sidebar.
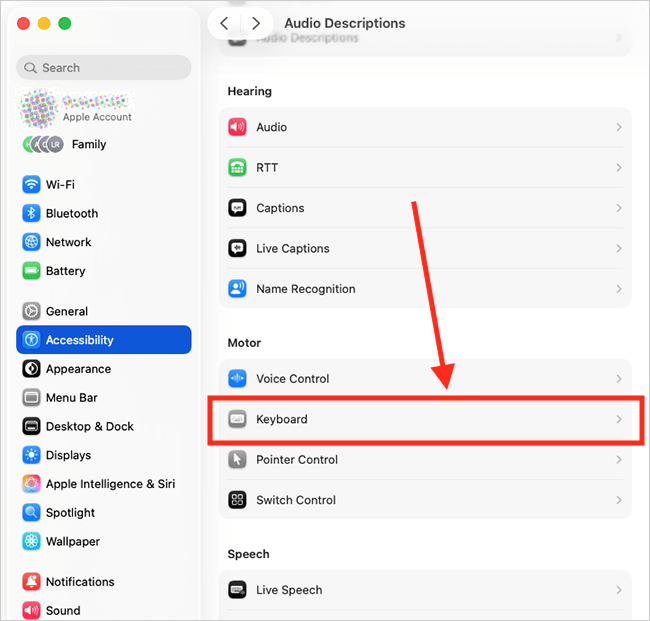
Find the Keyboard settings
3. Select Keyboard from the list of Accessibility options on the right.
Enable the Accessibility Keyboard
4. On the Keyboard page, click the toggle switch for Accessibility Keyboard to turn it on.
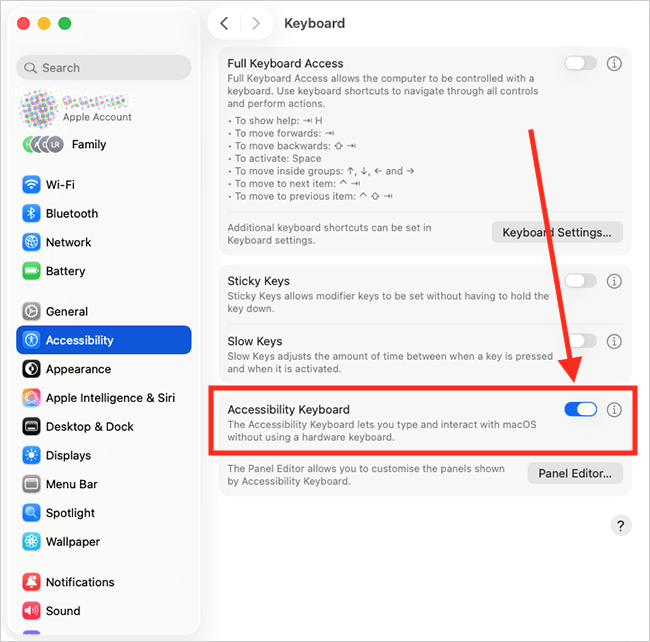
The Accessibility Keyboard
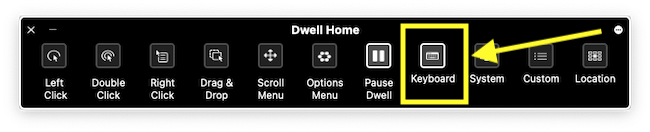
5. When you turn on the Accessibility Keyboard, a Dwell panel will appear on the screen. To open the Accessibility Keyboard itself, click the Keyboard button on the Dwell panel.
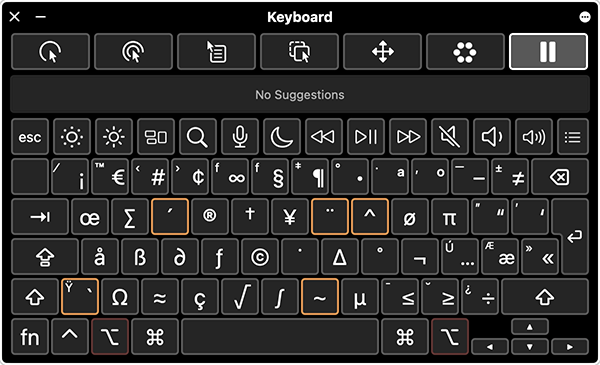
Customise the Accessibility keyboard
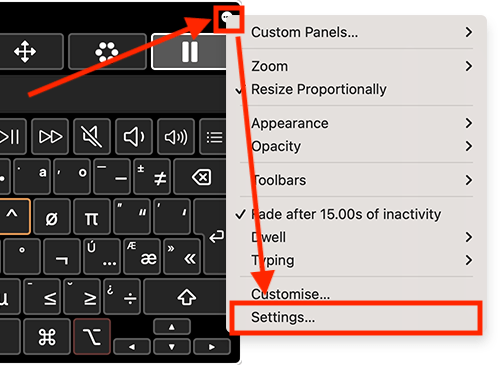
6. To customise how the Accessibility Keyboard behaves, select the Options (more) button  in the top-right corner of the Accessibility Keyboard, then select Settings.
Find the General settings
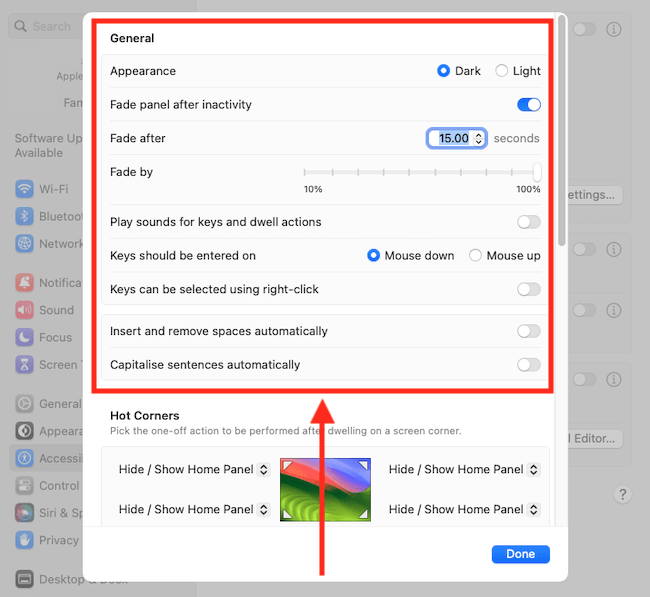
7. On the Accessibility Keyboard settings screen, scroll up to the General section.
Change the appearance of the keyboard
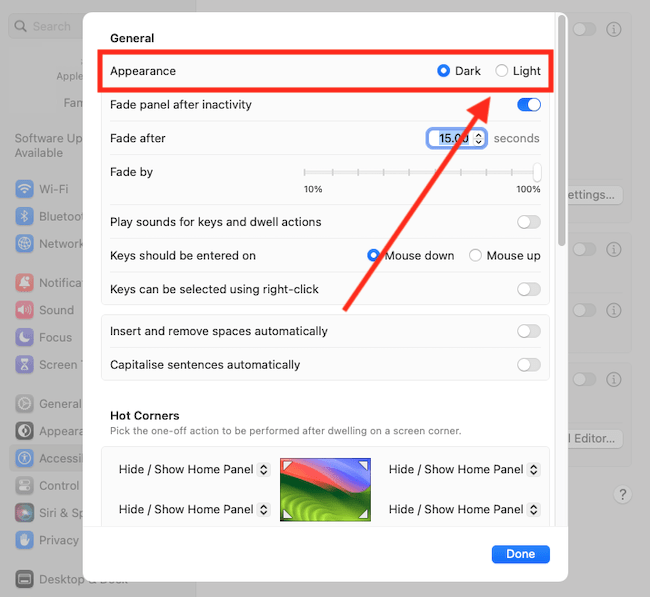
8. By default, the keyboard uses a dark colour scheme – white letters and icons on black keys. To use a lighter scheme (black letters and icons on light-grey keys), select the Light option for Appearance.
Fade the keyboard after a period of inactivity
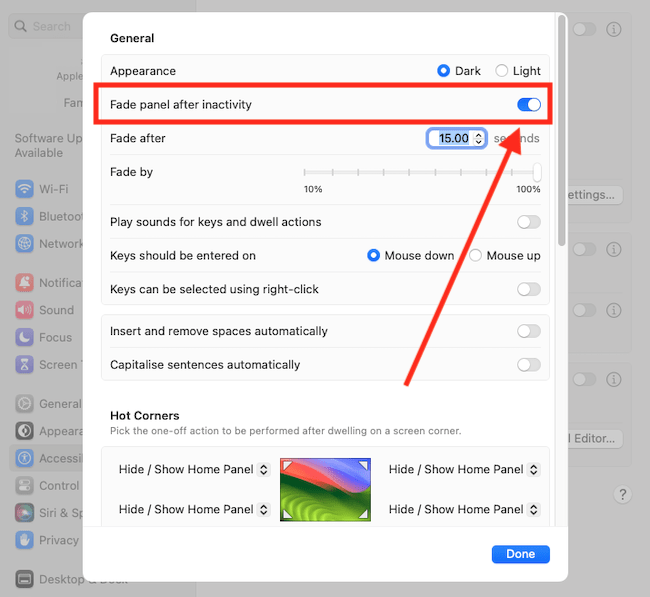
9. If you find having the keyboard on-screen all the time obtrusive, you can set it to fade out after a period of inactivity. To do so, set the toggle switch for Fade panel after inactivity to on.
Set how long the keyboard needs to remain inactive before it fades out
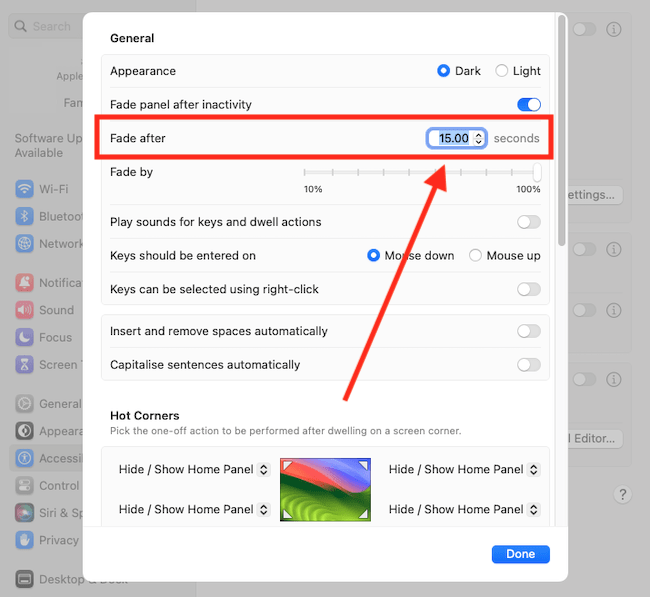
10. To set how long the keyboard needs to remain inactive before the keyboard fades out, adjust the seconds setting for Fade after. The default is 15 seconds.
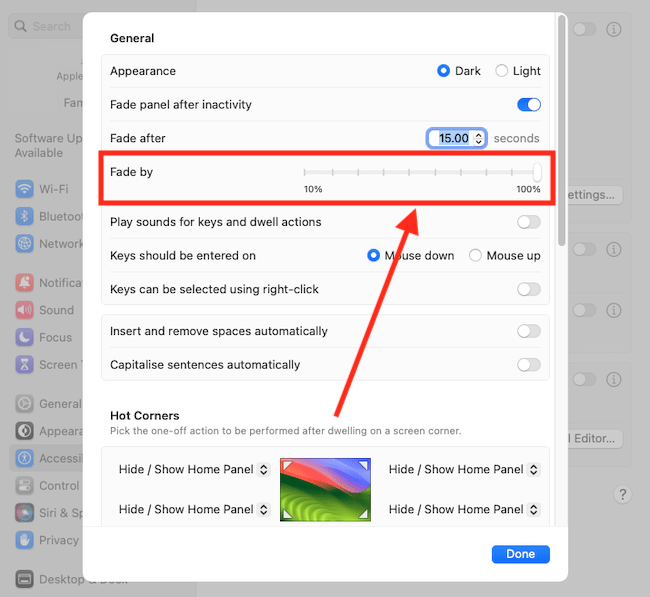
Set how much the keyboard fades by
11. To set how much the keyboard fades, adjust the slider for Fade by.
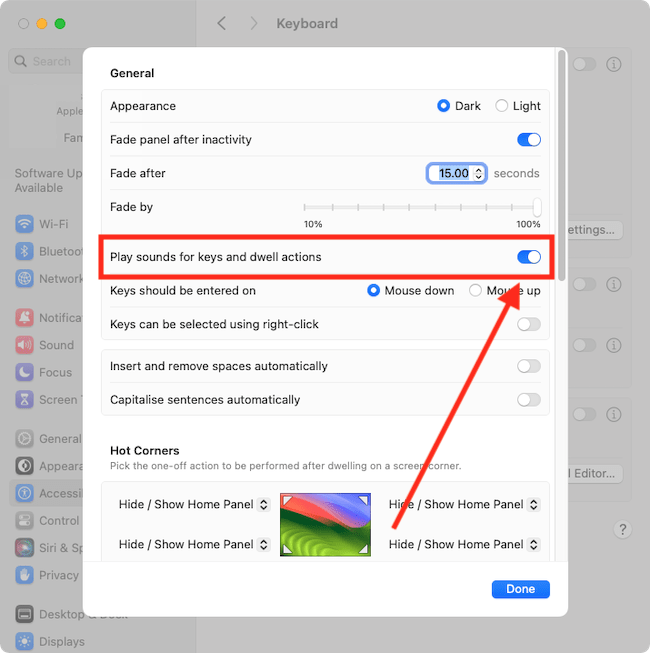
Play a sound when a key is pressed or an action is performed
12. If you would like your computer to play a sound to confirm a key was pressed, or an action was performed, set the toggle switch for Play sounds for keys and dwell actions to on.
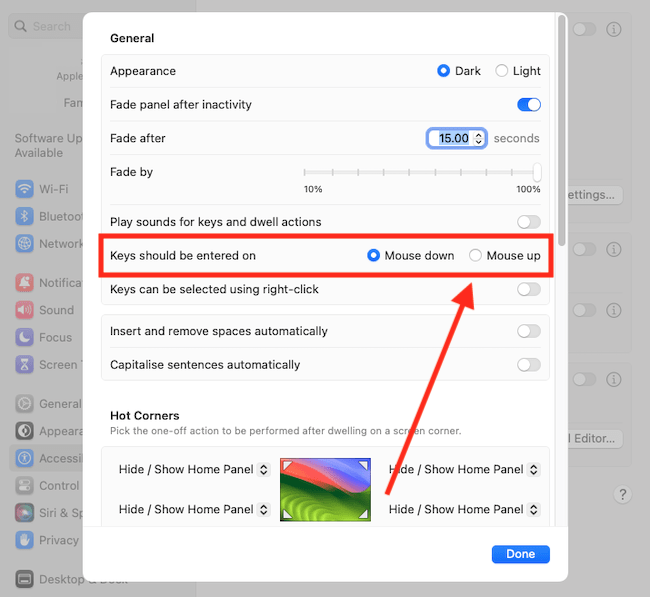
Choose when input is entered
13. By default, characters are entered and actions performed when a key is pressed (mouse down). To change this so they occur when a key is released (mouse up), select the Mouse up option for Keys should be entered on.
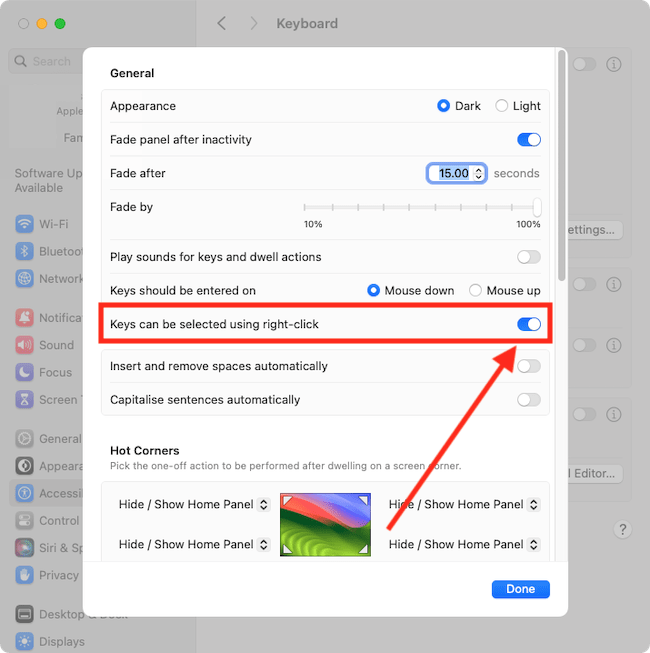
Enable keys to be selected using right-click
14. The Accessibility Keyboard can be set up so that you can use a right-click gesture to select keys. Click the toggle switch for Keys can be selected using right-click to turn it on.
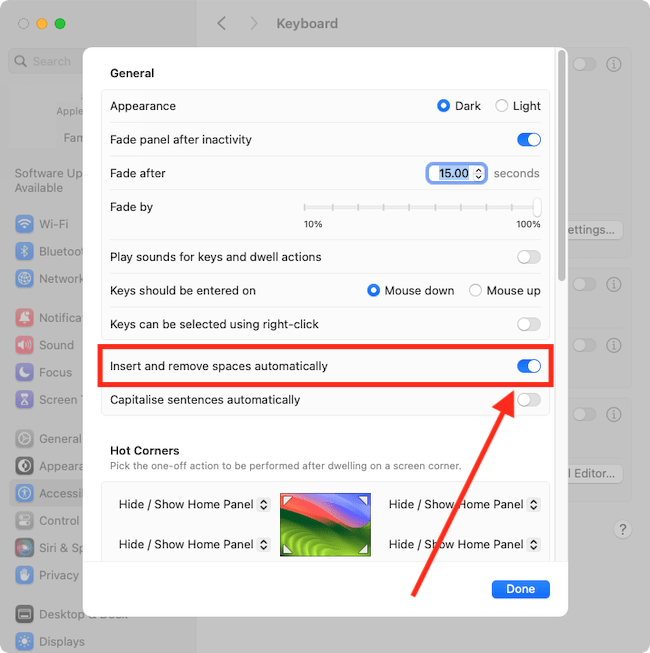
Insert and remove spaces automatically
15. The Accessibility Keyboard can automatically insert or remove spaces based on the context of what you're typing. For example, it will add a space after a full stop. Turn the toggle switch for Insert and remove spaces automatically on or off, as required.
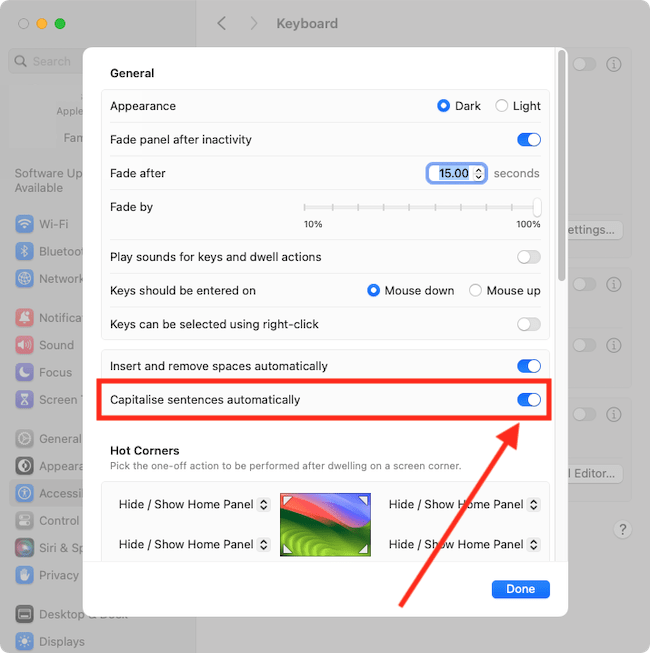
Capitalise sentences automatically
16. The Accessibility Keyboard can automatically capitalise words based on the context of what you're typing. For example, it will capitalise the first word after a full stop. Set the toggle switch for Capitalise sentences automatically to on or off as required.
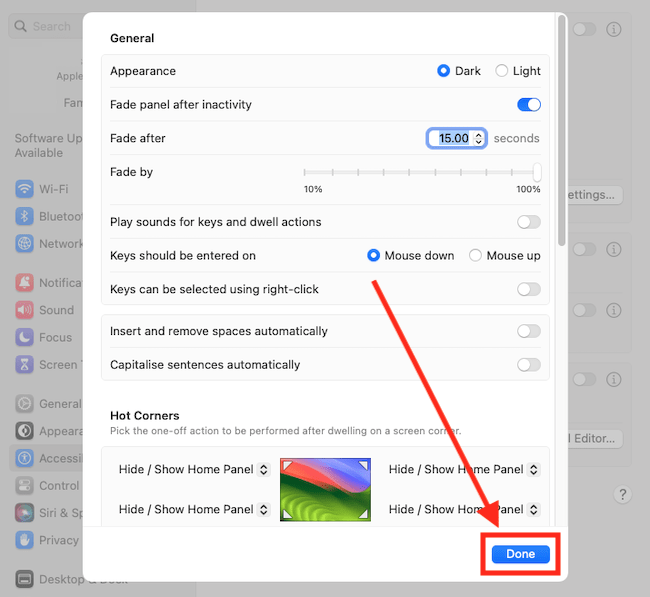
Close the Accessibility Keyboard settings window
17. When you are happy with your settings, click the Done button.
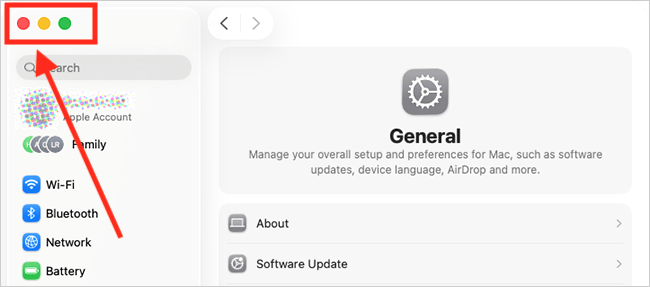
Close System Settings
18. To close the entire System Settings window, click the Close button (red circle) in the top-left corner of the window or use the Cmd + W keyboard shortcut.
Typing with the Accessibility Keyboard
19. You can type with the Accessibility Keyboard by using a mouse, trackpad,or an adaptive switch to select keys. If you are using eye or head-tracking hardware you can dwell (rest the pointer) on keys to make selections.
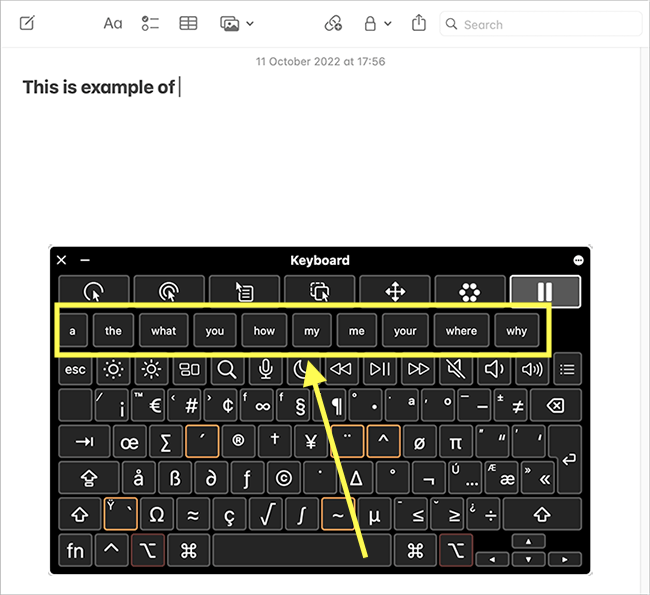
As your type, a wide selection of words will appear in the auto-suggestion row. Select any of these words to insert them into the text you are writing.
In order to perform keyboard shortcuts using the Accessibility Keyboard, you will first need to enable Sticky Keys. Sticky Keys allows you to perform shortcuts by pressing the keys one after the other rather than pressing them all at the same time. For more information on using Sticky Keys, see our article How to make keyboard shortcuts easier to perform in macOS 26 Tahoe.
Use Custom panels to perform custom actions
20. You can create your own collections of buttons, called panels, to perform tasks on your computer, such as entering pre-written text, opening apps, running shortcuts, or carrying out advanced mouse actions. For more information on creating custom panels, see our guide How to create panels to use with Switch Control and the Accessibility Keyboard in macOS 26 Tahoe.
Use Dwell to perform mouse action
21. With Dwell, you can perform mouse actions, such as left-clicks, by resting (dwelling) the pointer on items on the screen For more information about Dwell, see our guide How to use Dwell in macOS 26 Tahoe.
Use Hot Corners to switch Dwell actions
22. With Hot Corners, you can assign actions to each corner of the screen, such as temporarily switching to a different Dwell action or hiding the Accessibility Keyboard. Resting the mouse on a corner triggers the corresponding action. For more information about Hot Corners, see our guide How to use Dwell Corners with Dwell and the Accessibility Keyboard in macOS 26 Tahoe.
Note: If this does not work, it could be because your computer settings are managed by someone else (an IT department or administrator, for example). If so, you will need to contact them to access these settings or for help.
Need some more help?
Call our helpline 0300 180 0028 or email enquiries@abilitynet.org.uk
Need free IT Support at Home?
If you are older or disabled and need IT support at home, you can book a free home visit.