Call our helpline
0300 180 0028In this article
How to connect a mouse, trackpad, or point device
Pointing device settings
How to customise the buttons on your pointing device
Dwell Control
How to connect a mouse, trackpad, or point device
If you are using a wired device, simply plug it into the lightning or USB-C port of your iPad or iPhone.
To connect a compatible Bluetooth device:
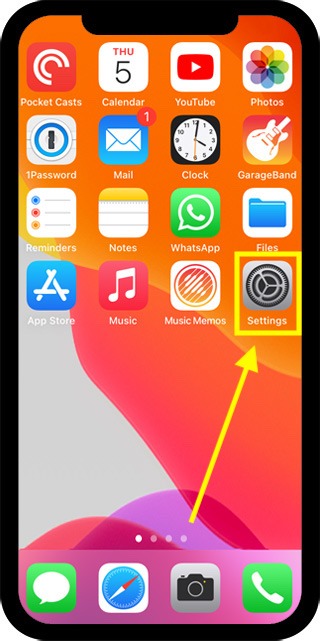
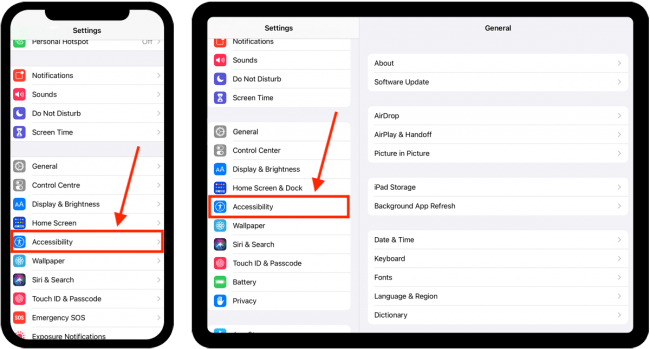
- Open the Settings app
 . Note: The Settings app icon may appear in a different place on your home screen than shown in our example, below.
- In the Settings app, select Bluetooth.
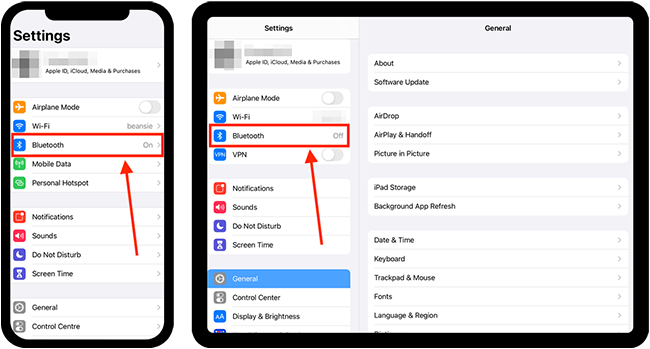
- On the Bluetooth screen, make sure Bluetooth is turned on – the toggle switch will be green.
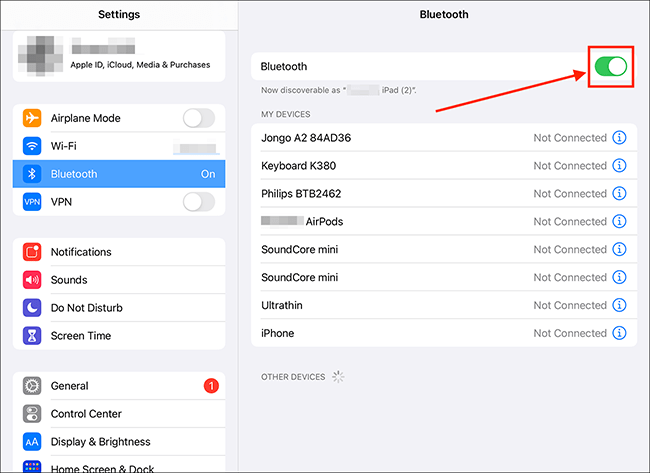
- Your device should appear at the bottom of the list, under Other Devices. If not, turn the device off and on to put it into ‘pairing mode’. Note: If your mouse, trackpad, or pointing device is paired with another device, disconnect it first.
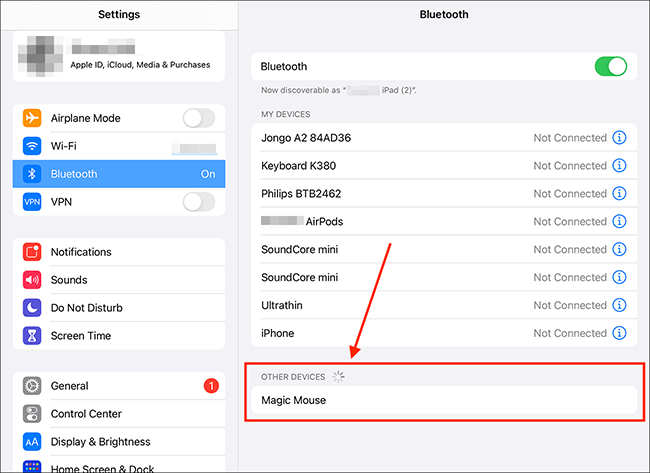
- Select your device to pair it.
You can now start using your pointing device with your iPhone or iPad. You will see a small, grey, circle on the screen. This is the pointer. You can move the pointer around the screen and click on items as you would on any computer.
When you place the pointer over a navigation item, the pointer will change its shape to a rectangle, highlighting the navigation item.
When you are happy with your settings, you can return to the home screen page of apps by:
- On devices with Face ID: Swipe up from the bottom of the screen.
- On all other devices: Press the home button once.
Pointing device settings
When you have a pointing device connected to your iPad or iPhone, you can customise how it looks and behaves.
- Open the Settings app . Note: The Settings app icon may appear in a different place on your home screen than shown in our example, below.
- In the Settings app, scroll down and select Accessibility from the list.
- On the Accessibility screen, scroll down and select Pointer Control. Note: This setting only appears when you have a pointing device connected.
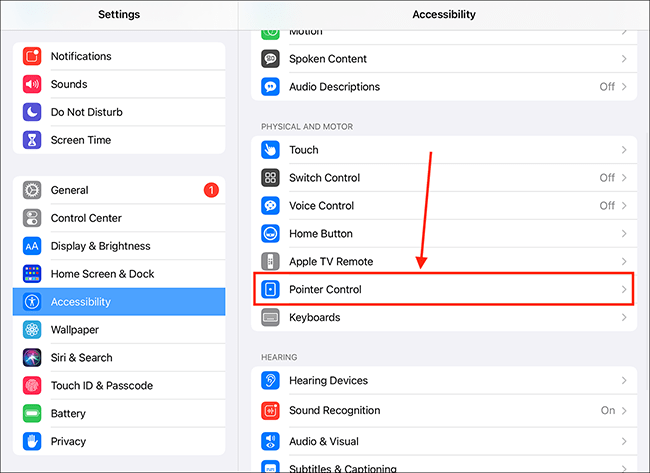
- On the Pointer Controls screen you can adjust the settings for:
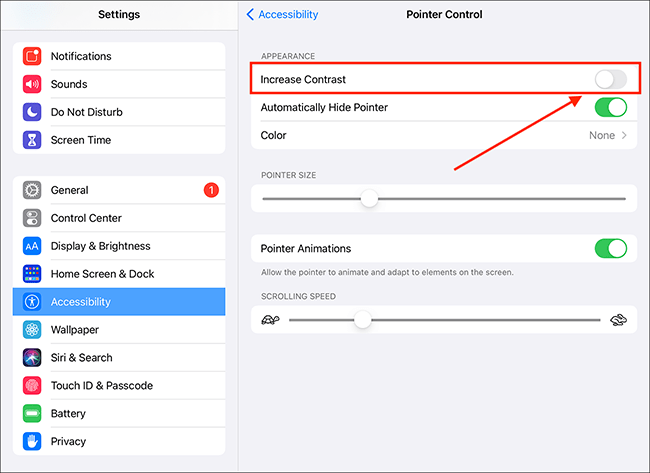
Increase Contrast
If you want to make the darker so that it stands out better, set the toggle switch for Increase Contrast to On.
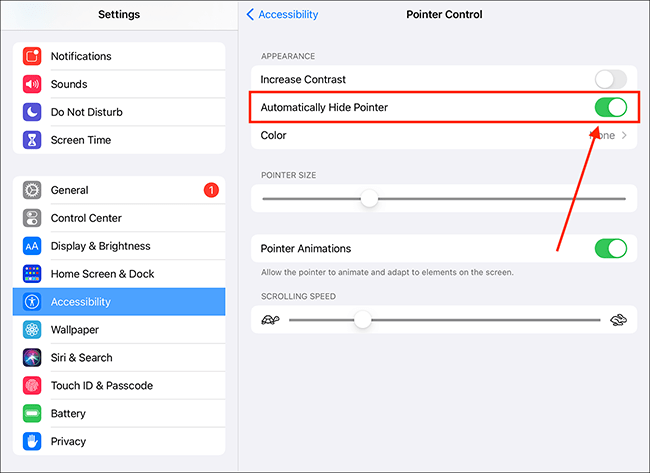
Automatically hide pointer
By default, the pointer is hidden after a period of inactivity. To keep the pointer on the screen at all times, set the toggle switch for Automatically Hide Pointer to Off.
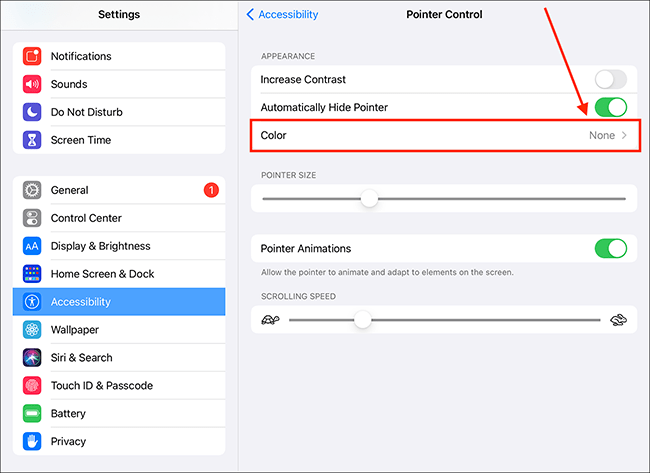
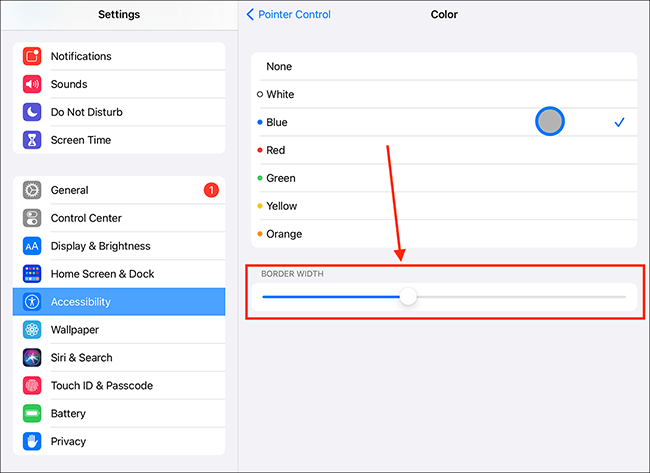
Colour
To make the pointer stand out better against the background, you can add a coloured border to it.
- Select Colour.
- On the next screen, choose a colour from the list.
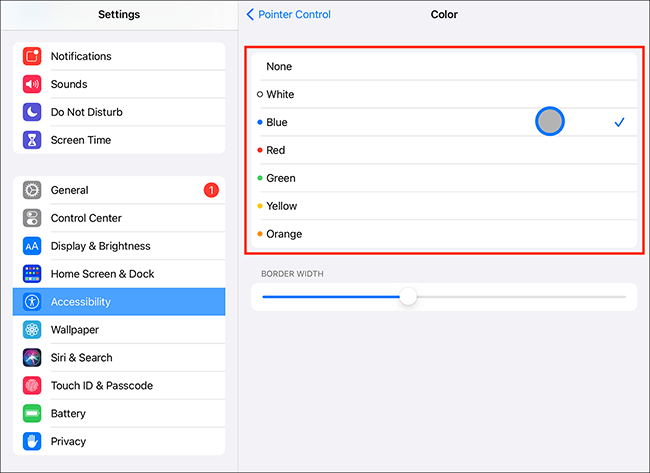
- To make the border wider or narrower, adjust the slider for Border Width.
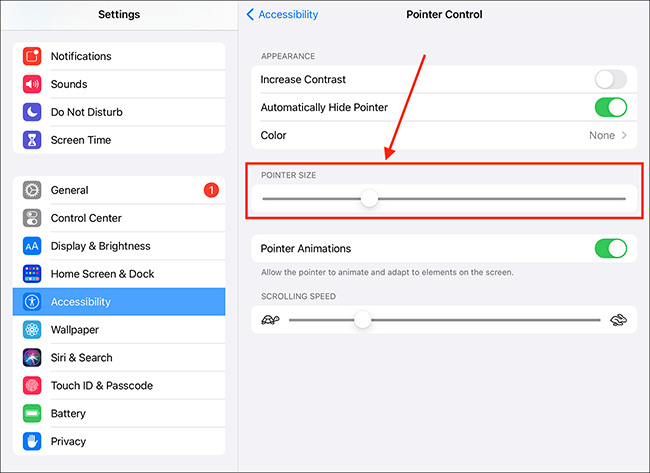
Pointer Size
To make the pointer larger or smaller, adjust the slider for Pointer Size.
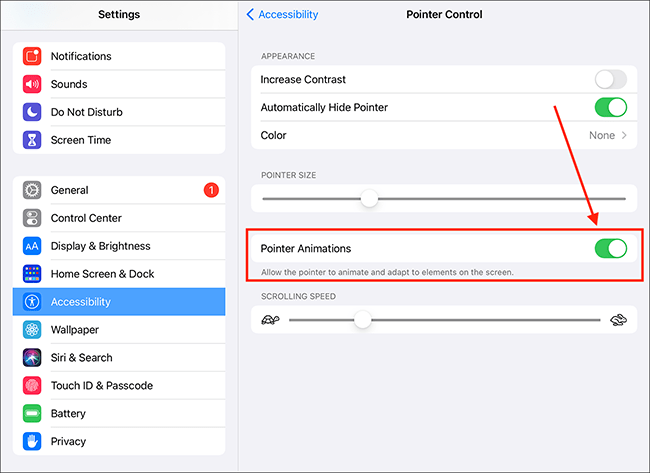
Pointer Animations
If you’d prefer that the cursor didn’t change shape when you place the pointer over navigation items, set the toggle switch for Pointer Animations to Off. Now when you hover over navigation items, the pointer stays the same, but the navigation item will grow slightly and have a light grey border.
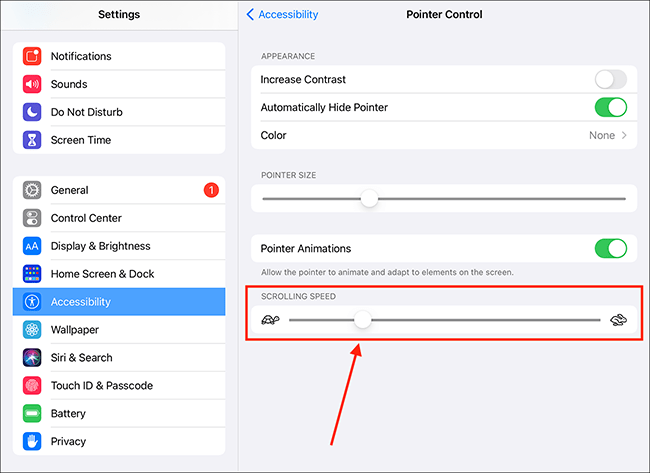
Scrolling Speed
To change how slowly or quickly the page scrolls, adjust the slider for Scrolling Speed.
When you are happy with your settings, you can return to the home screen page of apps by:
- On devices with Face ID: Swipe up from the bottom of the screen.
- On all other devices: Press the home button once.
How to customise the buttons on your pointing device
If your pointer device has more than one button, you can customise the action each button performs, such as take a screenshot, go to the Home screen, open the Control Centre, perform an accessibility action, and run a shortcut. To use this feature, you will need to enable AssistiveTouch.
- Open the Settings app . Note: The Settings app icon may appear in a different place on your home screen than shown in our example, below.
- In the Settings app, scroll down and select Accessibility from the list.
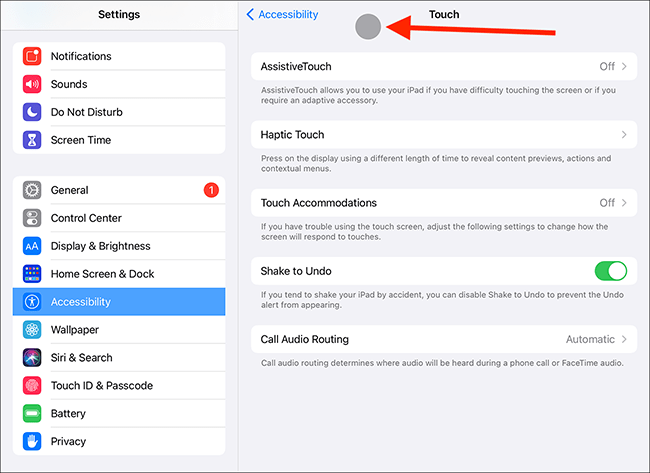
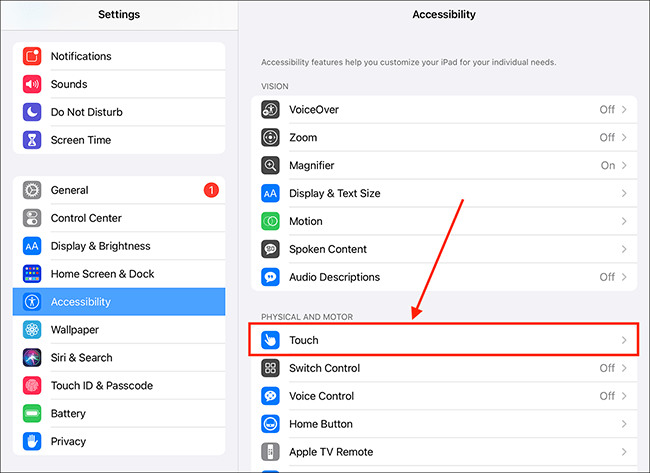
- On the Accessibility screen, select Touch.
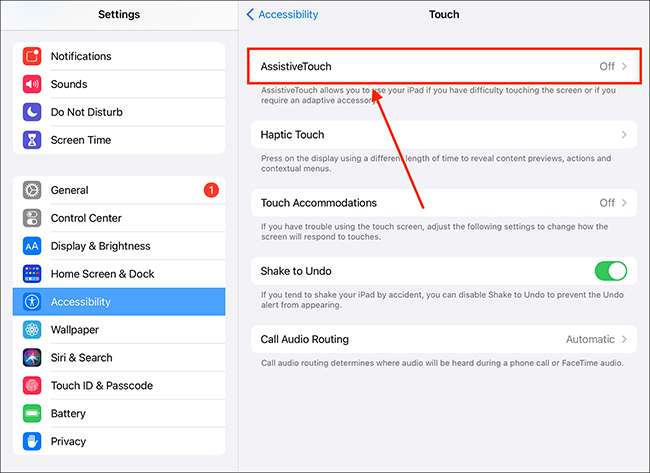
- On the Touch screen, select AssistiveTouch.
- On the next screen, set the toggle switch for AssistiveTouch to On.
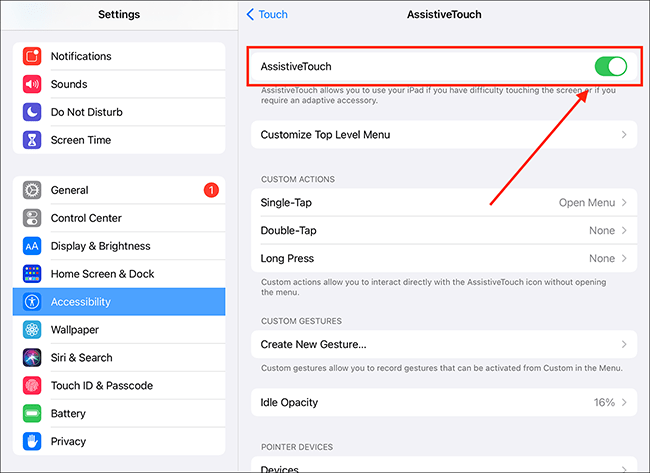
Note: By default, when AssistiveTouch is enabled the AssistiveTouch menu button appears on the screen. The AssistiveTouch menu enables you to perform a variety of tasks on your device. If you don’t want to show the AssistiveTouch menu all the time, set the toggle switch for Always Show Menu to Off. You can still use the AssistiveTouch menu by assigning a button to trigger it. For more information about AssistiveTouch see our article How to use an on-screen menu button to control your device in iOS 14.
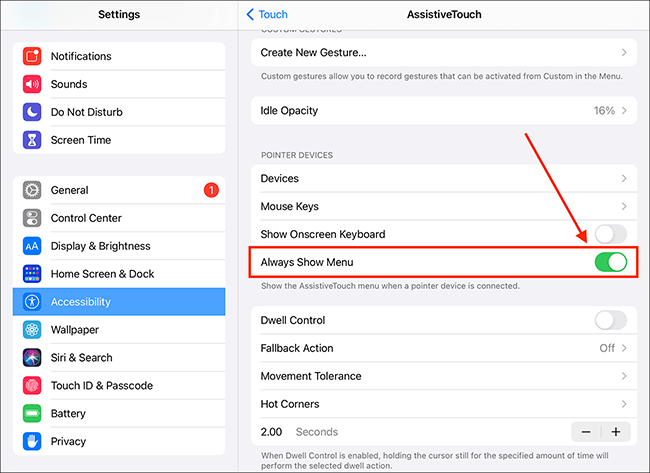
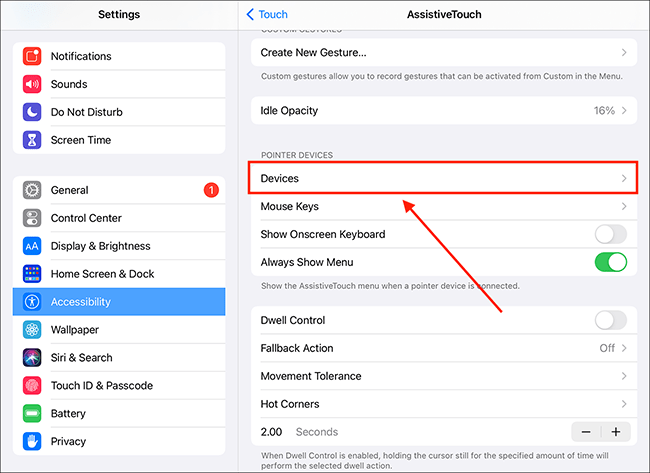
- To customise your device’s buttons, scroll down to the Pointer Devices section and select Devices.
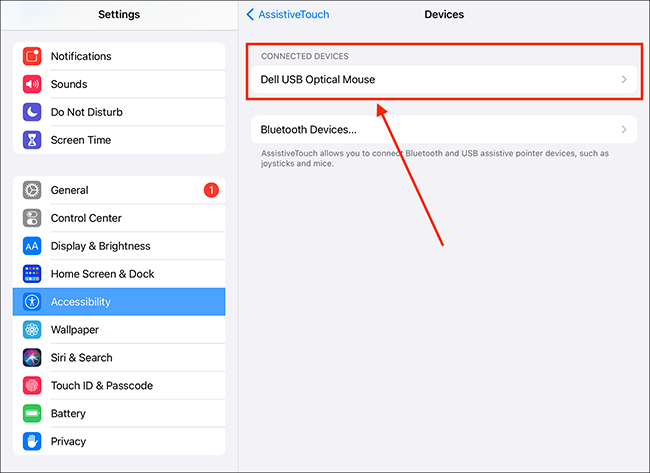
- On the Devices screen, you will see a list of all your connected devices. Select the one you want to customise the buttons for. In our example we select our Dell Optical Mouse.
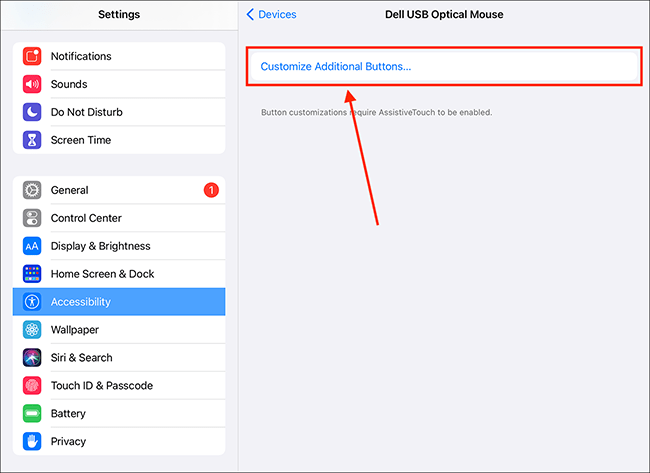
- On the next screen, select Customise Additional Buttons.
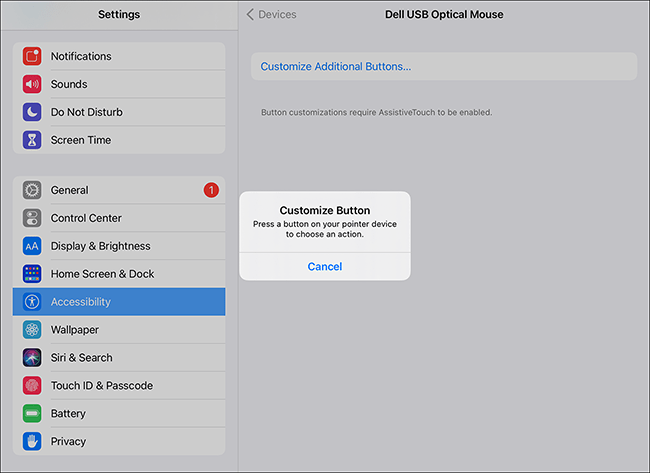
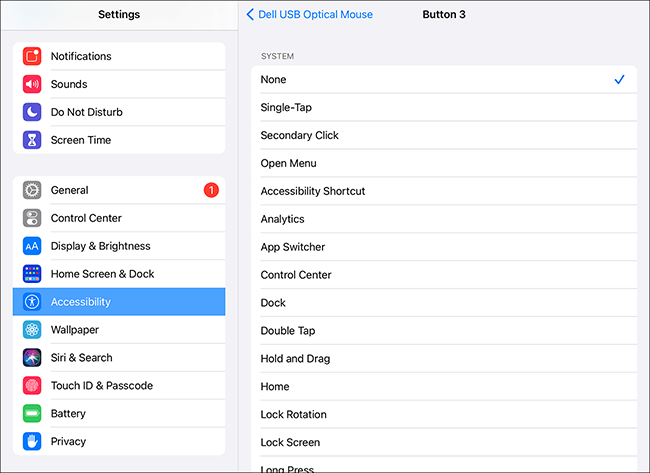
- You will see a pop-up notification instructing you to press the button you wish to customise. Press a button on your device now. Note: By default, the standard ‘left ’ and ‘right’ buttons are already set up to perform Single-Tap and Right-Click gestures respectively. These buttons can also be customised to perform different actions.
- On the next screen select the action you would like that button to perform.
- Repeat as necessary for any remaining buttons.
- When you are happy with your settings, you can return to the home screen page of apps by:
- On devices with Face ID: Swipe up from the bottom of the screen.
- On all other devices: Press the home button once.
Dwell Control
With Dwell Control enabled you can perform an action by resting (dwelling) the pointer over an item for a set amount of time. To use this feature, you will need to enable AssistiveTouch.
- Open the Settings app . Note: The Settings app icon may appear in a different place on your home screen than shown in our example, below.
- In the Settings app, scroll down and select Accessibility from the list.
- On the Accessibility screen, select Touch.
- On the Touch screen, select AssistiveTouch.
- On the next screen, set the toggle switch for AssistiveTouch to On.
Note: By default, when AssistiveTouch is enabled the AssistiveTouch menu button appears on the screen. The AssistiveTouch menu enables you to perform a variety of tasks on your device. This button can be hidden, and we will show you how once we’ve enabled Dwell Control. For more information about AssistiveTouch see our article How to use an on-screen menu button to control your device in iOS 14. - Next, set the toggle switch for Dwell Control to On.
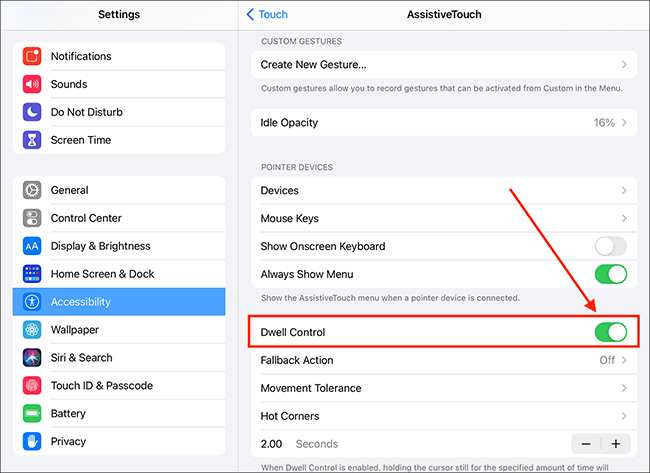
Note: When you enable Dwell Control, you will see a pop-up notification asking if you would like to add Dwell and Scroll to the AssistiveTouch menu. If you would like to, select Customisation, otherwise select No.

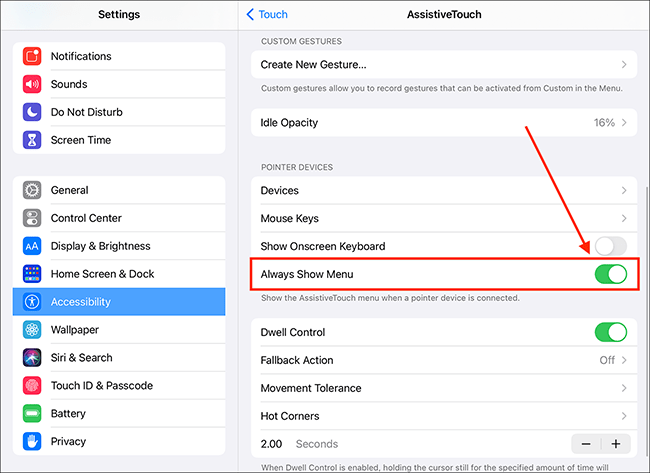
- If you don’t want to show the AssistiveTouch menu all the time, set the toggle switch for Always Show Menu to Off. Note: You can still use the AssistiveTouch menu by assigning a button or Hot Corner (see below) to trigger it.
- You can now perform a single-tap gesture by resting (dwelling) the pointer over an item for a certain amount of time – this is indicated by a white border encircling the outside of the pointer.
Dwell Control settings
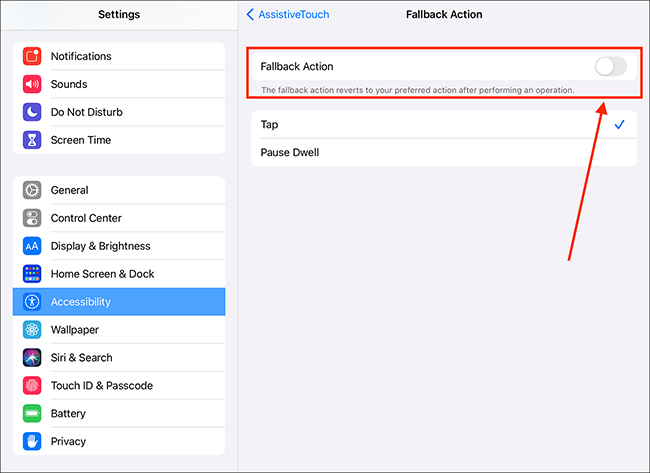
Fallback Action
This is the action dwell reverts to after you have performed an operation. By default, this is turned off. When Fallback Action is turned on, you can choose between Tap (this is the same as when Fallback Action is Off) or Pause Dwell.
- Select Fallback Action.

- On the next screen, set the toggle switch for Fallback Action to On.
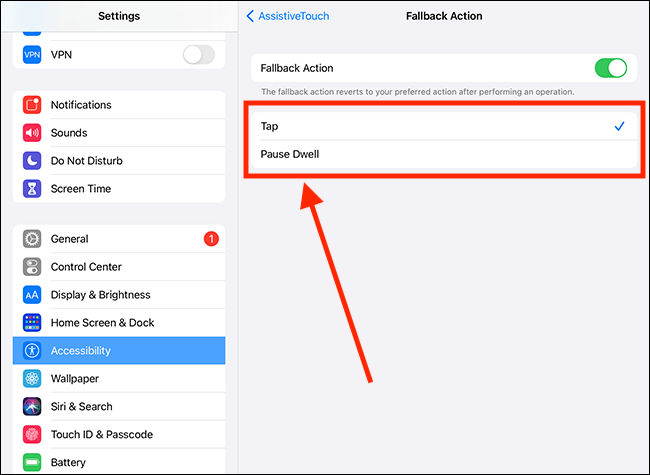
- Choose between Tap and Pause Dwell.
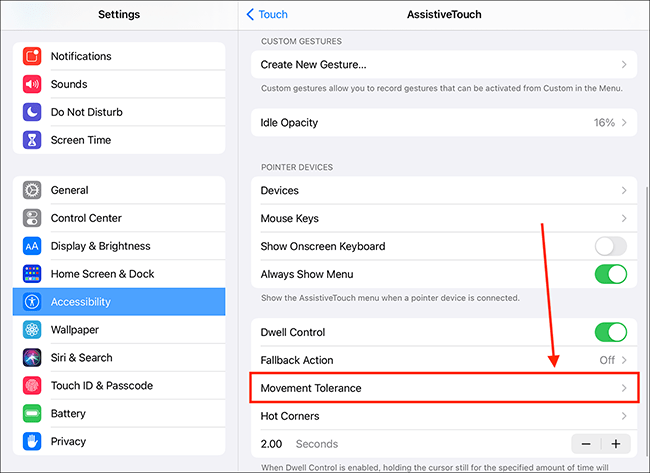
Movement Tolerance
This is how far you can move the pointer before a dwell action is cancelled.
To adjust the tolerance:
- Select Movement Tolerance.
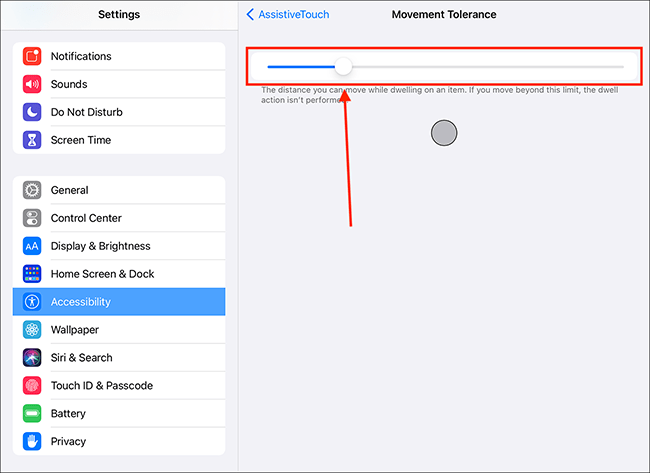
- On the next screen, adjust the slider. A grey circle will indicate how far you can move the pointer before a dwell action is cancelled.
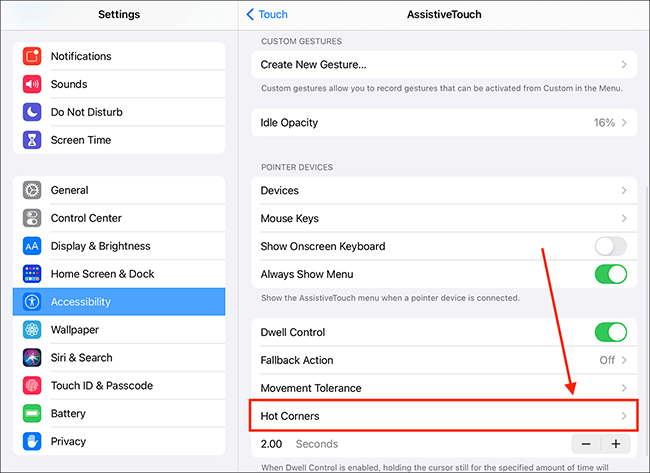
Hot Corners
With Hot Corners, you can perform actions by dwelling in the corners of the screen. You can choose from a wide variety of actions, such as take a screenshot, go to the Home screen, open the Control Centre, perform an accessibility action, and run a shortcut. You can assign a different action to each corner.
- Select Hot Corners.
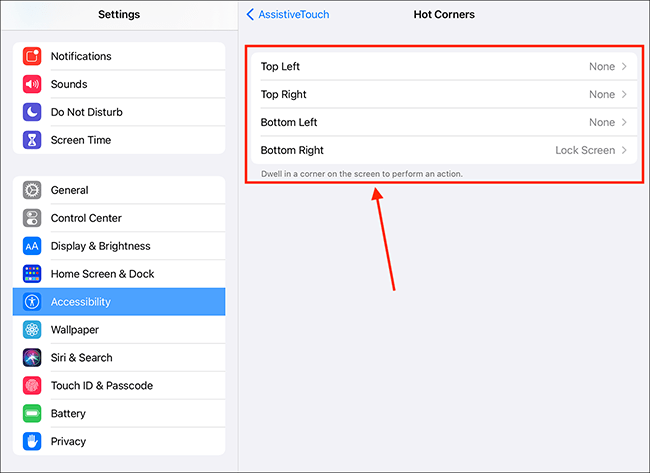
- On the Hot Corners screen, select a corner to assign an action to it.
- On the next screen, choose an action from the list.
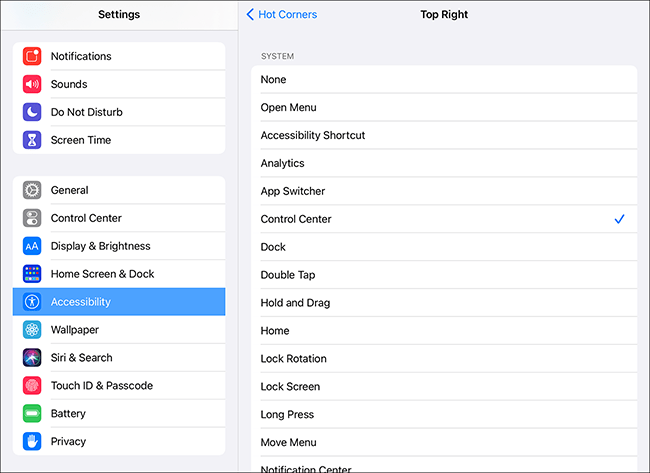
- Now when you dwell in a corner, the chosen action will be performed.
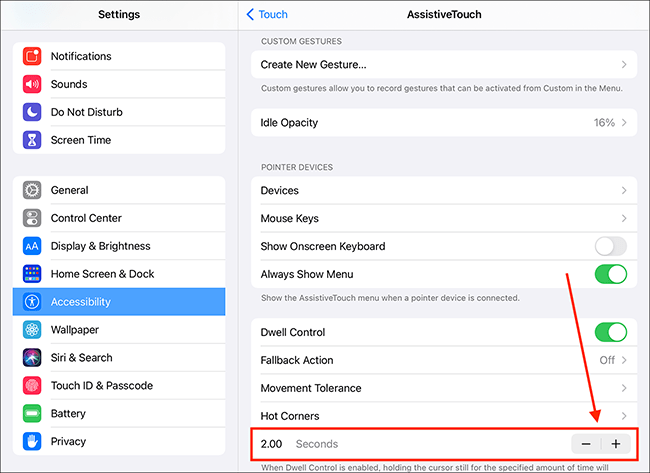
Dwell Time Limit
To set how long the pointer needs to rest (dwell) on an item before the dwell action is performed, use the + (plus) and – (minus) buttons.
When you are happy with your settings, you can return to the home screen page of apps by:
- On devices with Face ID: Swipe up from the bottom of the screen.
- On all other devices: Press the home button once.
Need some more help?
Call our helpline 0300 180 0028 or email enquiries@abilitynet.org.uk
Need free IT Support at Home?
If you are older or disabled and need IT support at home, you can book a free home visit.